9-20
Y100250-4
2
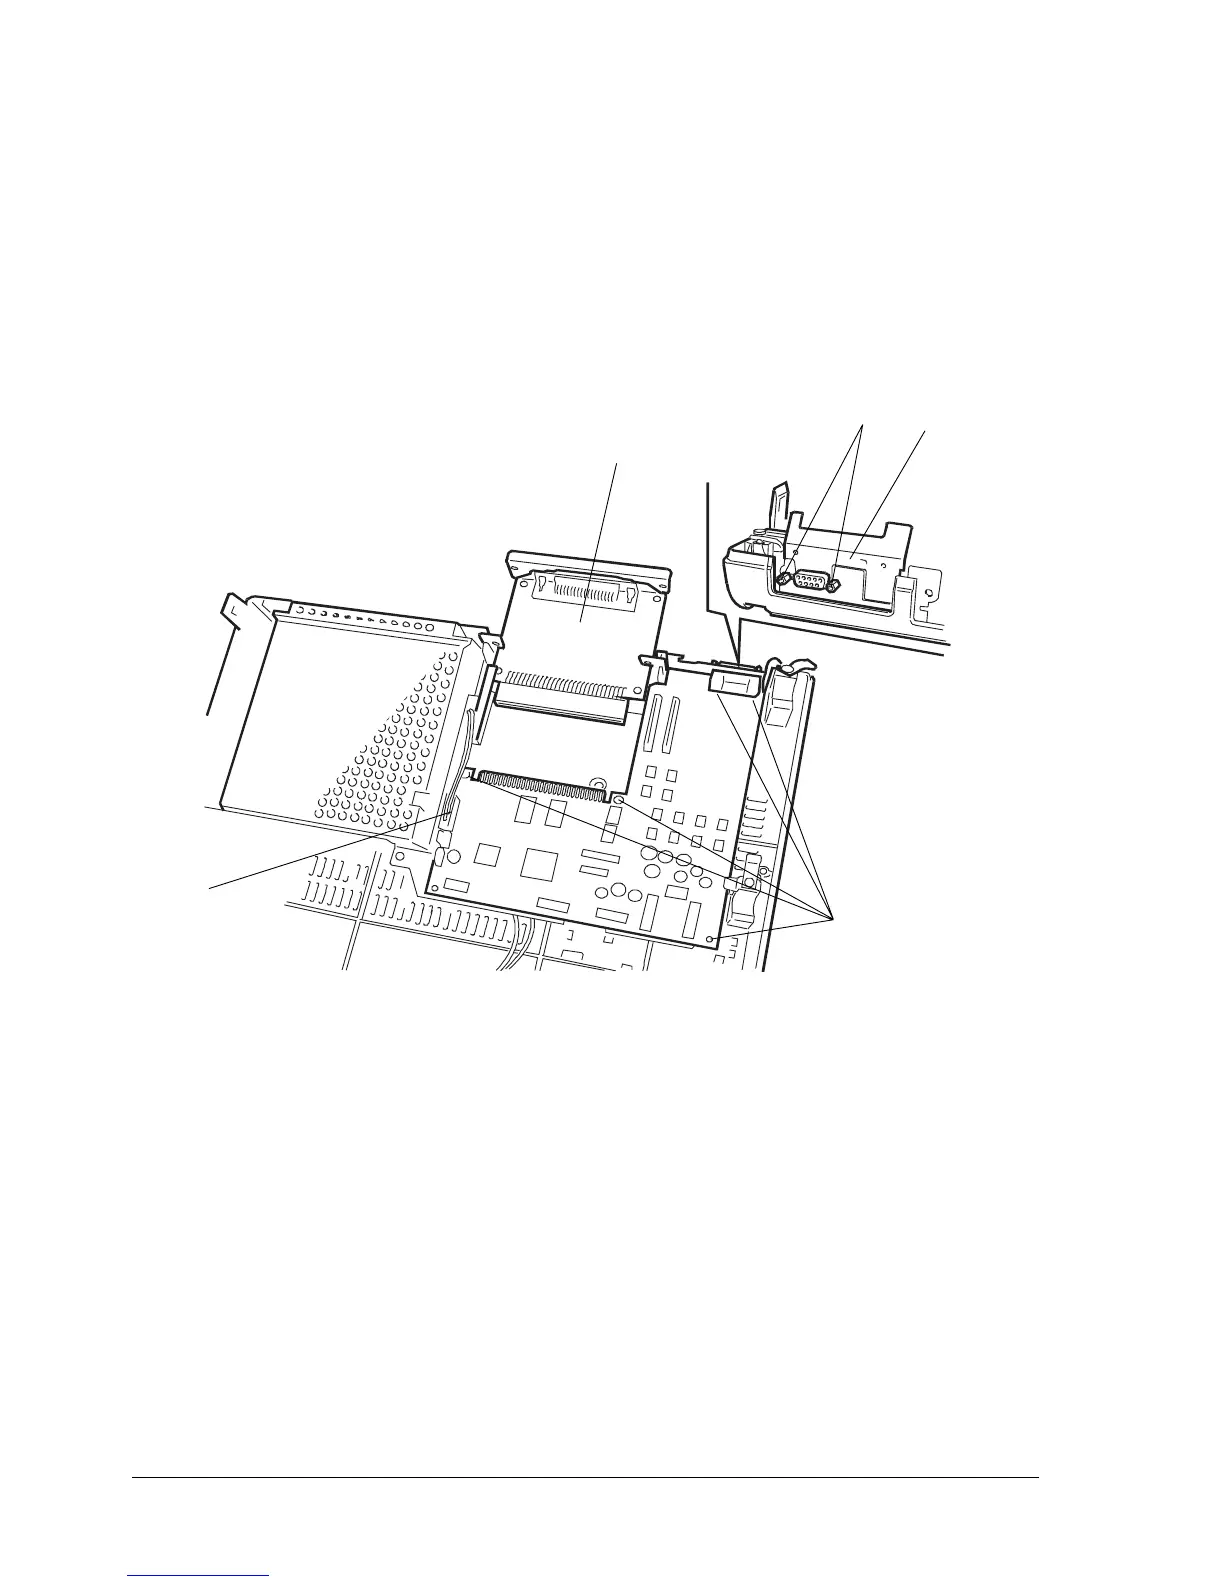
9.2.15 MAIN BOARD DISASSEMBLY/REASSEMBLY
- Power off the machine and unplug the power cord from the electrical outlet.
- Remove the mechanical assembly (section 9.2.3).
- Unplug the power supply cable (1) that connects the main board to the power supply assy.
- Remove the optional interface card (2), if installed.
- Remove the five screws (3) that secure the main board to the base.
- Unscrew the two connection screws (4) of the standard serial port.
- Remove shield (5).
- Extract the main board from the base of the printer.
Nota: Durante il rimontaggio del lamierino (4), bloccarlo dall'esterno della lamiera di supporto della
piastra base.
In caso di sostituzione della piastra, aggiornare il firmware secondo l'ultima release (paragrafo
1.11.1), effettuare il set up di installazione (paragrafo 4.3) e la taratura dei fotosensori
(paragrafo 4.4).
Fig. 9-21
2
3
4
5
1