PART 2: CX-Server PLC Tools
CHAPTER 10 – Data Links OMRON
CX-Server PLC Tools_Page 102
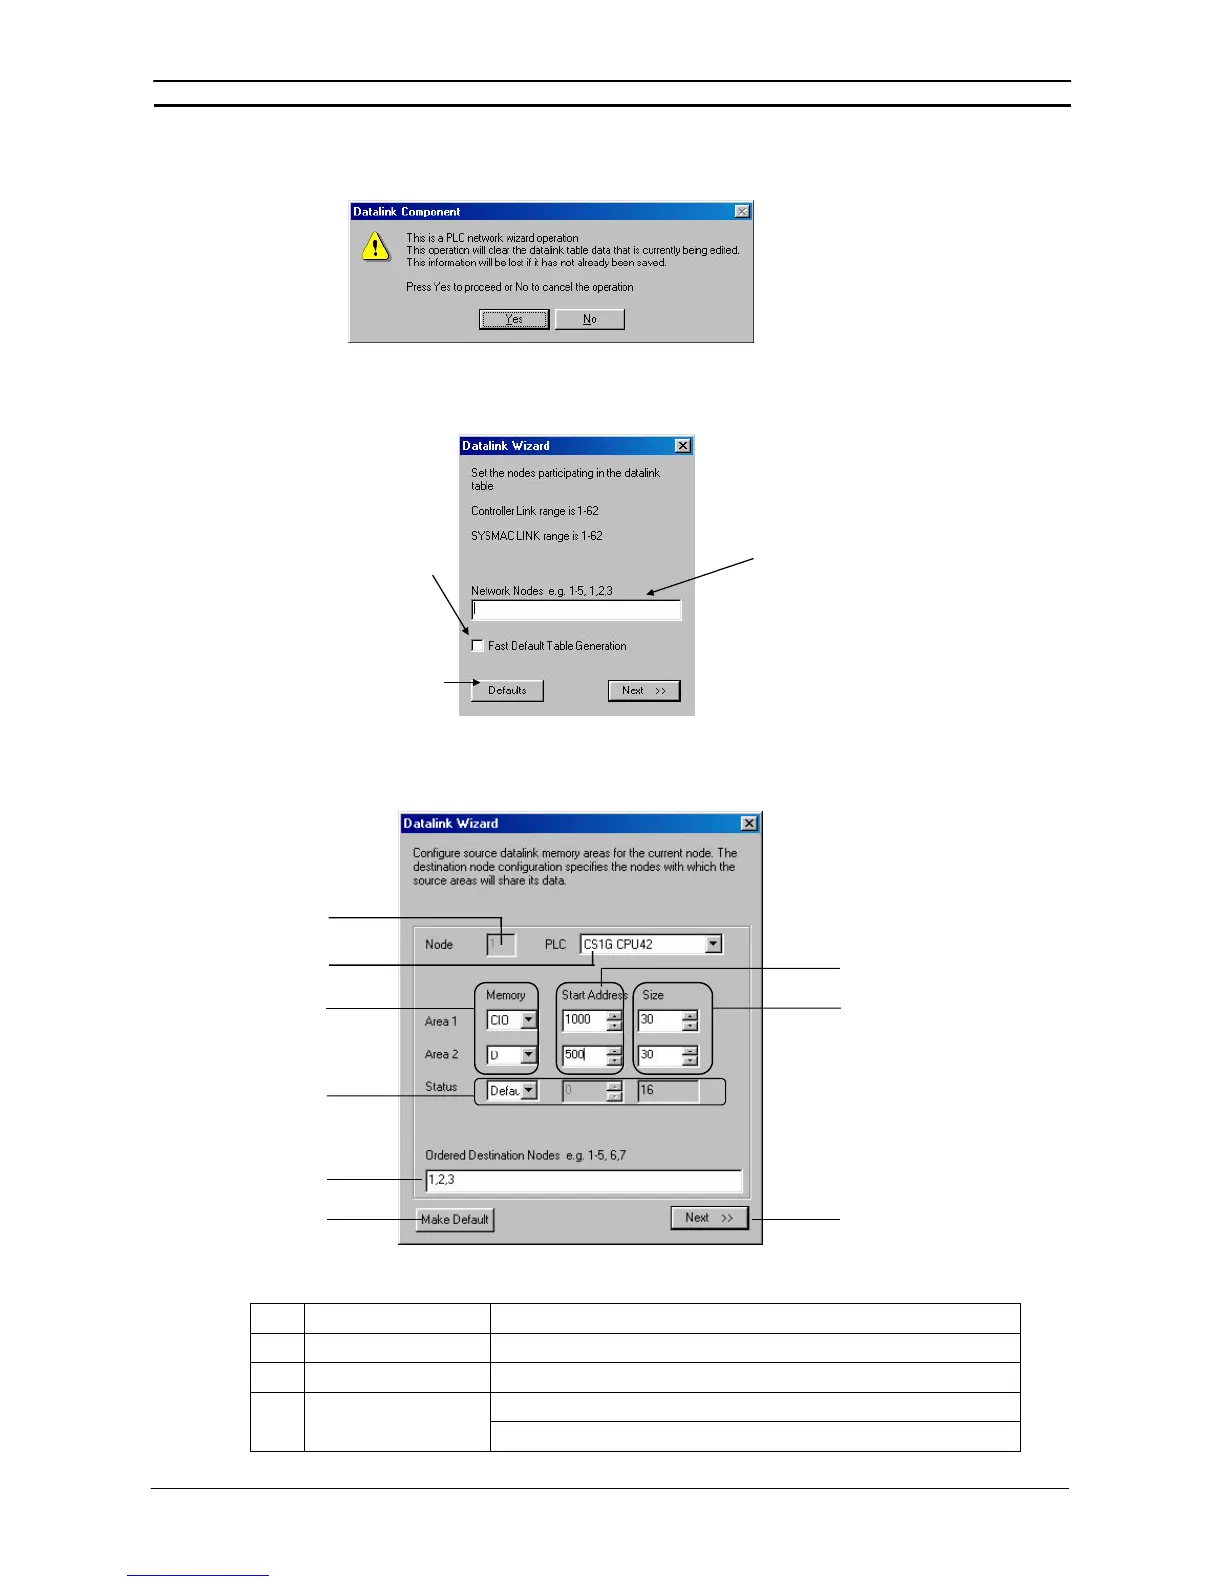
3 Select Table | Wizard. If data link tables have already been input, the following dialog box will be displayed.
(It will not be displayed if these are the first data link tables being created.)
4 Click the Yes button. The Datalink Wizard dialog box will be displayed for setting the participating data link
nodes.
ddresses of nodes to participate in the
data links.
If this box is selected, fast
default table generation will
be set when the Defaults
button is clicked. In that
case, all nodes will be set
as a group, using the initial
values that have been set.
Clicking the Defaults button
sets the initial values used
for fast default table
generation.
5 Set the addresses of the nodes that are to participate in the data links. In this case, input 1-3 to set node
addresses 01 to 03. (To set node addresses 01, 02, and 04, for example, input 1,2,4.)
6 Click the Next button or press the Enter key. The following dialog box will be displayed.
(1)
(2)
(3)
(6)
(4)
(5)
(7)
(8)
(9)
No. Item Function
(1) Node Displays node number to set.
(2) PLC Sets the PLC type.
(3) Memory area Area 1 memory area
Area 2 memory area