Installation
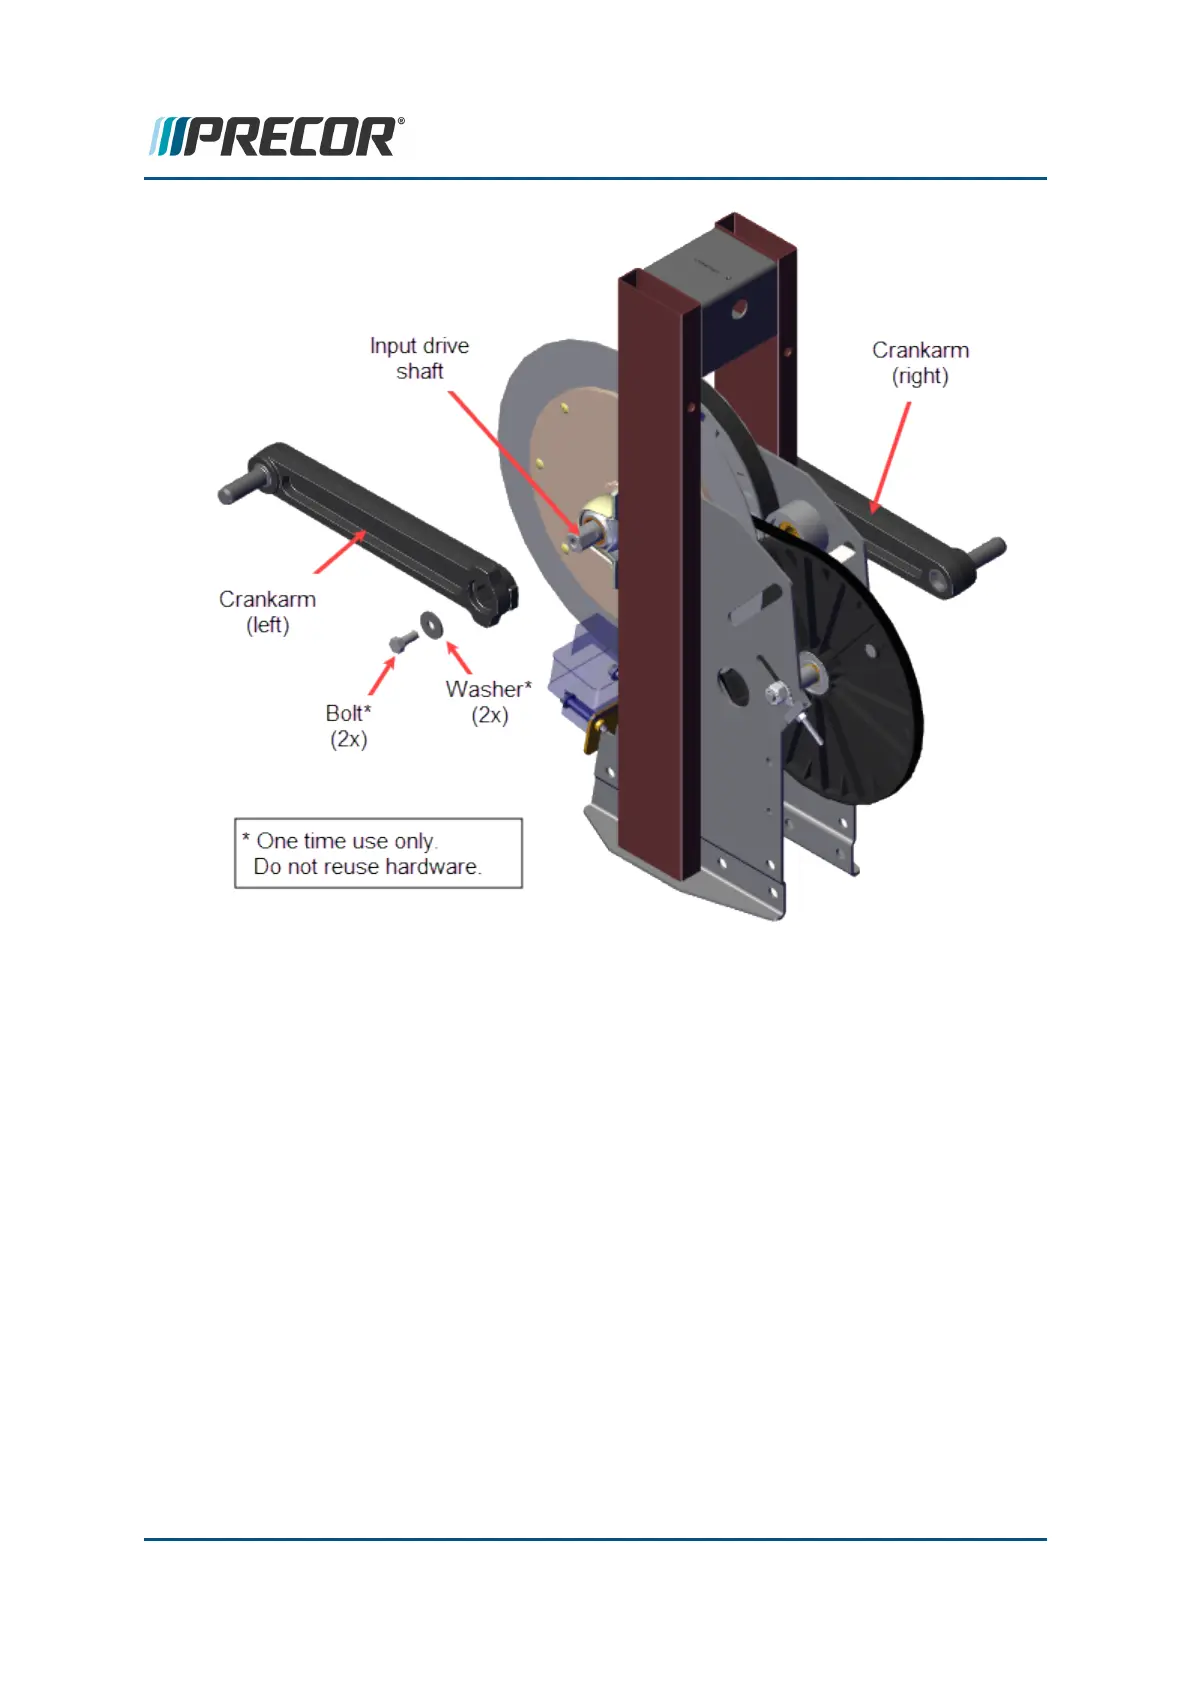
7. Slide the crankarm onto the input drive assembly shaft. Do not use a mallet to seat
the crankarm which could knock the input drive assembly out of alignment.
8. Use a new mounting bolt and washer to secure the crankarm to the input drive
assembly shaft. Fully tighten and torque to 300 in-lbs (25 ft-lbs, 34 Nm).
9. .Repeat procedure to install the opposite side crankarm. Make sure to mount the
crankarm 180 deg. opposite of the installed crankarm.
Contact Precor Customer Support at support@precor.com or 800.786.8404 with
any questions.
Page 152
6 Available Replacement Procedures
Crankarm Assembly Replacement