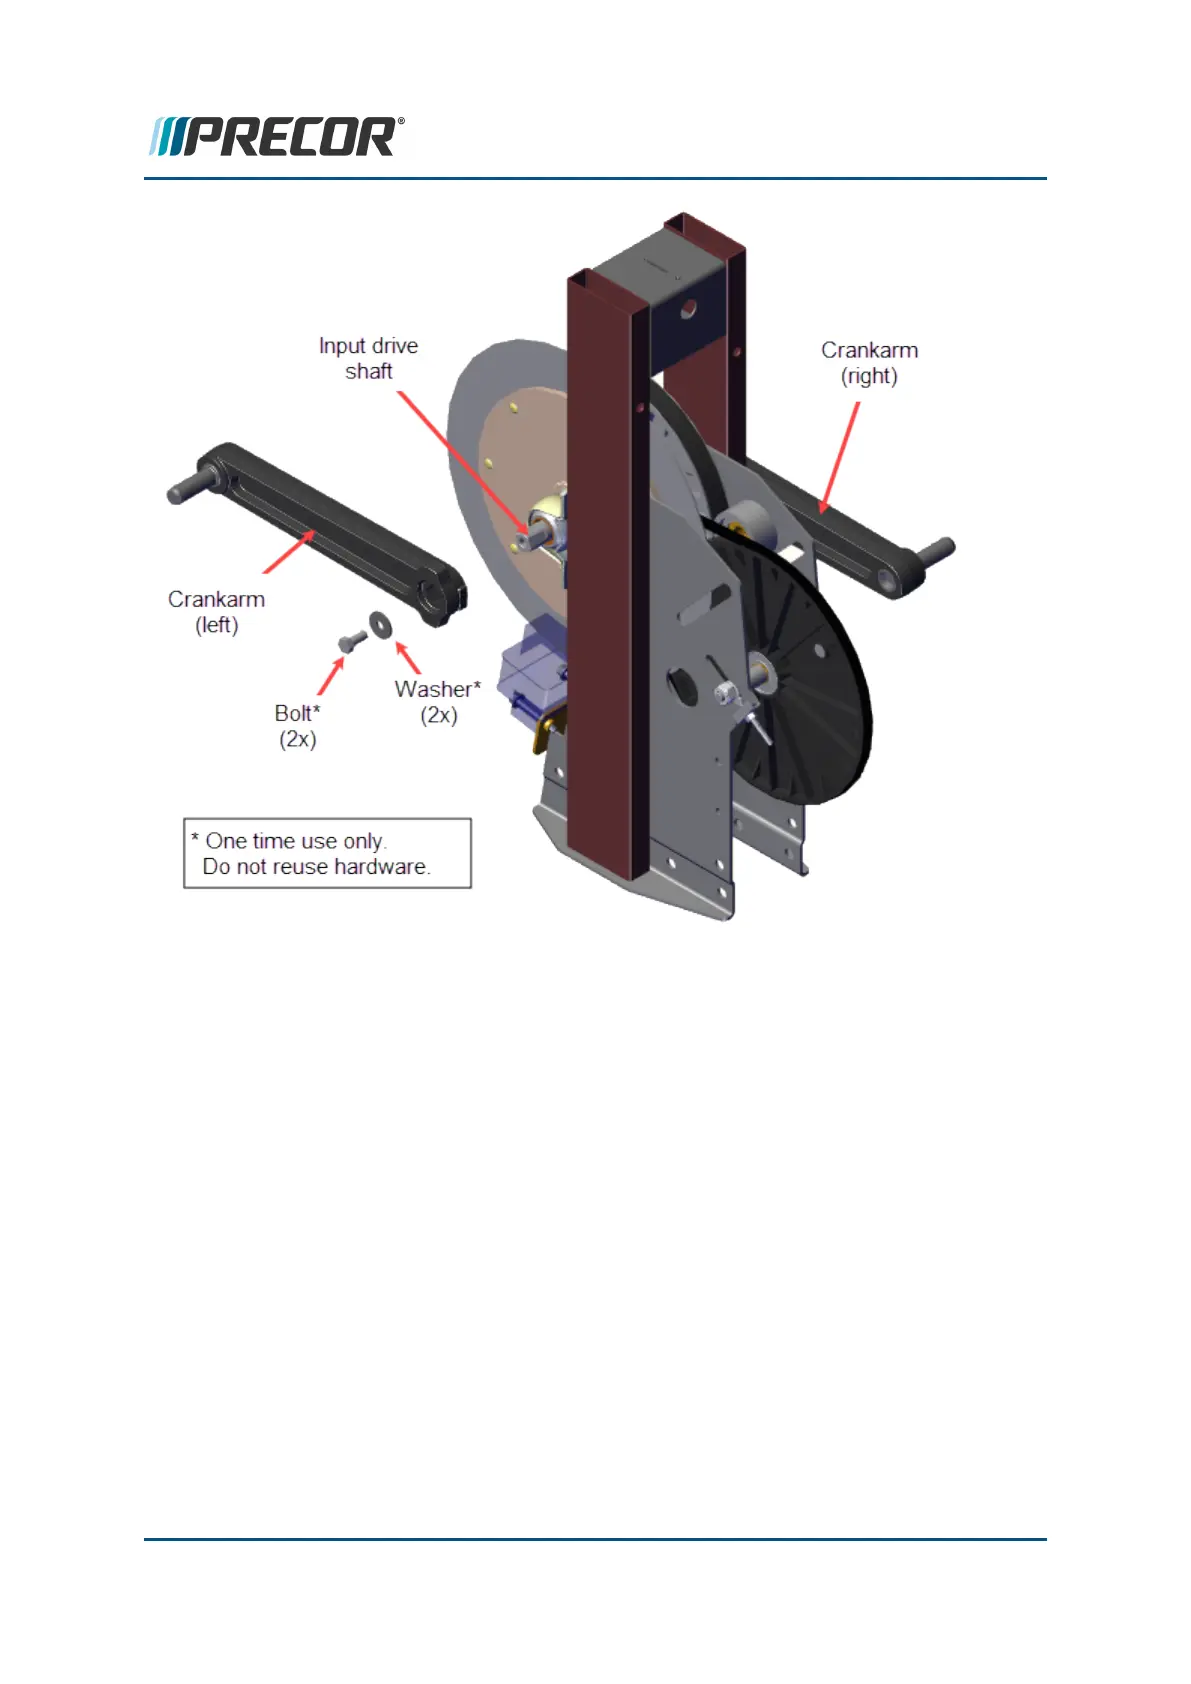
10. Thread and hand tighten the pillow block mounting bolts into the drive weldment. Pos-
ition the shaft so that the left and right distance measured from the ends of the shaft to
the side of the drive weldment upright are equal (the shaft-weldment distance).
11. Fully tighten and torque the pillow block mounting bolts to 120 in-lbs (10 ft-lbs, 13.6
Nm).
12. Break-in procedure.
a. Start a manual workout, set the resistance to the maximum level and do the
break-in workout for a minimum of 3 minutes.
b. Stride in a forward direction for half of the time and in a backward direction for
half of the time. Stop the workout and re-torque both of the crankarm mounting
bolts to specification 300 in-lbs (25 ft-lbs, 34 Nm).
13. Replace the stairarms.
14. Replace the removed rear drive covers.
Contact Precor Customer Support at support@precor.com or 800.786.8404 with
any questions.
Page 153
6 Available Replacement Procedures
Crankarm Assembly Replacement