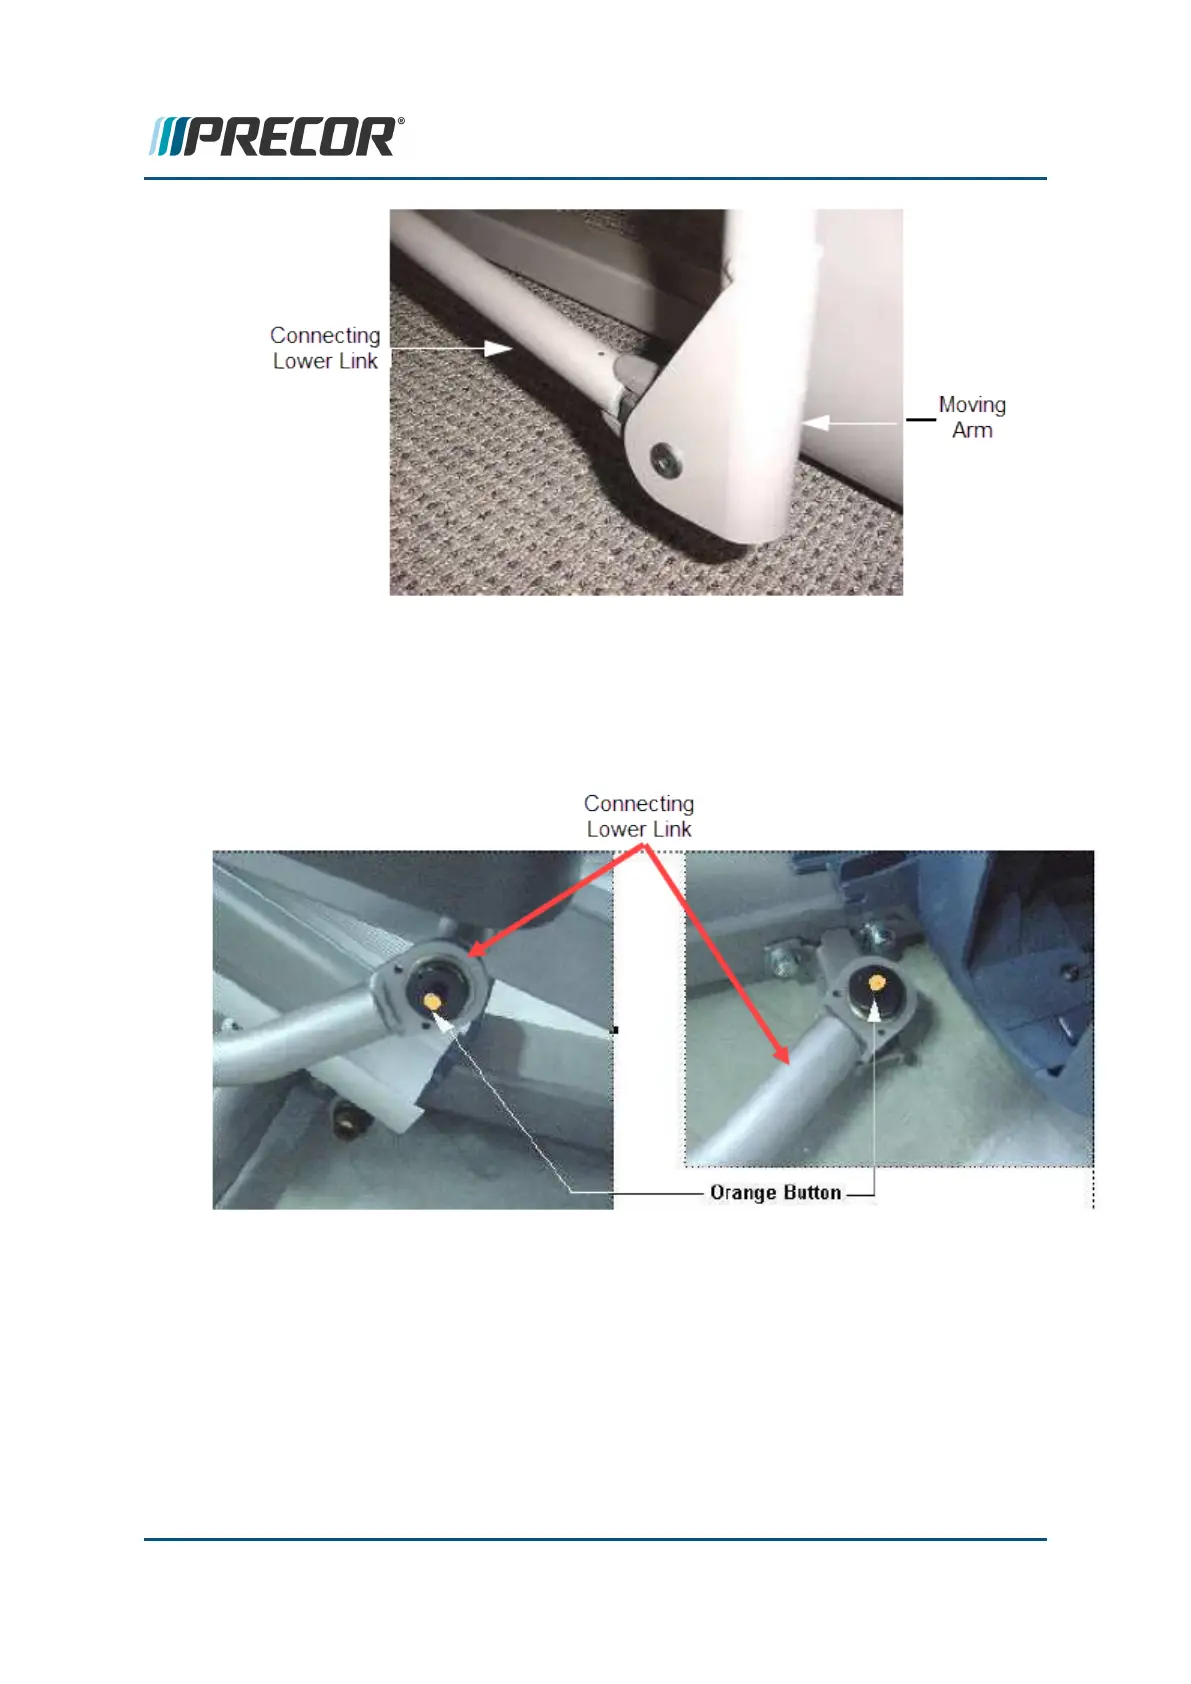
3. The back end of the Connecting Lower Link will either be attached to the stairarm or
to the storage point on the frame weldment. Depress the orange button and remove
the Connecting Lower Link. Removing the Connecting Lower Link prevents the mov-
ing arm from resting on the outrigger side tube preventing painted surfaces and Con-
necting Lower Link assemblies from damage.
4. Remove the outrigger side tube assembly, see "Moving Arm Replacement" on the
previous page. Retain part(s) and/or fastener(s) for installation.
5. Use a 1/2 inch open end wrench to unscrew the moving arm axle and remove the
Moving Arm.
Contact Precor Customer Support at support@precor.com or 800.786.8404 with
any questions.
Page 176
6 Available Replacement Procedures
Moving Arm Replacement

 Loading...