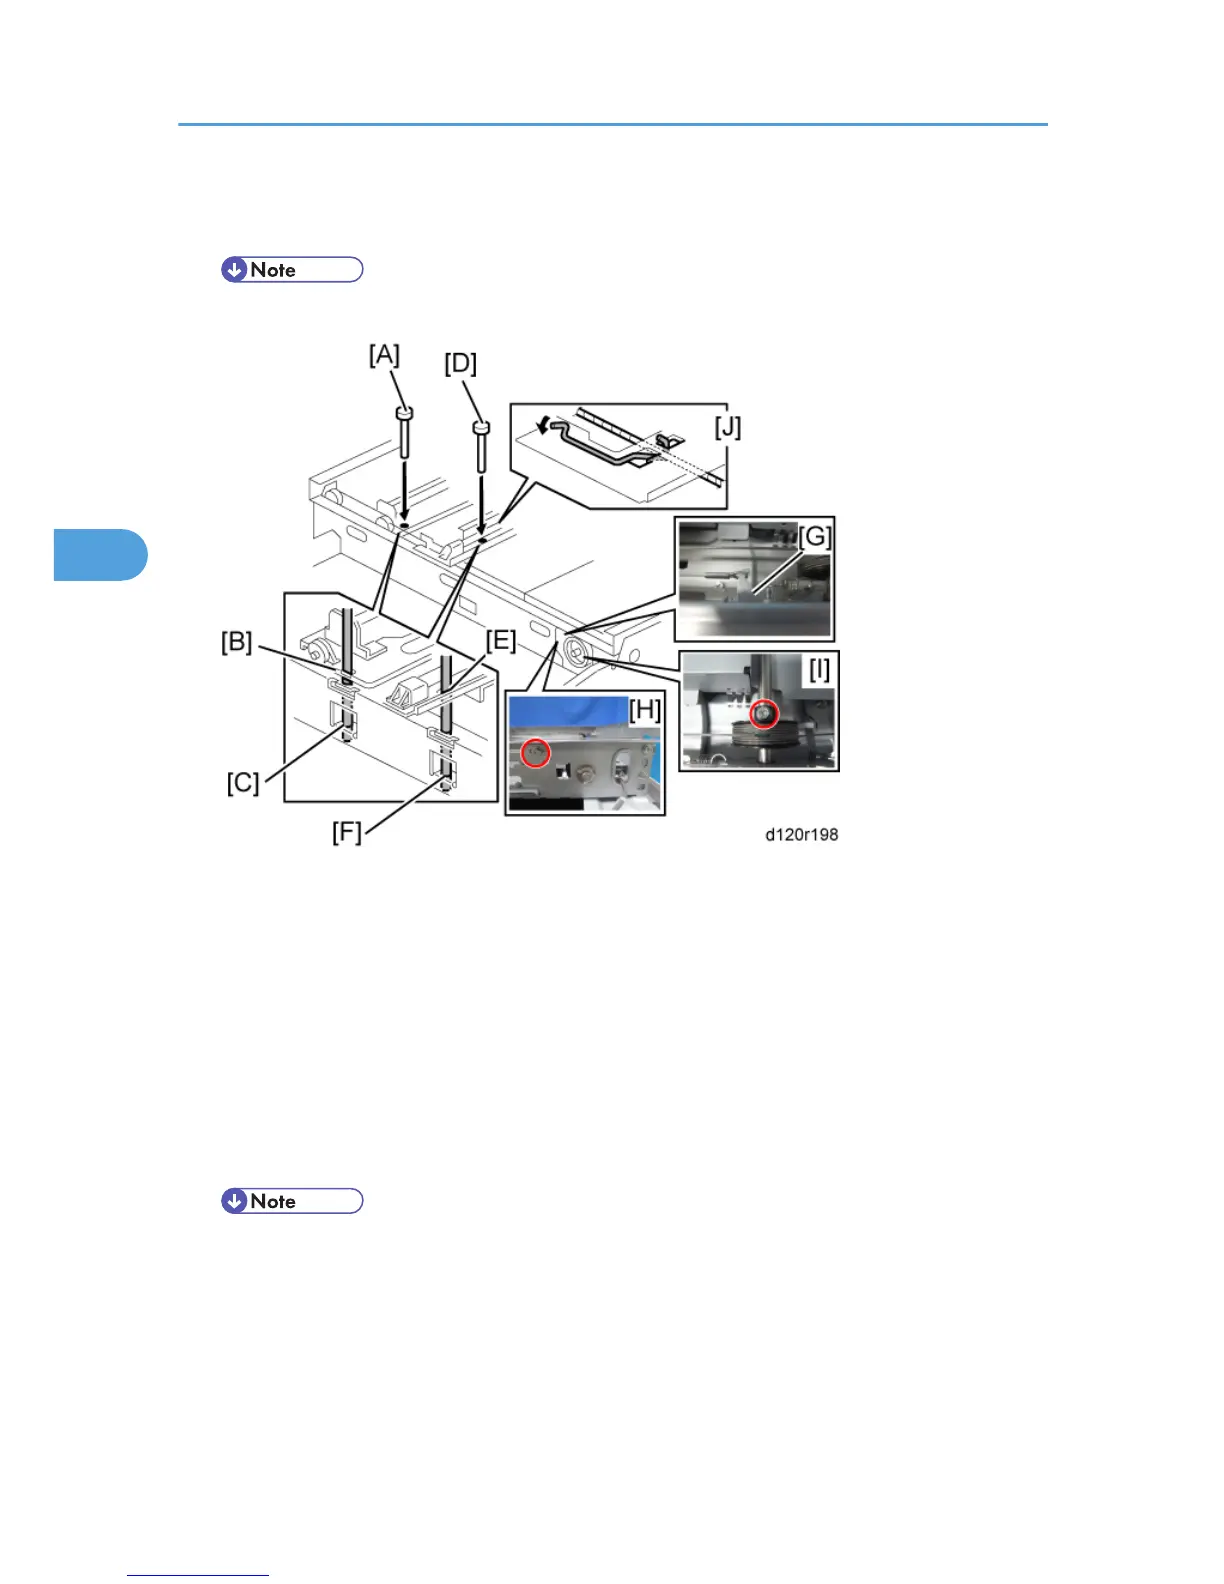
6. Hook the right end onto the front scanner wire bracket [A]. The end should go via the front track of
the right pulley [B] and the front track of the movable pulley [C].
• Do not attach the scanner wire bracket with the screw at this time.
7. Remove the tape from the drive pulley.
8.
Insert a scanner-positioning pin [A] through the 2nd carriage hole [B] and the left holes [C] in the
front rail. Insert another scanner positioning pin [D] through the 1st carriage hole [E] and the right
holes in the front rail [F].
9.
Insert two more scanner positioning pins through the holes in the rear rail.
10.
Screw the drive pulley to the shaft [I].
11. Screw the scanner wire bracket [G] to the front rail with screw [H].
12. Install the scanner wire clamp [J].
13. Pull out the positioning pins.
• Make sure the 1st and 2nd carriages move smoothly after you remove the positioning pins.
Do steps 8 through 13 again if they do not.
4. Replacement and Adjustment
202
 Loading...