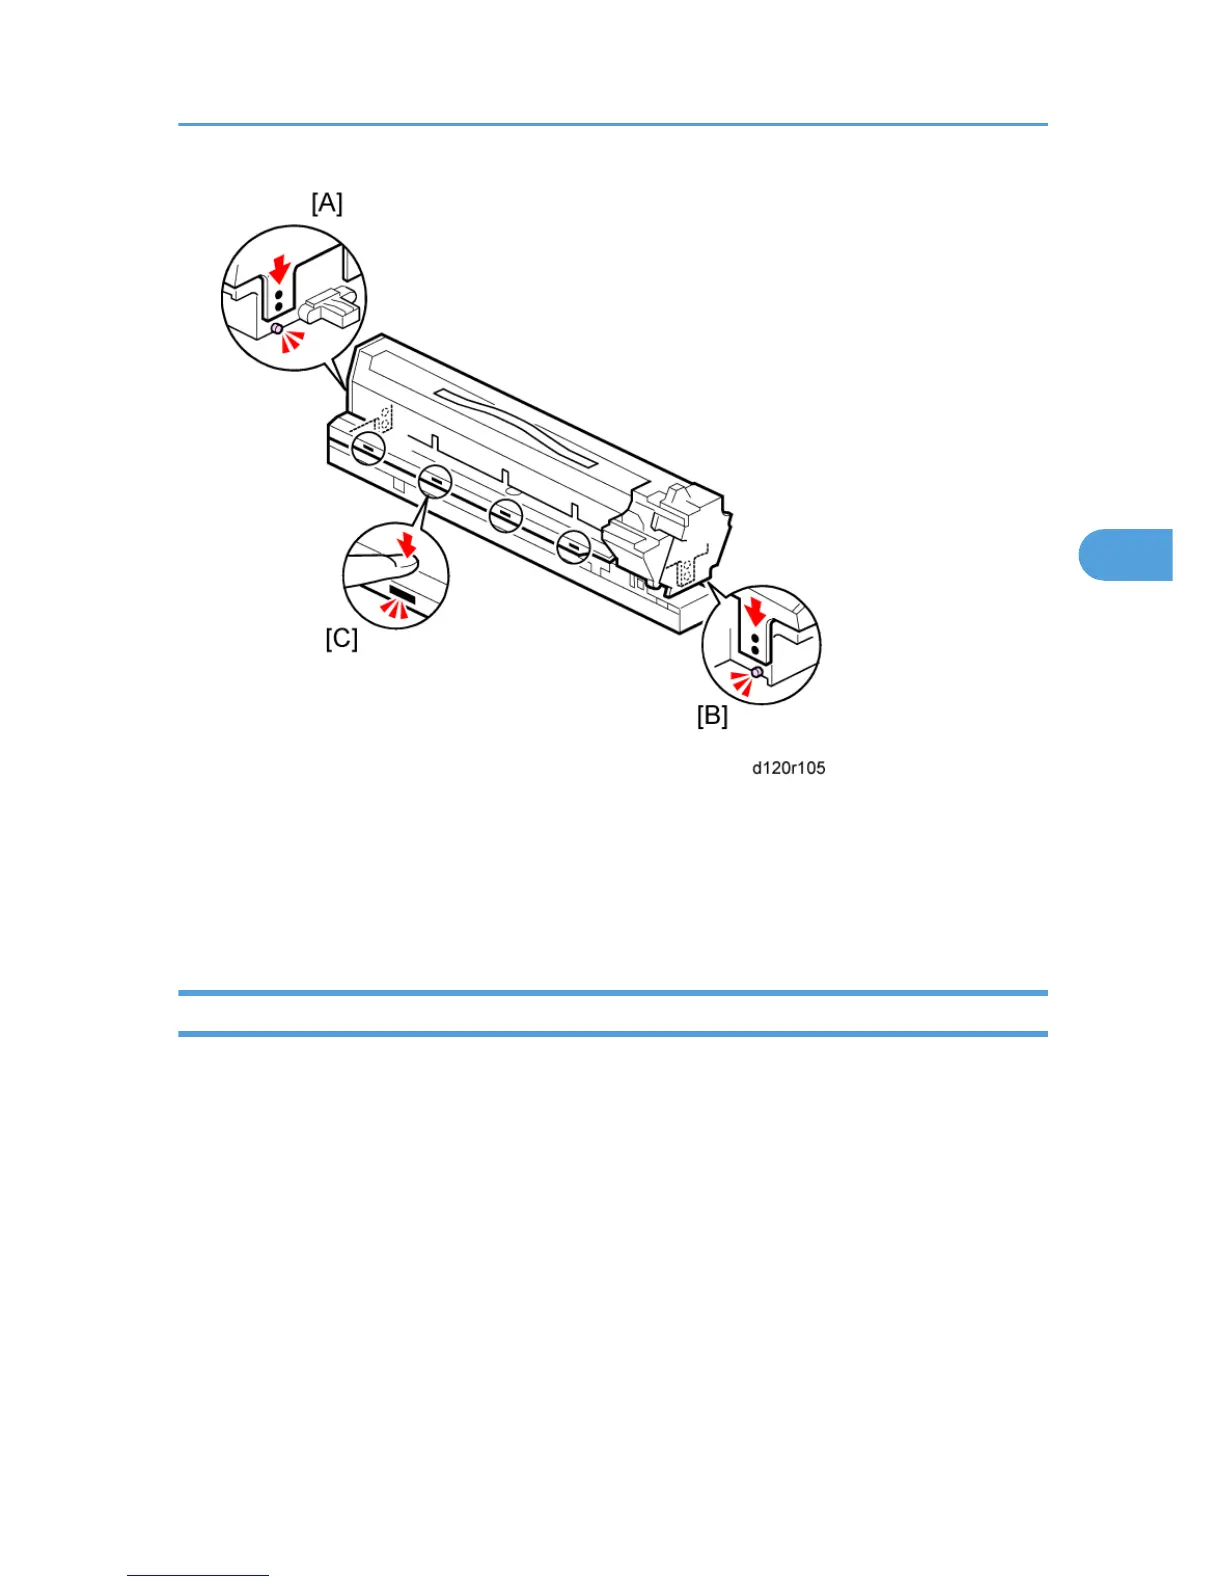
7. Make sure that all of the holes and tabs on are engaged at [A], [B], and [C]. Then push down to
lock the tabs on the front and rear end of the PCU.
8. Make sure that the holes for the screws on the front and rear end of the PCU are aligned correctly.
If the holes are not aligned correctly, make sure that the tabs at the front, rear, and left side of the
PCU are engaged correctly.
After Replacement of PCU Components
Do this procedure after you replace the PCU components and developer.
1. Assemble the PCU and install it in the machine.
2. Turn on the main power switch.
3.
If you replaced developer, go into the SP mode and do SP2-801 (Developer Initialization).
4. Make 5 sample copies.
5. Check the copies.
• If the copies are clean (no black dots), the replacement is completed.
-or-
• If you see black dots of toner that fell on the copies, go to the next step.
6. Remove the PCU from the machine.
Photoconductor Unit (PCU)
219
 Loading...