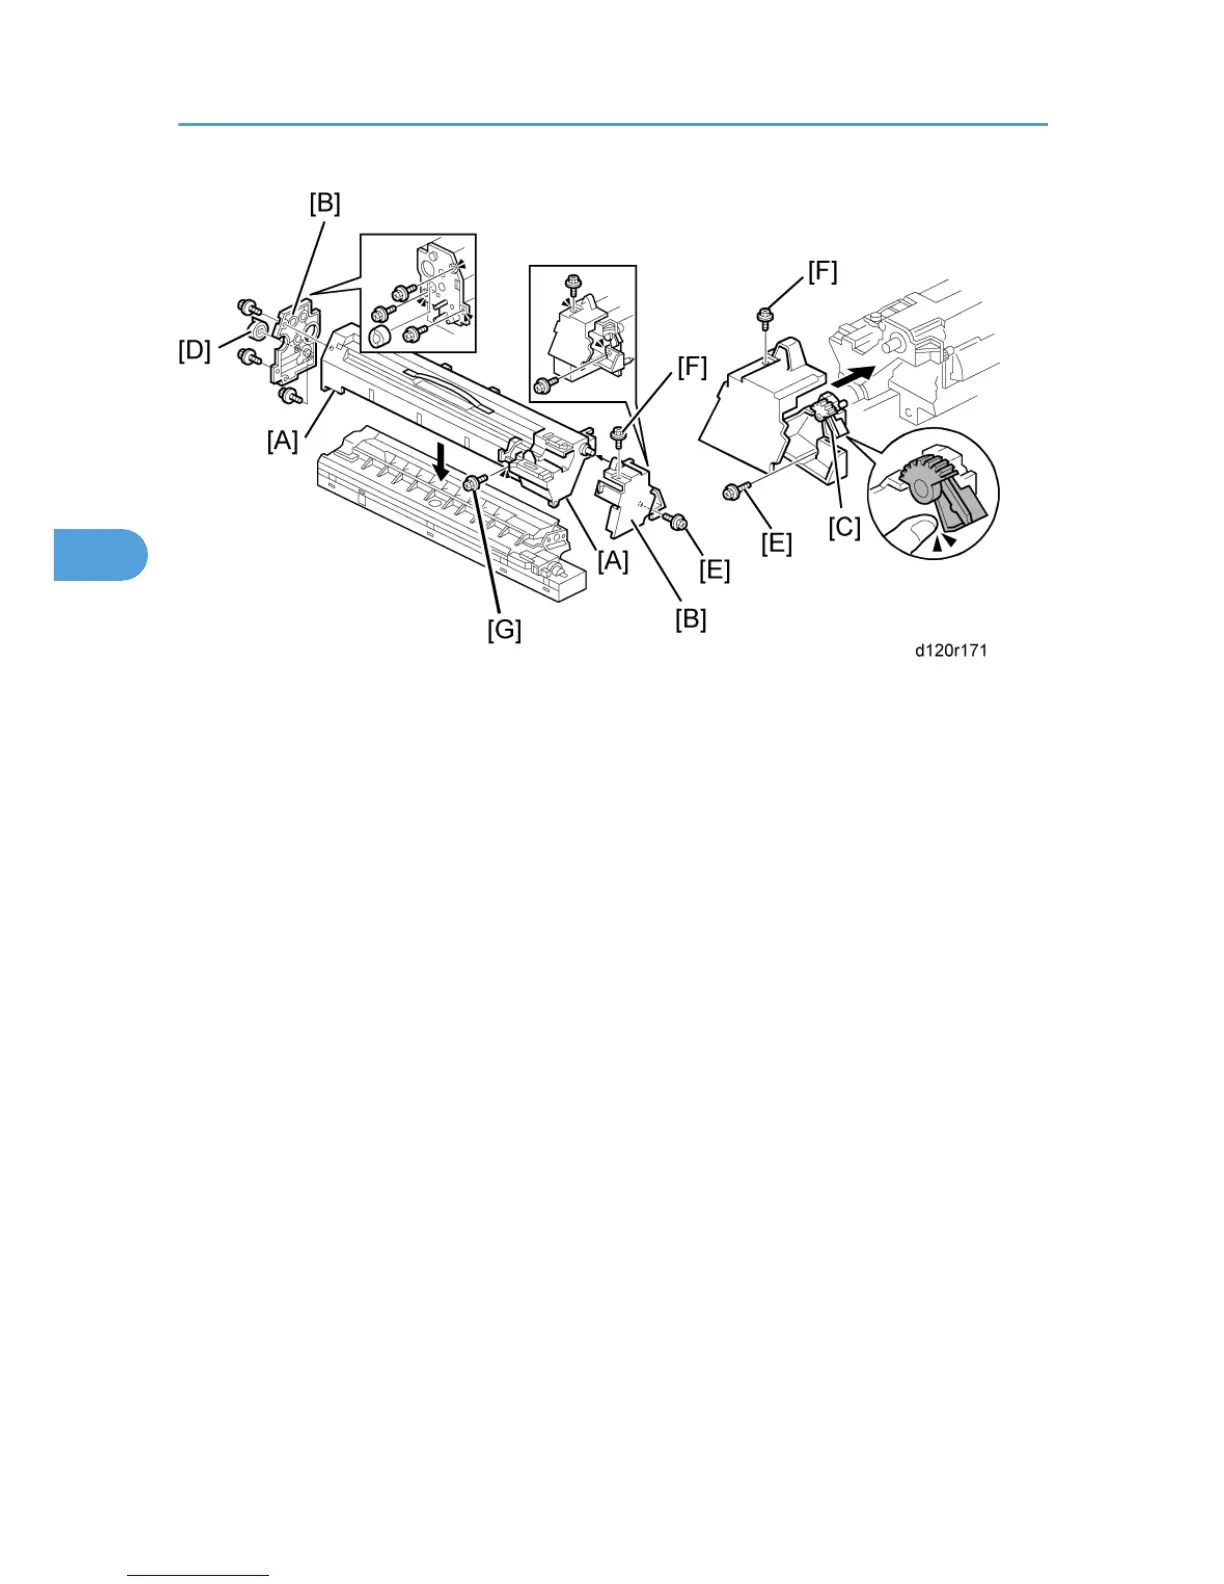
1. Attach the front frame pawls and front and rear [A].
2. Set the rear cover and front cover [B].
• Never touch the lever [C] until after the top screw has been fastened.
3.
Tighten the three screws and coupling [D].
• Never press down on the top of the PCU when you reattach the rear or front cover.
4. Tighten the lower screw [E].
• Always install the lower screw first to maintain the correct gap between the rollers.
5. Tighten the top screw [F].
• Lift and lower the lever [C] to make sure that the shutter opens fully and operates smoothly.
6. Attach the side screw [G].
4. Replacement and Adjustment
218
 Loading...