• Be careful. Do not spill developer on the gears and sponges. If you accidentally spill
developer on the gears or sponges, remove it with a magnet or the tip of a magnetized
screwdriver.
Re-assembly
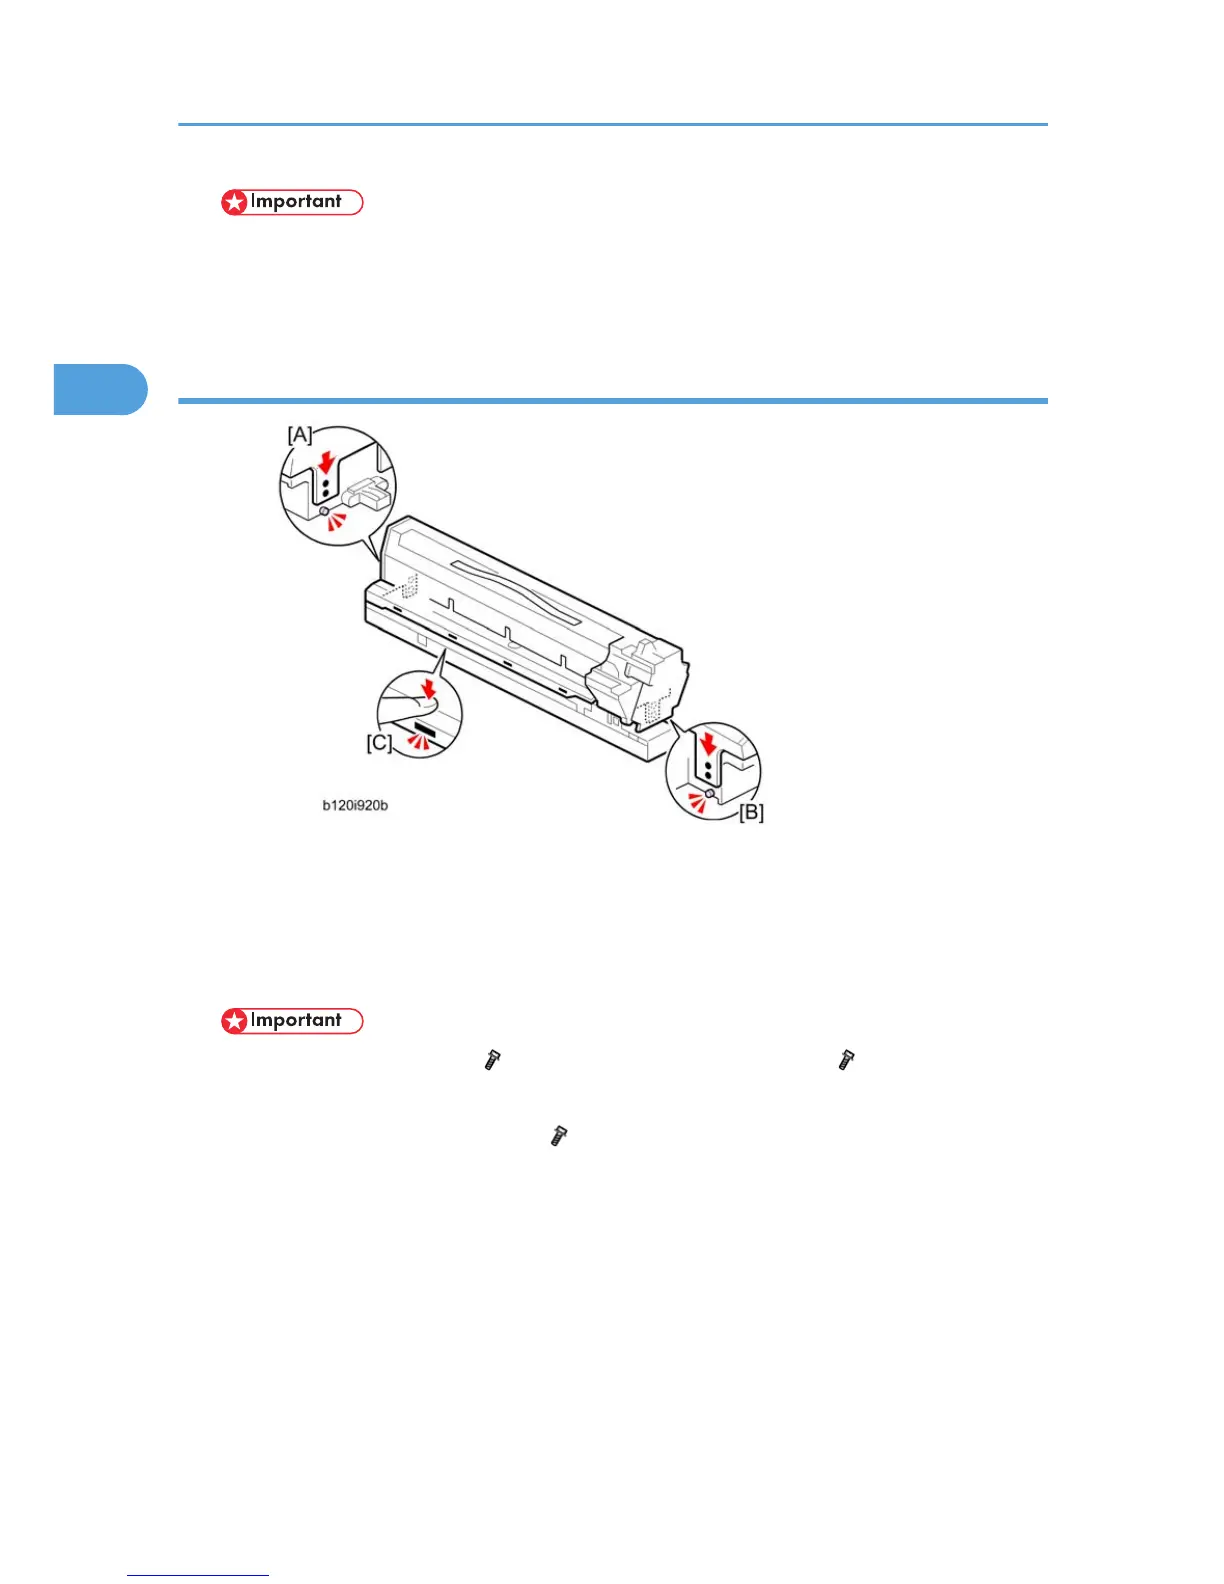
1. Make sure that all of the holes and tabs are engaged at [A], [B], and [C]. Then push down to lock
the tabs on the front and rear end of the PCU.
2. Make sure that the holes for the screws on the front and rear end of the PCU are aligned correctly.
If the holes are not aligned correctly, make sure that the tabs at the front, rear, and left side of the
PCU are engaged correctly.
• Reattach the rear screws ( x 2) first, then reattach the front screw ( x 1).
• Do not push down on the top of the PCU when you attach the rear and front screws
3. Reinstall the PCU in the main machine ( x 1).
2. Installation
34
 Loading...