Specifying the Scan Size
Select the size of the original to be scanned.
[Regular Size]
Select a size to scan originals at a specified size regardless of the actual size of the originals you
have placed.
You can specify the following template sizes:
8
1
/
2
× 14
, 8
1
/
2
× 13
2
/
5
, 8
1
/
2
× 13 , 8
1
/
2
× 11 , 5
1
/
2
× 8
1
/
2
, 5
1
/
2
× 8
1
/
2
, A4
, A5 , A5 , B5 JIS
[Custom Size]
Select [Custom Size] to scan originals whose sizes do not match a standard template or to scan
only a part of an original.
You can specify the length and width of your originals in mm or inches.
[Programmed Size]
Select a size from those specified in [Program/Change Scan Size] in [Scan Settings] under
[Scanner Features].
For details about programming scan sizes, see “Scan Settings”, Scan.
If you want to scan the entire area of a custom size original, select [Custom Size] as the scan size.
To display the custom size setting screen, on the initial scanner screen, press [Scan Settings] > [Scan
Size] > [Custom Size].
The following tables explain how to measure custom size originals and how to specify the scan settings
on the custom size settings screen.
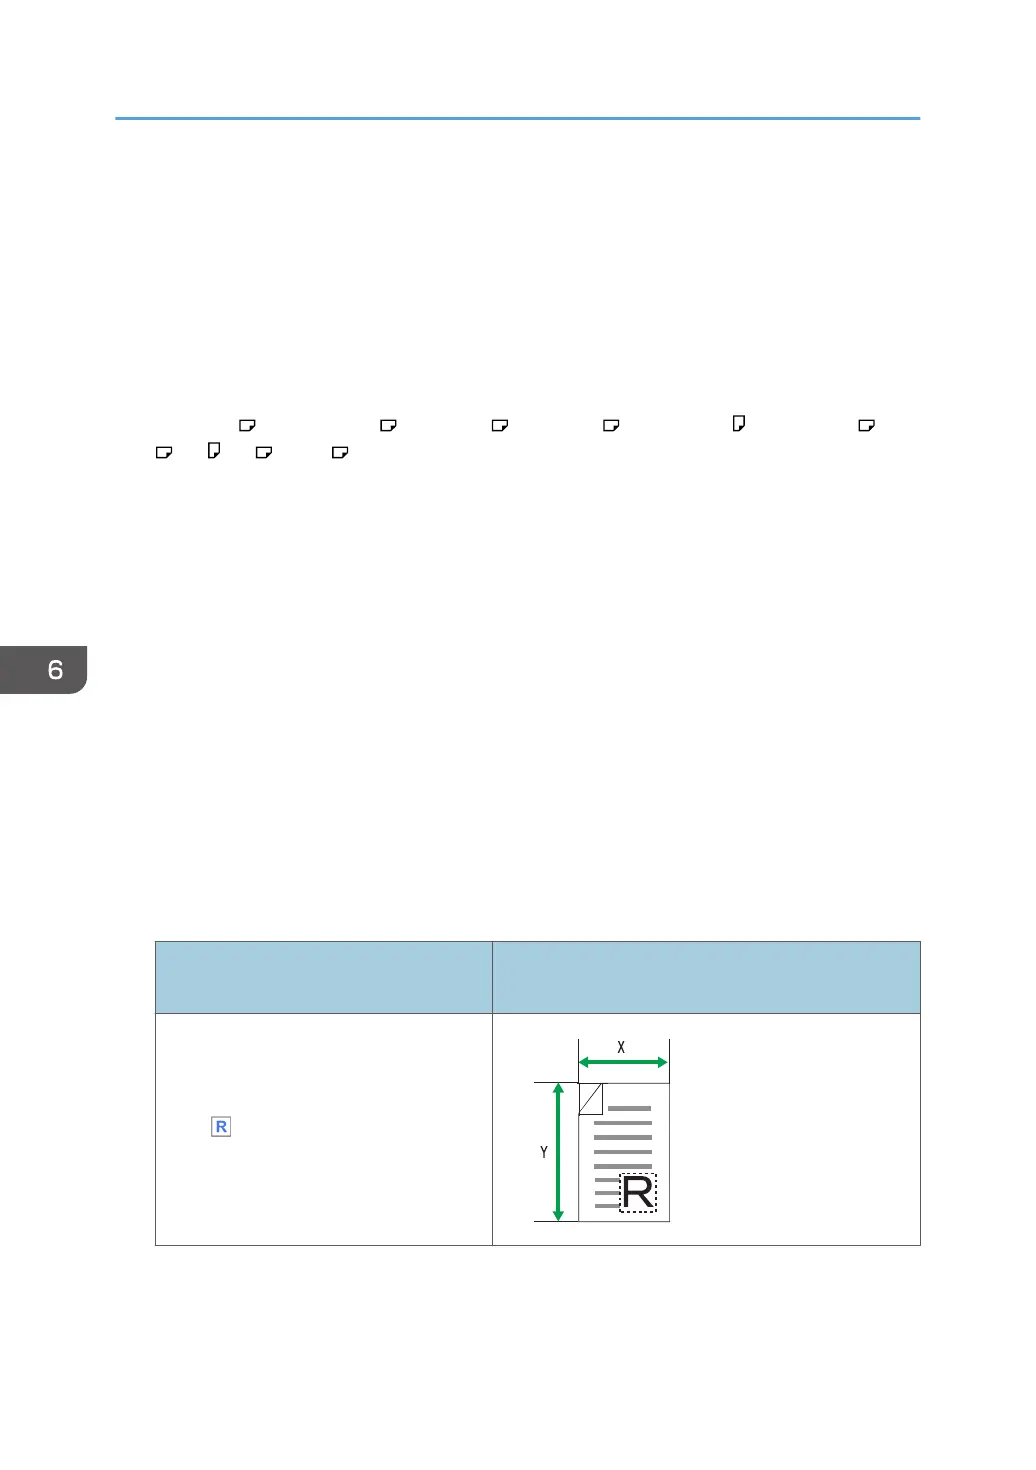
How to measure sizes
Orientation and placement of original
Measuring method for scanning the entire area of a
custom size original
In the orientation
6. Scan
96
 Loading...


