86 Rockwell Automation Publication 2071-UM001E-EN-P - November 2013
Chapter 6 Configure Your Drive for Communication
Apply Power to Your Kinetix 3
Drive
This procedure assumes that you have completed the following:
• Wired your Kinetix 3 system
• Verified the wiring
• Are ready to begin establishing communication to the drive
To apply power to your Kinetix 3 drive, follow these steps.
1. Disconnect any load to the motor.
2. Apply main and control input power to the Kinetix 3 drive, and observe
the operator interface on the front of the drive.
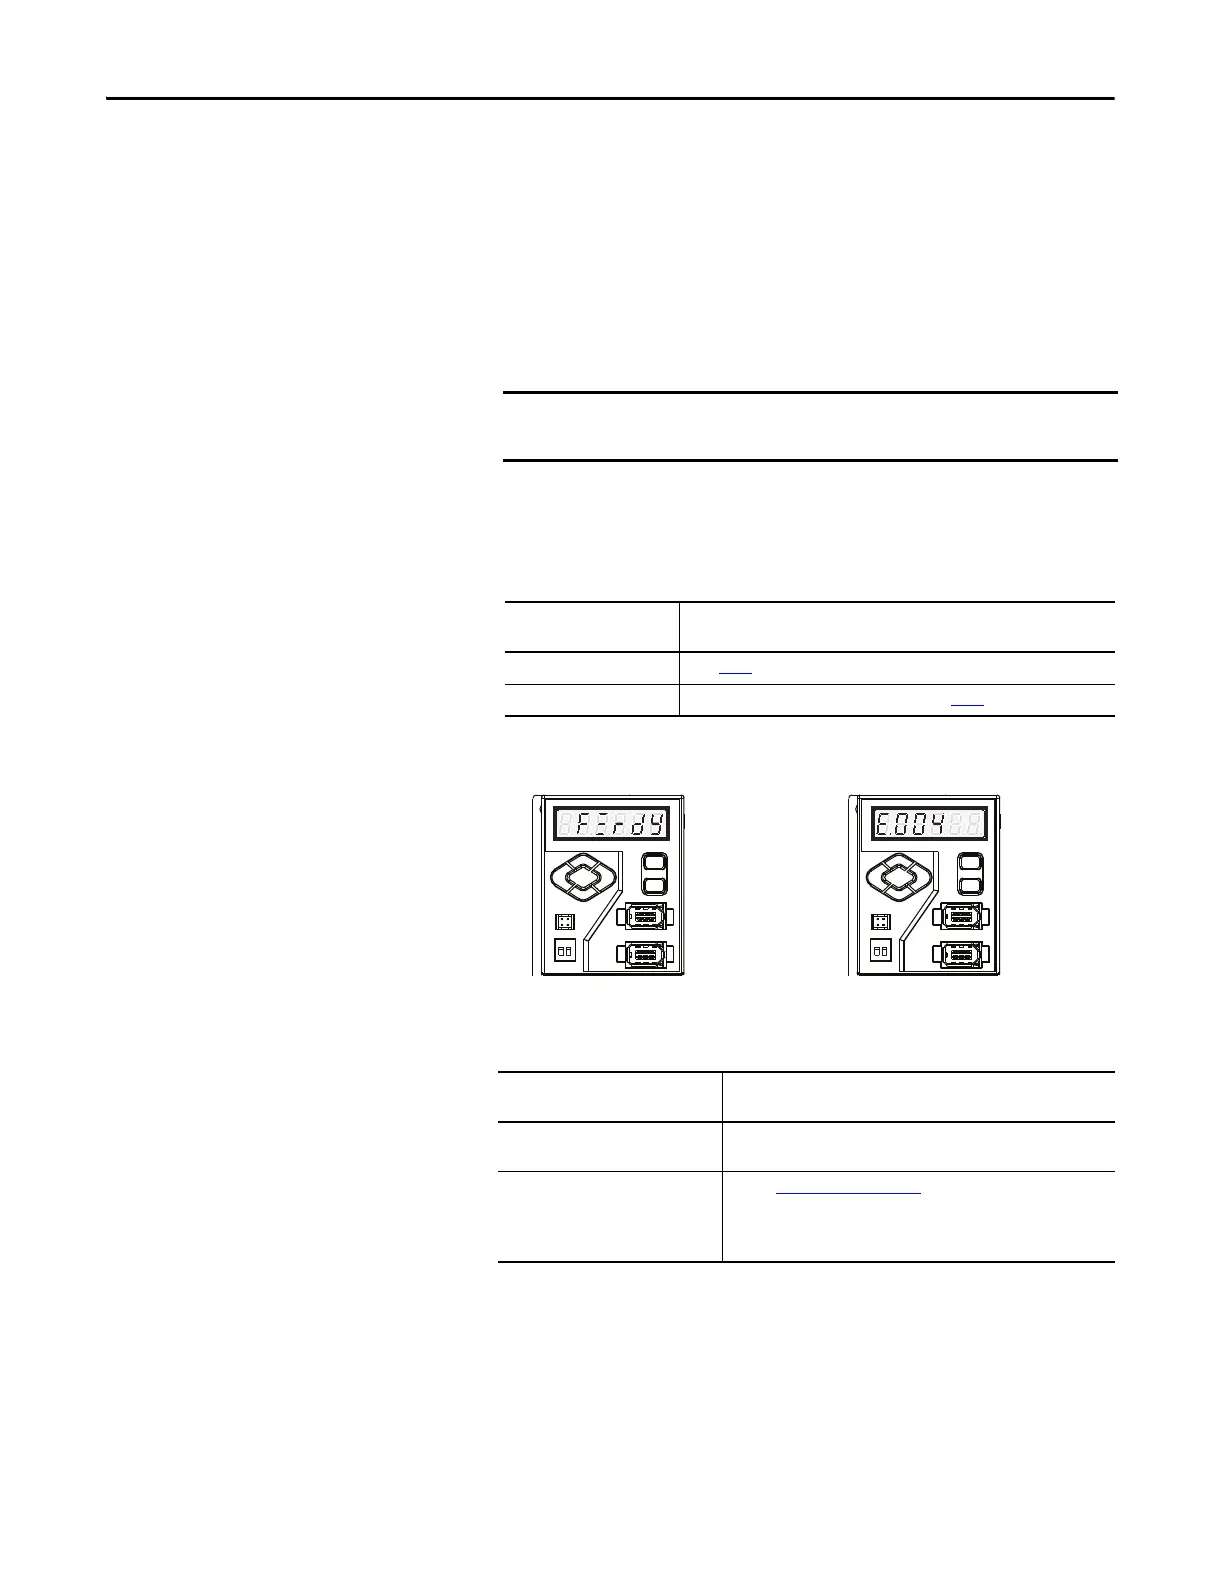
The drive enters a normal startup, as outlined below and shown in below.
3. Verify the status of the drive startup, as outlined below and shown in
above.
Be sure that the motor is free of all linkages when initially applying
power to the system.
If the Main Power Status
Indicator is
Then
ON Go to step 3.
OFF Check your input power connections and repeat step 2.
If the Six Characters on the
7-segment Display Indicator
Then
rdY in the three least significant
characters
The drive is ready.
E. in the most significant character
followed by a text string or error code
number
Refer to Error Displays on page 116
to troubleshoot the fault
condition.
IMPORTANT: If a 17-bit serial motor is not connected or a 17-bit serial
motor is installed without a battery backup, a fault condition occurs.
Startup Normal Error Detected during Startup
 Loading...