8
Reference Manual
00809-0100-4108, Rev CA
Configuration
March 2017
Configuration
2.5 Configuration overview
This section contains information on commissioning and tasks that should be performed on
the bench prior to installation, as well as tasks performed after installation as described in
“Performing transmitter tests” on page 23.
Field Communicator, AMS
Device Manager, and Local Operator Interface (LOI) instructions
are given to perform configuration functions. For convenience, Field Communicator Fast
Key sequences are labeled “Fast Keys,” and abbreviated LOI menus are provided for each
function below.
Full Field Communicator menu trees and Fast Key sequences are available in Appendix C:
Field Communicator menu trees and Fast Keys. LOI menu trees are available in Appendix D:
Local Operator Interface.
2.6 Configuration basics
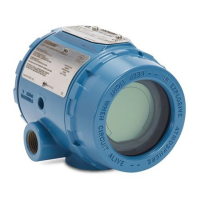
The Rosemount 2088, 2090F, and 2090P can be configured either before or after
installation. Configuring the transmitter on the bench using either a Field Communicator,
AMS Device Manager, or LOI ensures all transmitter components are in working order prior
to installation. Verify that the security switch is set in the unlock position ( ) in order to
proceed with configuration. See Figure 4-2 on page 43 for switch location.
Note
LOI is available with the Rosemount 2088 (option M4) but is not available with the
Rosemount 2090F or 2090P.
2.6.1 Configuring on the bench
To configure on the bench, required equipment includes a power supply, and a Field
Communicator, AMS Device Manager, or an LOI (option M4). Wire equipment as shown in
Figure 2-4 below. To ensure successful HART communication, a resistance of at least 250 Ωs
must be present between the transmitter and the power supply, see “Power supply” on
page 46 for details. Connect the Field Communicator leads to the terminals labeled
“COMM” on the terminal block or 1–5 V configuration, wire as shown in Figure 2-4 on
page 9. The Field Communicator is connected to the terminals labeled VOUT/COMM.
Set all transmitter hardware adjustments during commissioning to avoid exposing the
transmitter electronics to the plant environment after installation.