SECTION 26: INSTRUMENT BREAKDOWN InSpec Sampler Controller
SECTION 26: INSTRUMENT BREAKDOWN
No.1 Pozidriv (cross-head) Screwdriver
2.5mm Hexagon Wrench or Allen Key
4mm Hexagon Wrench or Allen Key
7mm Combination Spanner
Modern electronic devices are very sensitive to static electric charges.
Use a grounding wrist strap at all times - See section 0 for more details
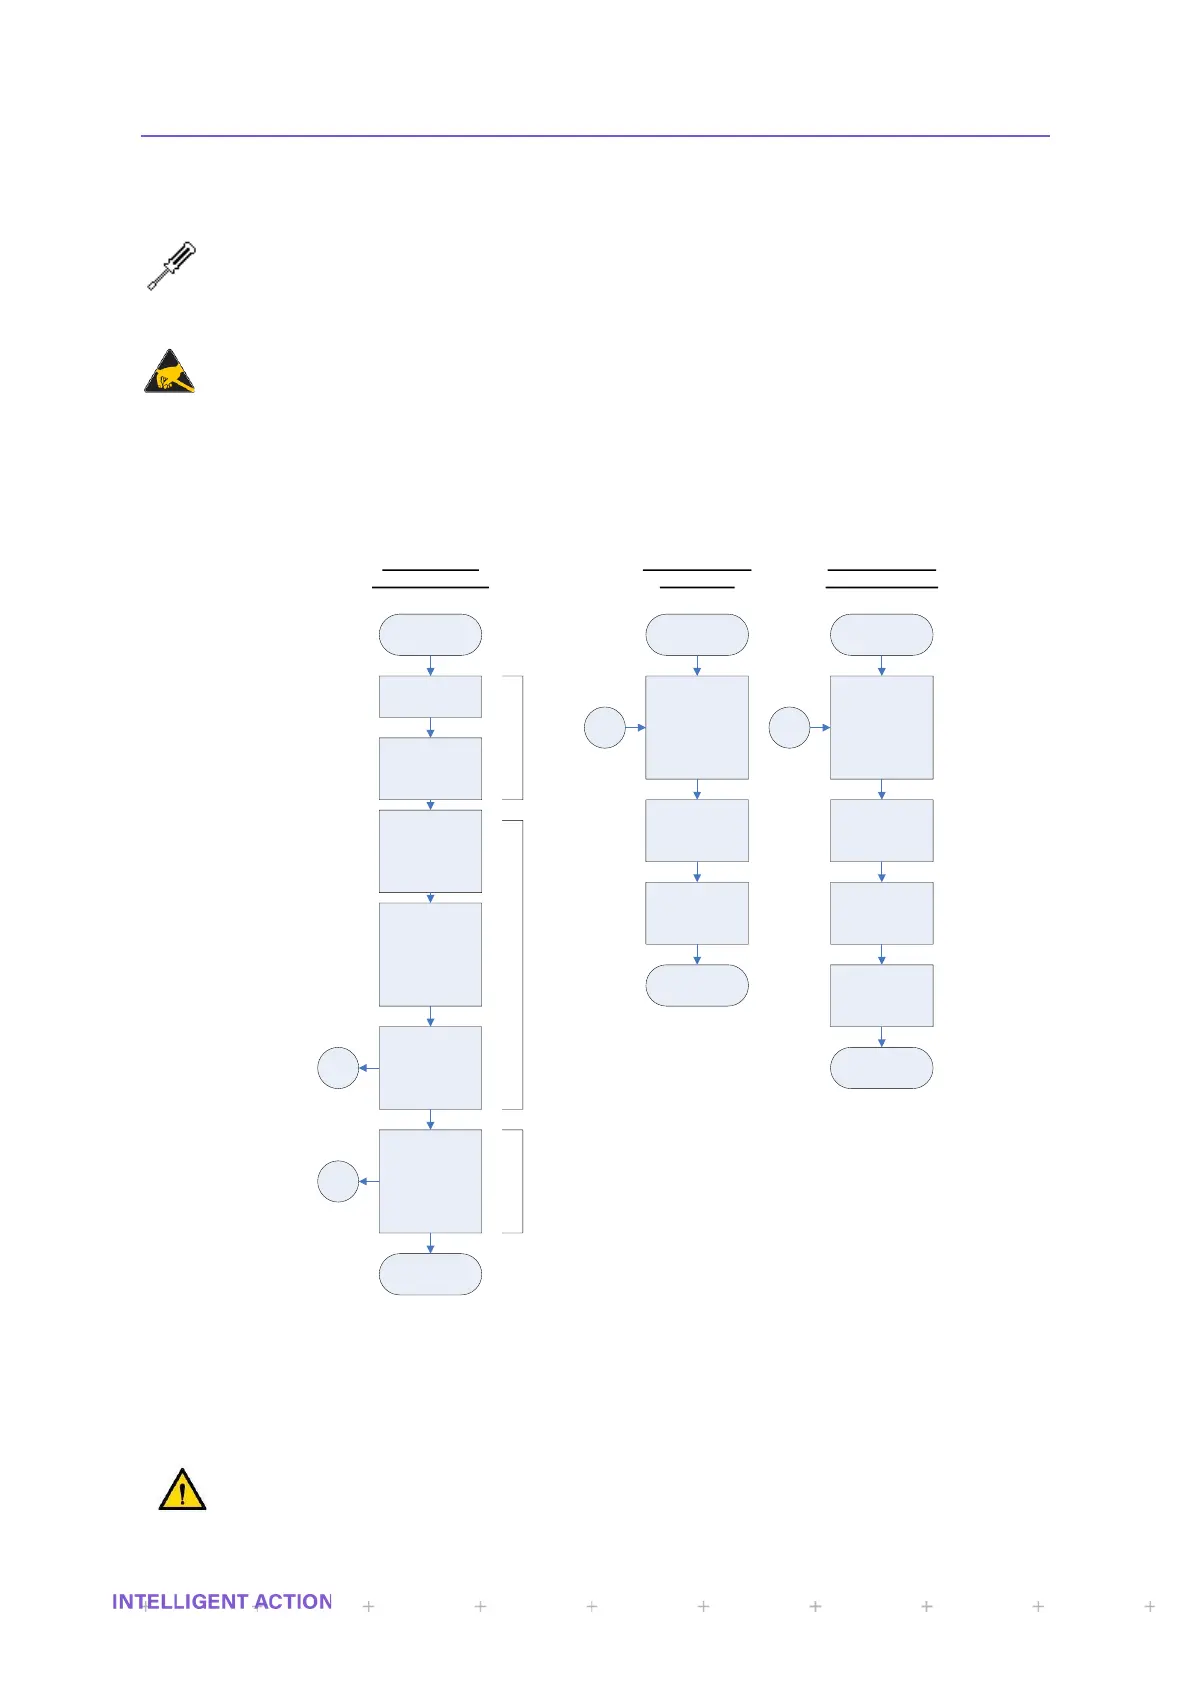
26.1 DISASSEMBLY
The following flowchart provides an overview of dismantling the unit into its component parts, which
maybe required for configuration, service or repair. Only suitably instructed or skilled persons should carry
out this work: -
START
Power down
instrument
Remove
connectors from
rear of instrument
Using 2.5mm
Allen Key, undo
fixing screw from
bottom of front
panel.
Hinge front panel
forward, then lift
panel up to
remove from main
body of the
instrument
Remove external
cables
Removing the front
panel
Disconnect ribbon
cable from front
panel, before
removing front
panel completely
Using a 4mm
Allen Key, undo
the adjustable
latches and
remove the case
from the panel
Removing the main
case
END
START
Remove the 6
fixing screws
holding the
moulding and
metalwork
together
Remove the 4
fixing screws
holding the PCB
into the moulding
The PCB and
keypad can now
be removed
END
START
Remove the six
fixing screws
holding the sheet
metalwork onto
the front of the
extrusion
1
1
2
2
Remove all nuts
and washers from
the CEP on the
instrument rear
F3174 & F3175
may be removed
at this point.
F3172 may be
removed at this
point
END
Removal from
instrument panel
Dismantling the
front panel
Dismantling the
main instrument
Figure 59 - InSpec Disassembly Flowchart
26.2 REASSEMBLY
Reassembly is the reverse of disassembly.
Protective Earth (PE)
Pay particular attention to the reassembly of the CEP when rebuilding the instrument.
 Loading...