- 14 -
Gasket
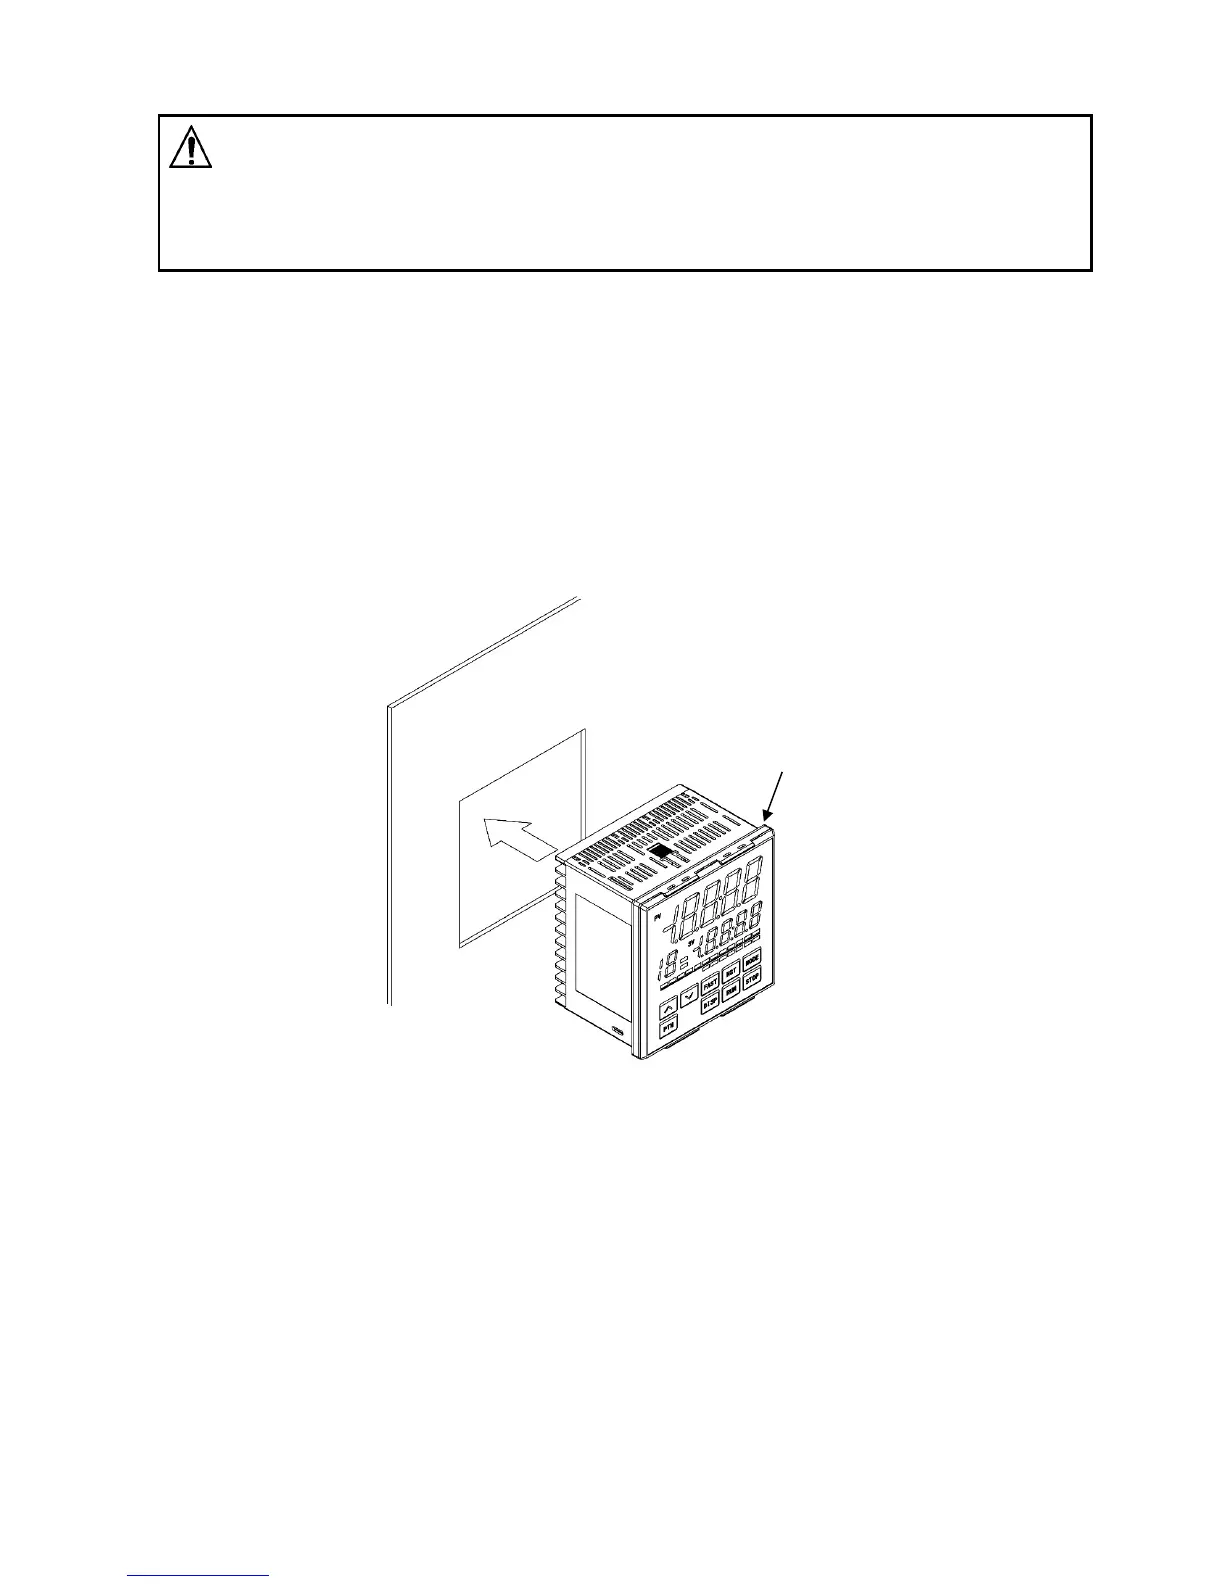
3.4 Mounting to, and Removal from, the Control Panel
Caution
As the case of the PCB1 is made of resin, do not use excessive force while tightening
screws, or the case and mounting brackets could be damaged.
The torque should be 0.1 N•m.
3.4.1 How to Mount the Unit
Mount the controller vertically to the flat, rigid panel to ensure it adheres to the Drip-proof/Dust-proof
specification (IP66).
If the horizontal close mounting is used for the controller, IP66 specification (Drip-proof/Dust-proof) may
be compromised, and all warranties will be invalidated.
Mountable panel thickness: 1 to 7 mm
(1) Insert the controller from the front side of the control panel. (Fig. 3.4.1-1)
If the Drip-proof/Dust-proof specification (IP66) is not necessary, the gasket may be removed.
(Please keep in mind the warranty is void if gasket is removed).
(Fig. 3.4.1-1)