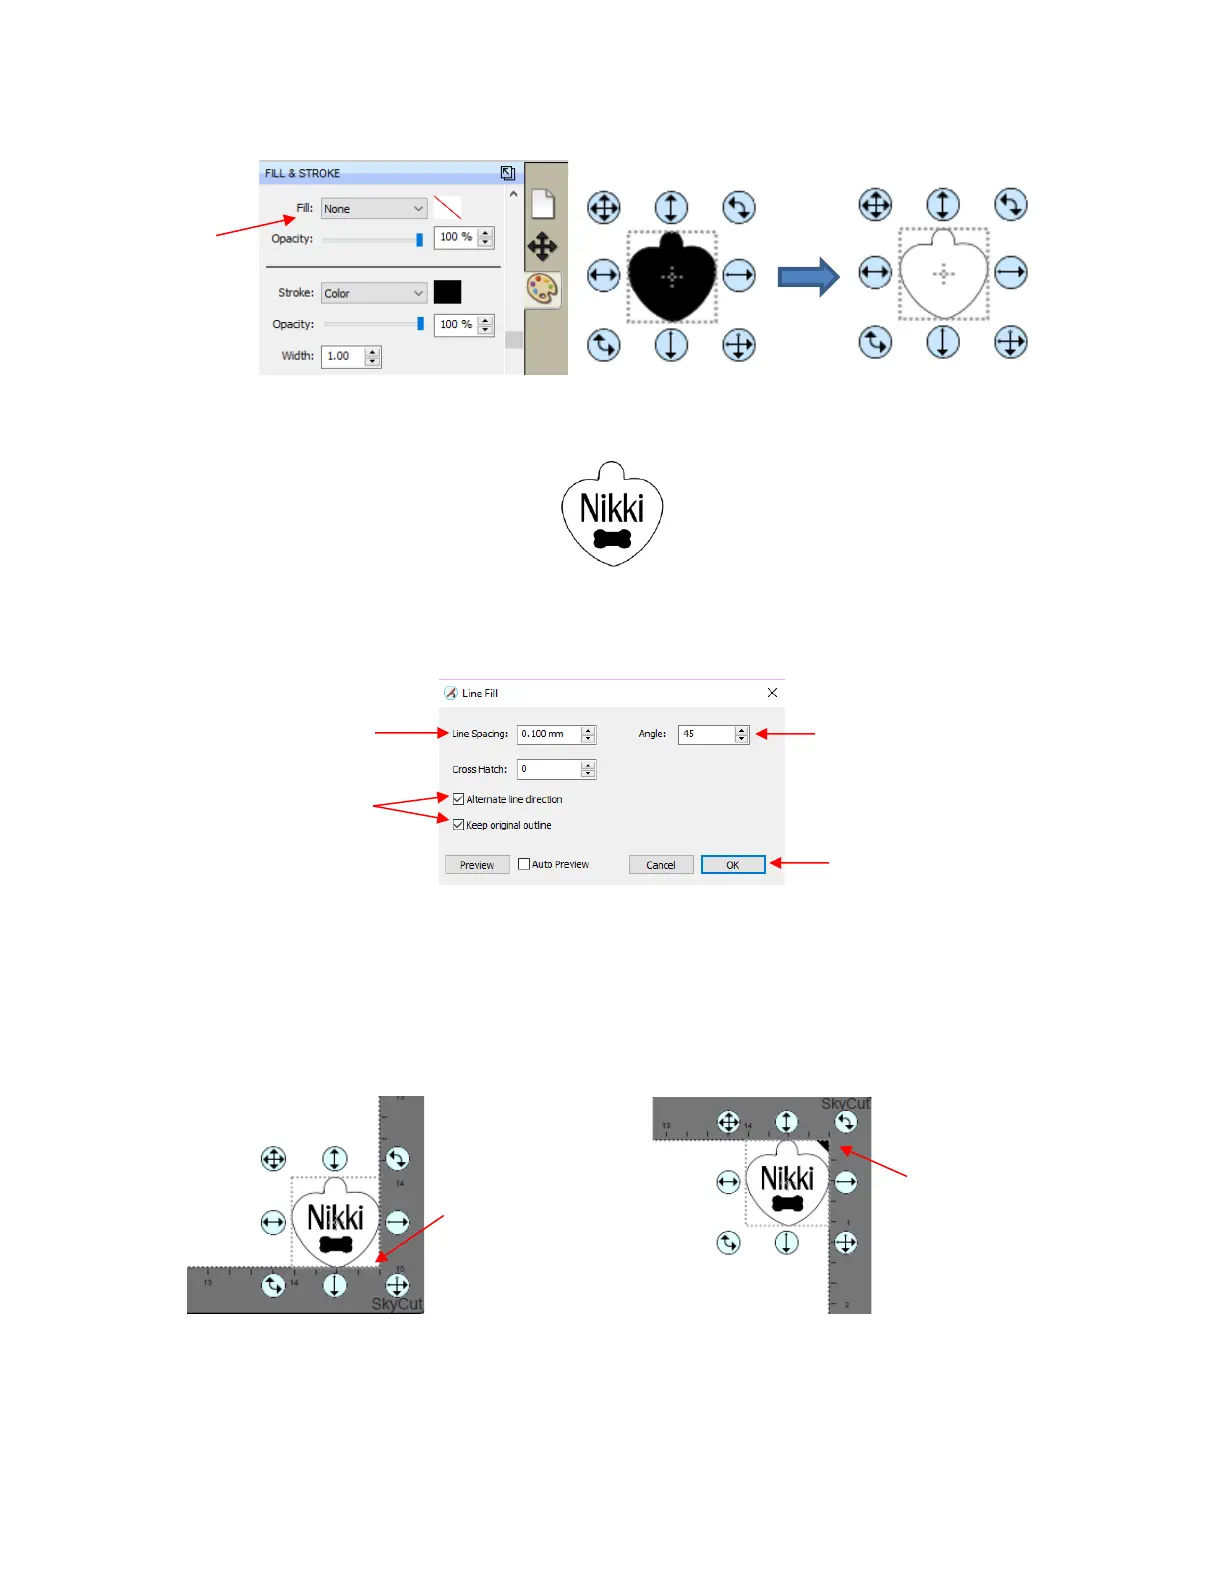
• Create the design. In this case both text and a vector shape of a bone are added:
• Because a filled engraving is desired, select the text and the bone shape and go to Effects>Line Fill. The
following window suggests some settings to use. More information on Line Fill is covered in Section 12.09.
• The next step is to relocate the project to align with the origin:
Note the dimensions of the Cutting Mat in SCAL. In this example, the mat is set at 15” x 15”. The
shapes are going to be moved so that they align with the exact corner of the Cutting Mat. Depending
on whether you are using Portrait orientation or Landscape orientation, you will be moving the shapes
to the following corners:
To be more precise, use the Position and Size Panel to enter specific X and Y locations based on the
corners of the Cutting Mat:
If using mm, enter 0.10, if
using inches, enter 0.004


 To Next Page