2.02.2 Controlling Where Shapes Will Cut
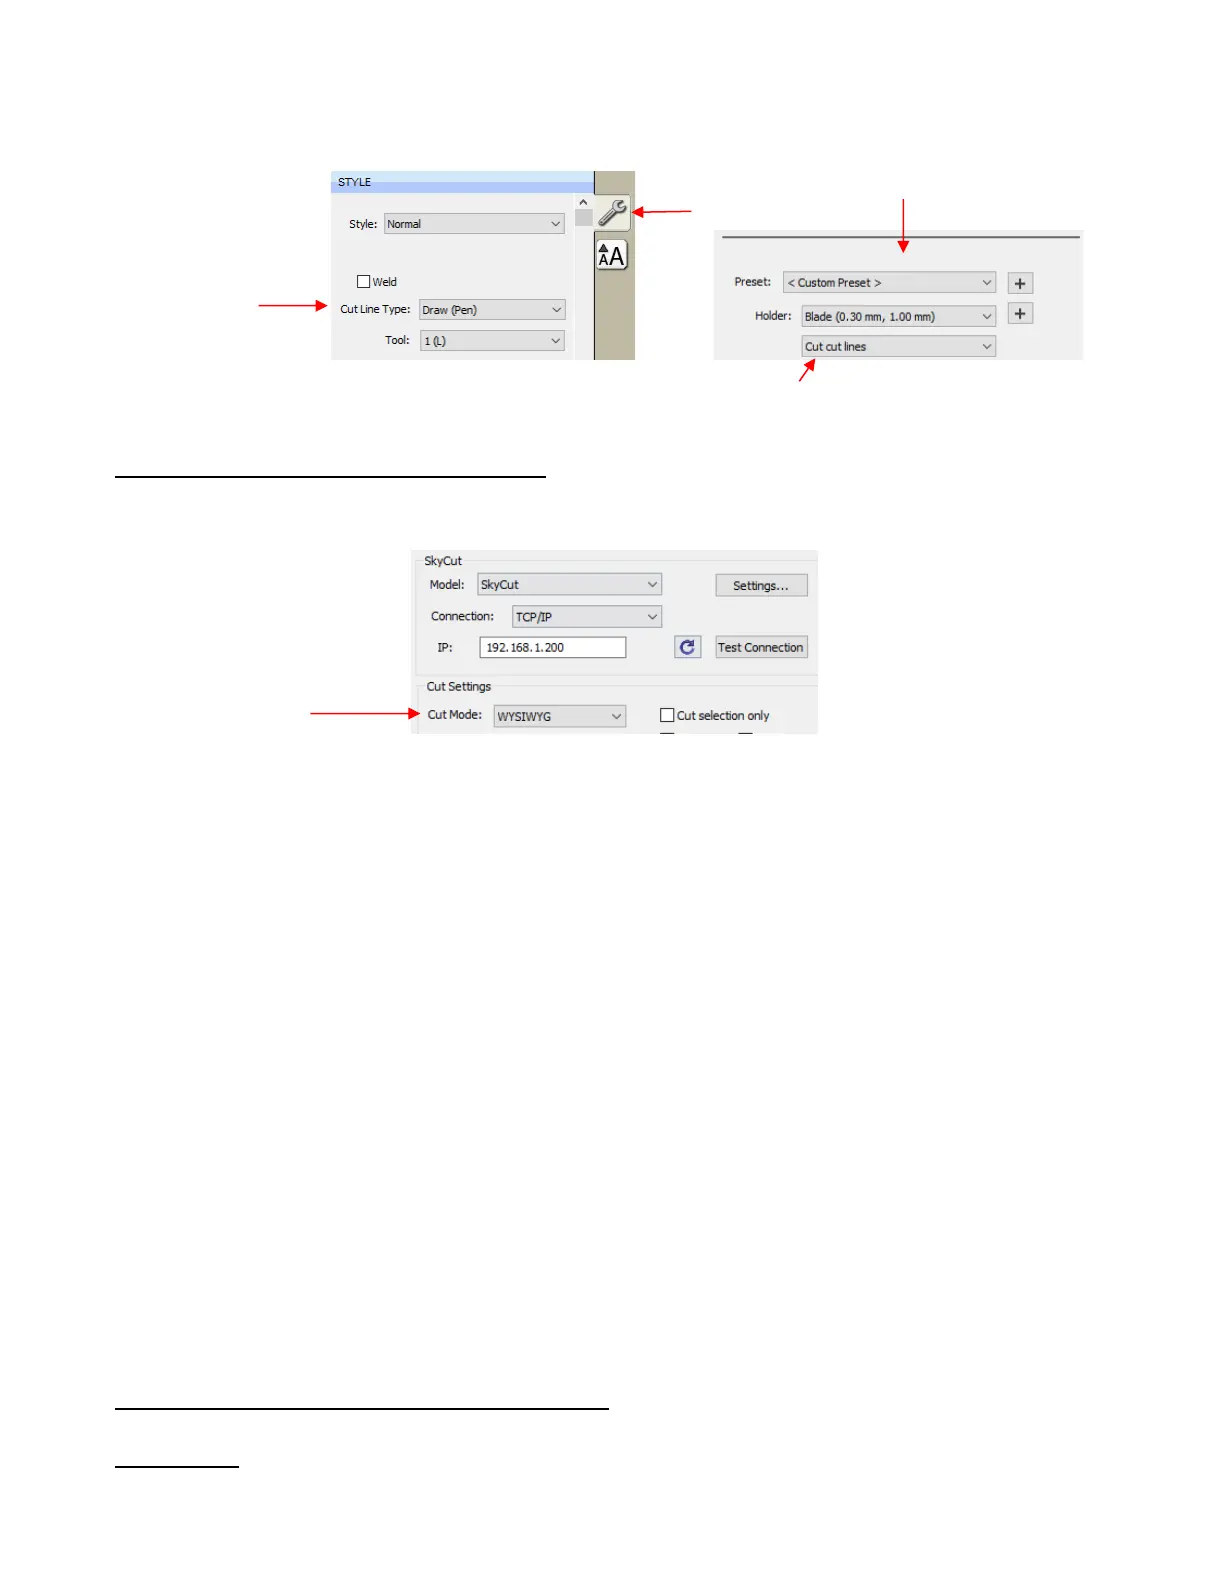
• In the Cut Settings window is a Cut Mode option:
• This was briefly covered in Section 1.13.2. Cut Mode has three choices:
WYSIWYG: Cuts the shapes where they are positioned on the Cutting Mat. For more details, refer to
Section 12.07.3.
Origin Point: Moves the shapes to align with the origin you have set based on the blade tip. Refer to
Section 12.07.2.
Center Point: Moves the shapes to center around the origin you have set based on the blade tip. Refer
to Section 12.07.4.
• A fourth mode is called Print+Cut (aka Print and Cut or PNC):
This is the mode selected when you want to print images on your printer and then have the Skycut cut
them out.
Four registration marks are printed, along with your images, from SCAL to your home or office printer.
The printout is placed on the cutting mat. The camera automatically locates and aligns with each printed
mark. The Skycut will then cut out your shapes based on triangulation. This is far more precise than
WYSIWYG because it takes into account not only any misalignment of your printout on the mat, but also
any errors in the printing. Most printers do not print images precisely in the location on the paper as they
are located on the screen.
Note that raster images (.JPG, .BMP, .PNG etc.) will need to be traced first so that cut lines are created.
Refer to Section 9.03 for tutorials on how to do the tracing
Access to the Print+Cut mode is located in the bottom left corner of the Cut Settings window. Refer to
Chapter 3 for complete instructions on calibrating the camera and examples of PNC applications.
2.02.3 Selecting the Tool to be Used for Cutting
Blade Holder
• When using the blade holder, you will leave the Cut Line Type (on the Style Panel) set to Cut. Also, leave
Tool set to 1 (left), as it is recommended that the blade holder always be installed on the left side:


 To Next Page