4.02.1 Draw and Cut
• A draw-and-cut application involves using the test pen to draw shapes and then using the blade holder to
cut them out. This rest of this section covers the process.
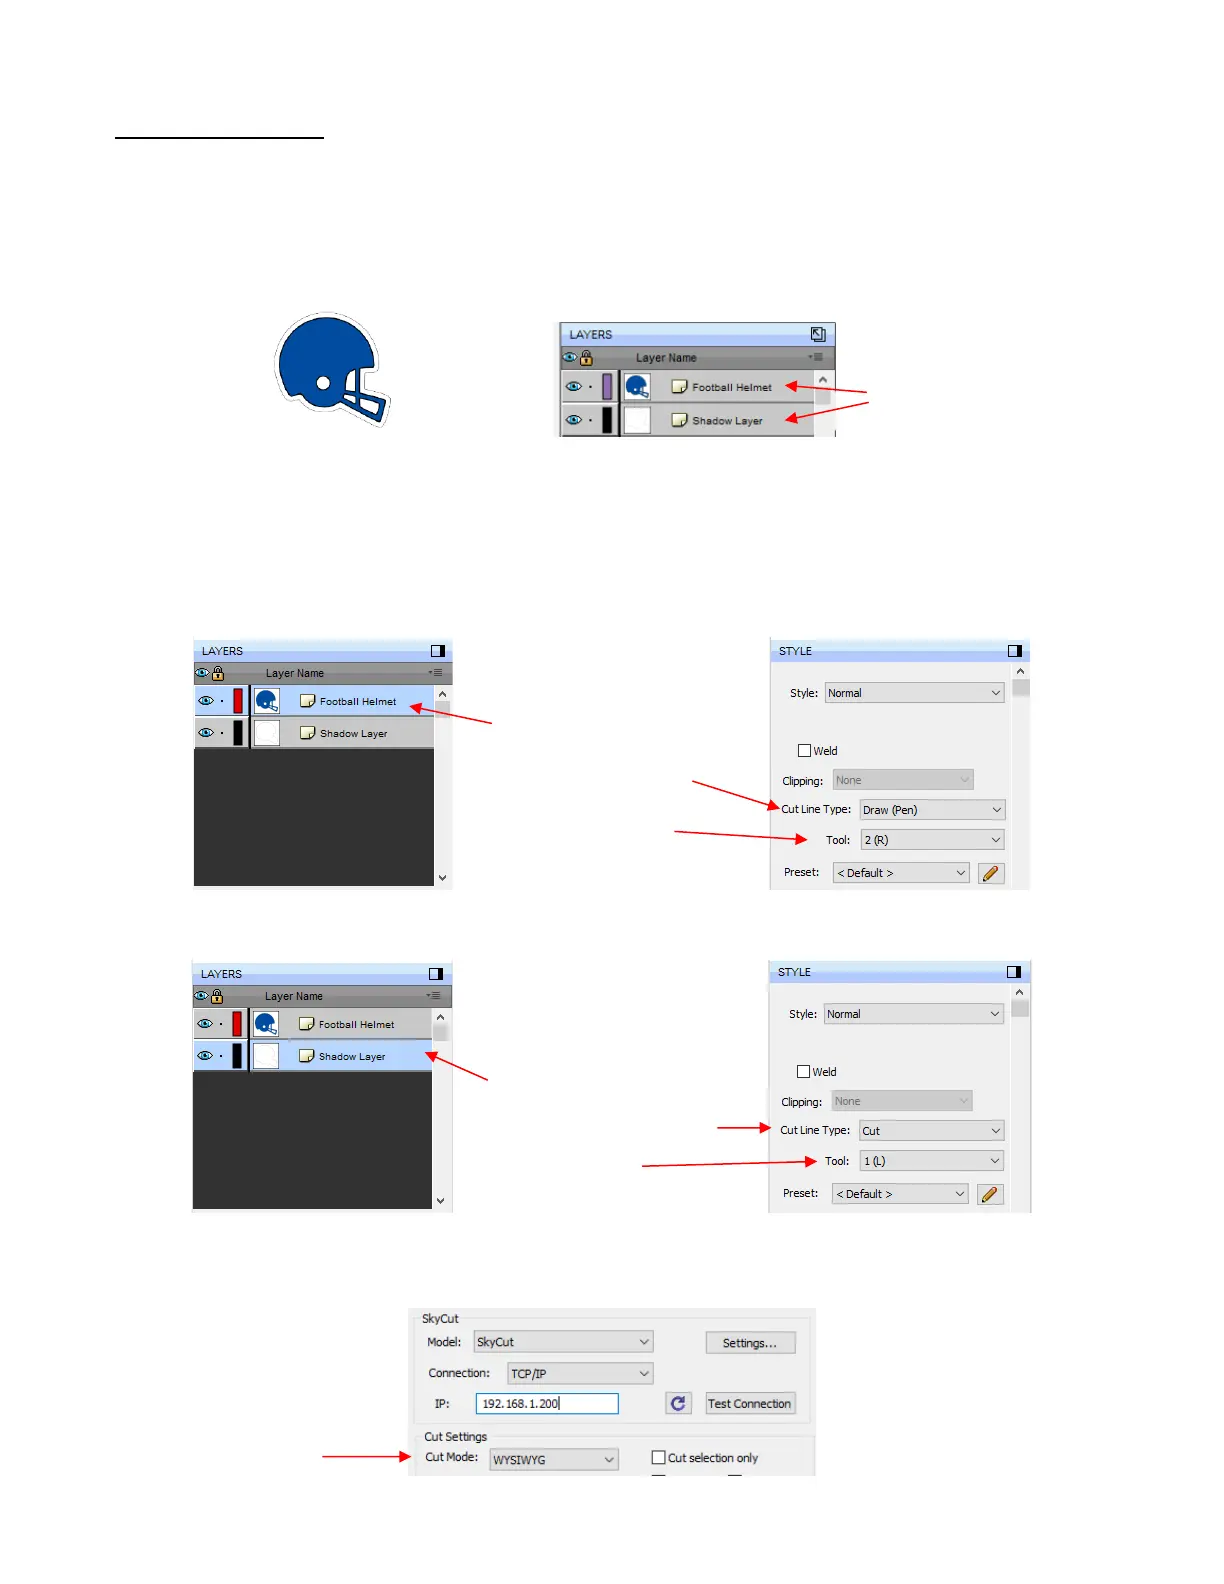
• Create the shape(s) to be drawn along with the shape(s) to be cut. In this case a football helmet will be
drawn followed by having a shadow layer cut around it. Make sure the shape(s) to be drawn are also on a
separate layer from the shape(s) to be cut:
• Move the shape(s) to an appropriate location on the Cutting Mat (usually lower right corner in Portrait
orientation or upper right corner in Landscape orientation). Because this project requires using WYSIWYG
mode, the location for drawing and cutting directly corresponds to where shapes are positioned on the
Cutting Mat.
• Select the layer to be drawn (Football Helmet) and, on the Style Panel, set the Cut Line Type to Draw
(Pen) and change the Tool setting to 2(R) because the pen will be mounted on the right blade holder seat:
• Select the layer to be cut (Shadow Layer) and, on the Style Panel, verify that the Cut Line Type is still set
to Cut and Tool is still set to 1 (L):
• Open the Cut Settings window and set the Cut Mode to WYSIWYG. This is very important to ensure the
draw layer ends up aligned with the cut layer.


 To Next Page