2.02.4 Determining the Cut Settings
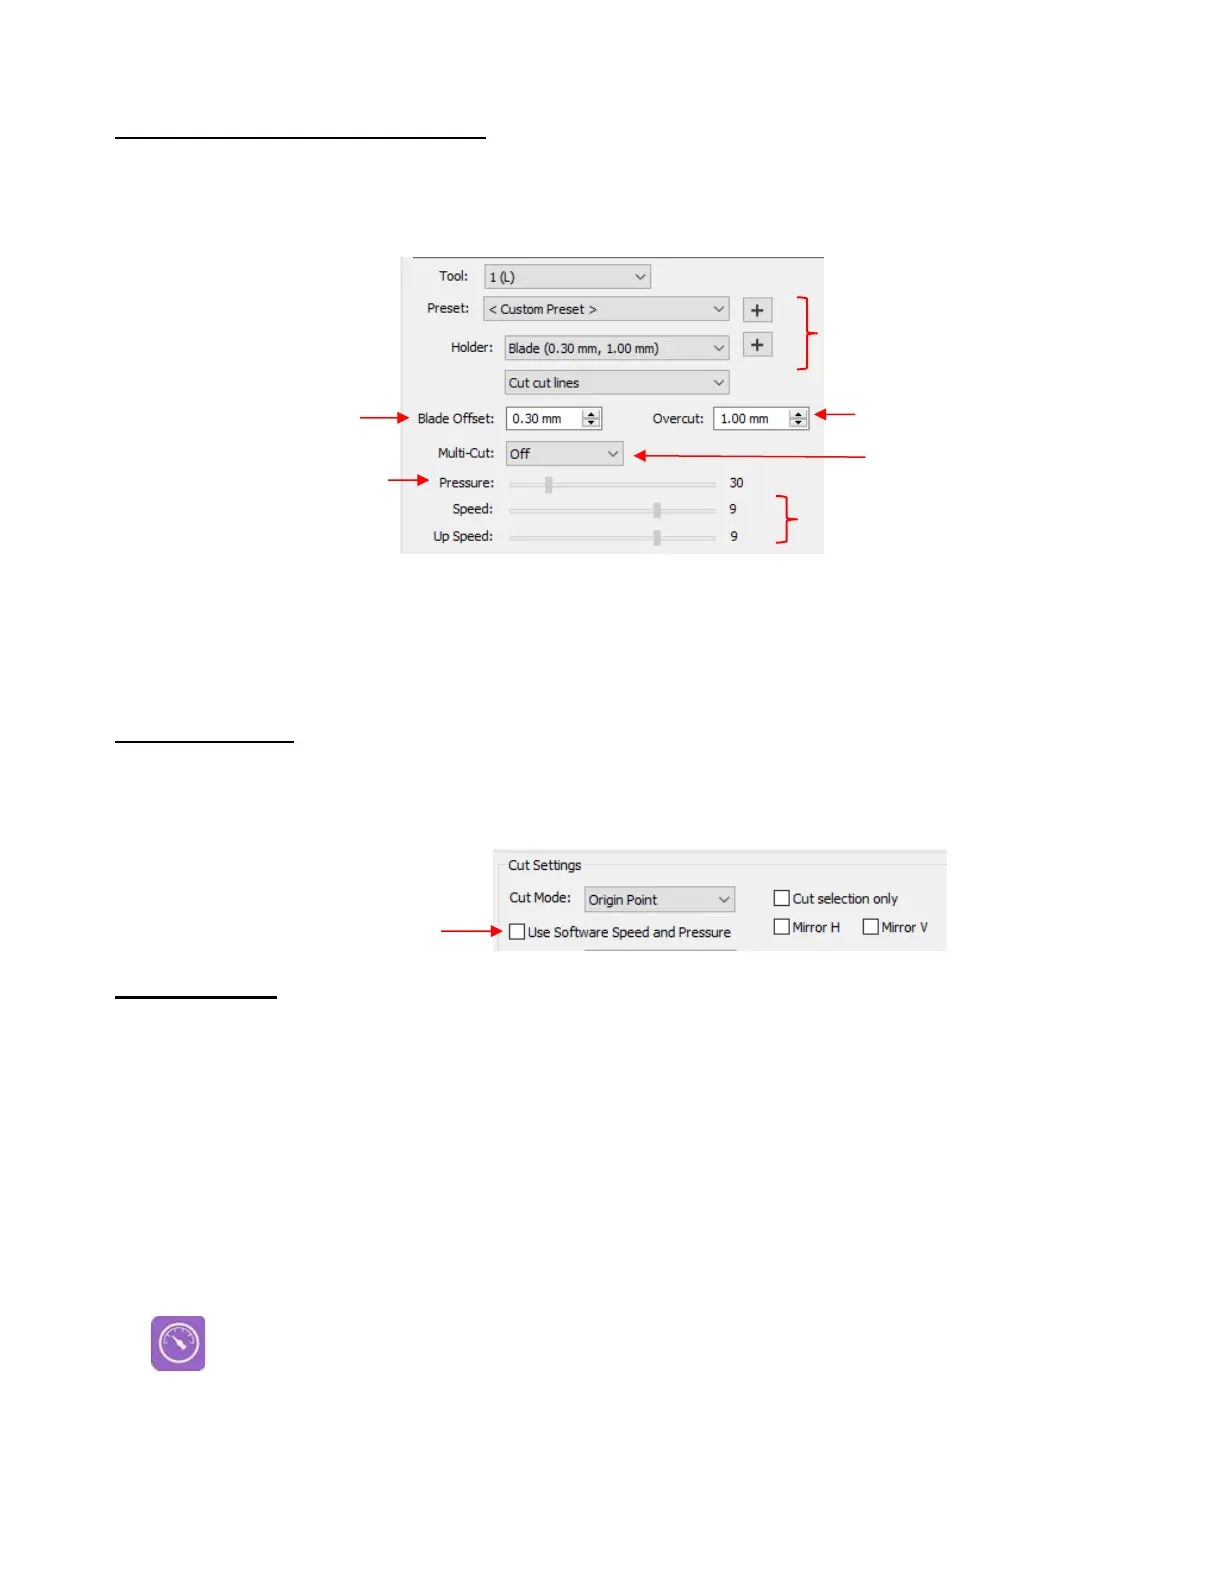
• In the lower half of the Cut Settings window, there are a number of settings which should be understood
thoroughly, as you will be checking these settings before every cut. The following screenshot shows the
section number to go to for more information:
• Reminder: Use the flow chart in Section 2.09 while test cutting your material to determine optimum settings.
Then record these settings for future reference. You can also set up Presets which are covered in Section
2.04.
2.03 Cut Settings
• Before presenting the various settings, note that the Pressure/Force and Speed settings can be set on the
control panel itself. In order to cut from SCAL and use the settings on the Skycut, uncheck this box in the
upper half of the Cut Settings window:
2.03.1 Pressure
• The cutting Pressure (also called Force) ranges from 1 to 160 where the maximum of 160 represents
~2000g of cutting force. If it is set too low, the material cannot be cut. If it is set too high, you will get bad
cutting (even incomplete cutting at times) and tearing of the material. Always perform small test cuts before
cutting your actual project and make adjustments in order to get a clean test cut before proceeding with your
larger cut..
• Dull blades will need more force than new blades, thus anticipate increasing the force over the life of the
blade.
• When cutting materials that can use either blade, the 45
o
blade (red cap) will need a little more force than
the 60
o
blade (blue cap), because of the extra contact with the material being cut and because the 60
o
blade
is cut much thinner, making it a “sliver blade.”
• As noted earlier, this setting can be made on the Skycut control panel instead. Press the Force/Speed icon
and then set the FORCE to the desired level.


 To Next Page