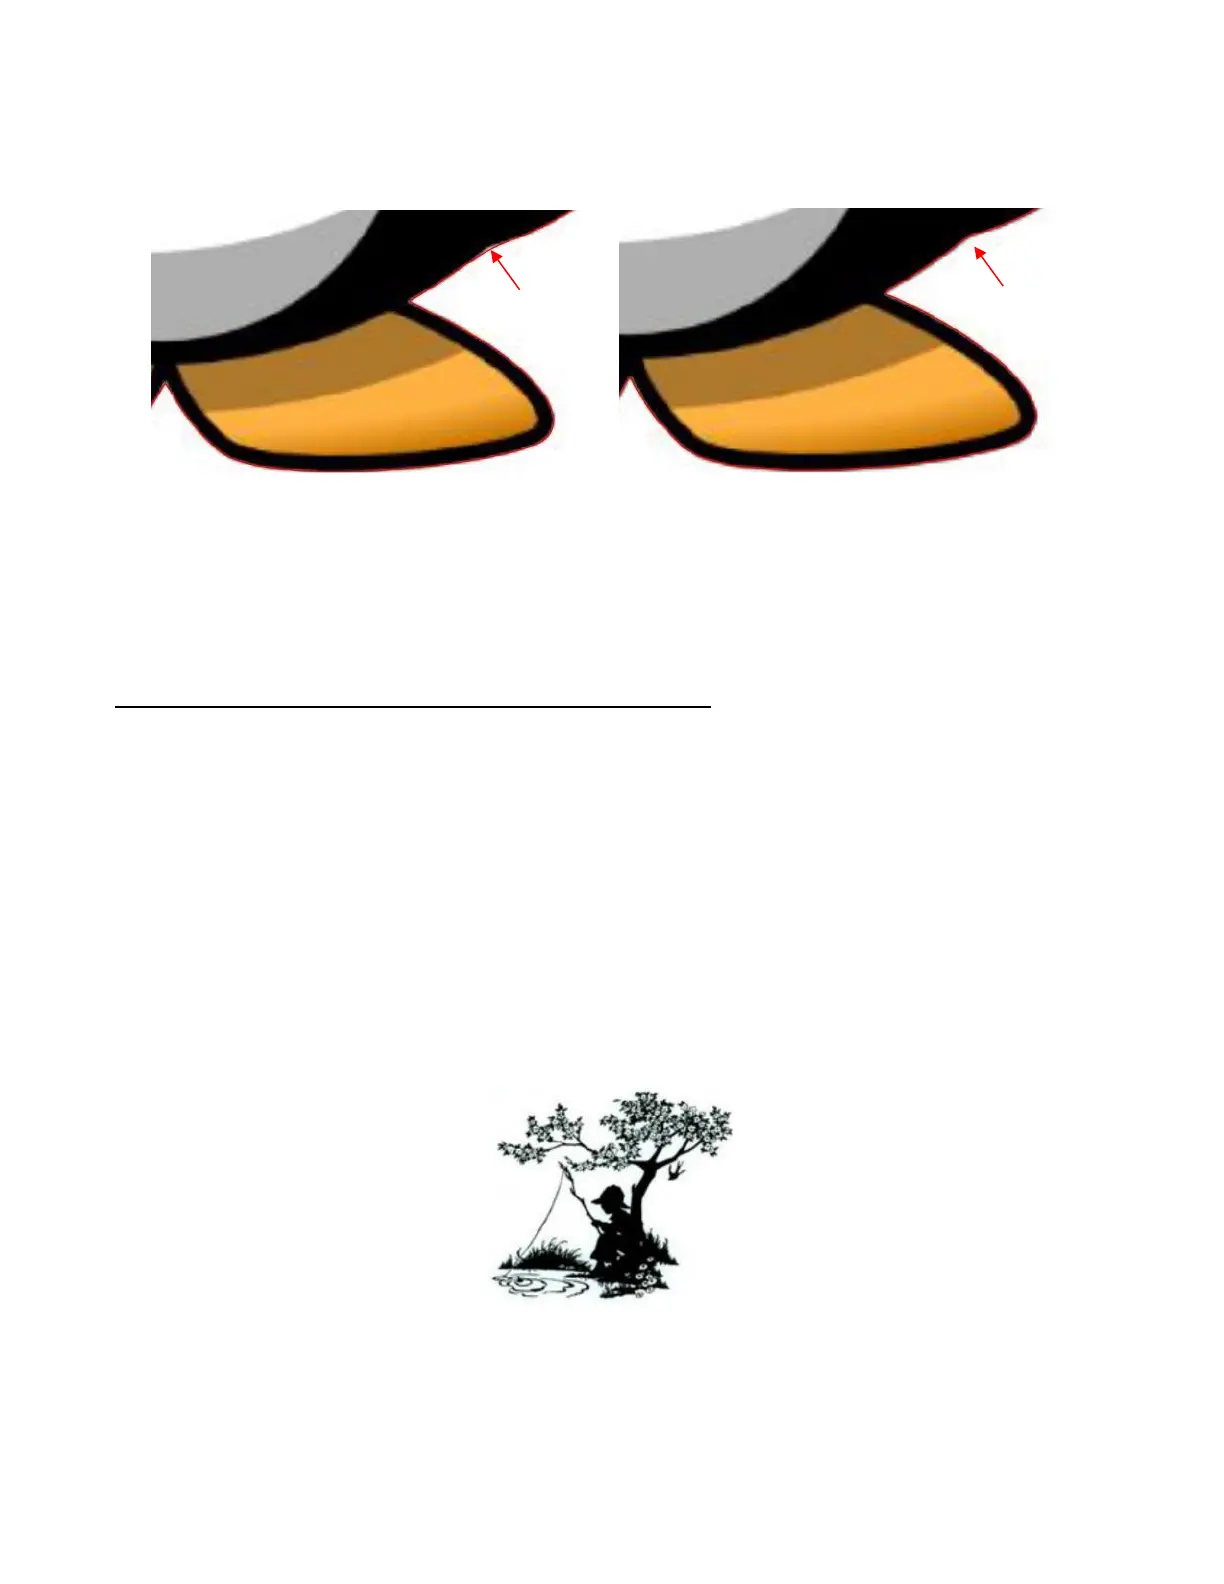
• If you compare the Preview in both cases, there doesn’t appear to be a difference in the trace. However, if
you select the Print + Cut Cut layer on the Layer Panel and change the Stroke to a bright color and then
zoom in closely, you can clearly see places where the x 2.0 Resample resulted in a tighter fit:
• In Section 9.03.3, it was shown how the Smooth setting affects the trace line. This setting can also be
tested on PNC tracings as a way of getting a better fit, by decreasing the value. Alternatively, you can
also create an Inset after the trace, if needed, to create a path that will cut just inside the image. Refer
to the Inset Offset option in Section 10.05.
9.03.8 Resample Versus Smooth and the High Pass Filter
• In many respects, the Resample setting appears to have the same effect as the Smooth setting. However,
the Resample is applied to the imported raster image ahead of tracing, while the Smooth setting is applied
to the actual trace lines.
• While there is no definite way of knowing which setting to use in any given tracing, keep in mind the
following:
The purpose of Resample is to help the tracing algorithm “see” more pixels and provide a tighter, more
precise trace.
The purpose of the Smooth setting is to make the trace less angular or more angular. Thus, the
Smooth setting would probably be set high when tracing something like a stuffed toy but set very low
when tracing something like a box pattern with lots of right angles.
• In general, you’ll just need to test them to see which one is better or if applying both is the best option.
• In the example below, it will be shown that Resample improves the accuracy of the trace over Smooth.
Using a Resample of x 1.0 and other settings set (which will again be used when Smooth is tested),
the trace results in the following. Since an important focal point would be on the boy’s face and hat, note
that the resulting trace isn’t as sharp as one might want:


 To Next Page