(17) Click on Scan and the Skycut’s camera will now move over each registration mark and take a photo and
make an adjustment. Once it has read all four marks plus the first one a second time, it will proceed to cut
out the printed shapes. That’s the process!
3.05 Additional Information on Print and Cut Applications
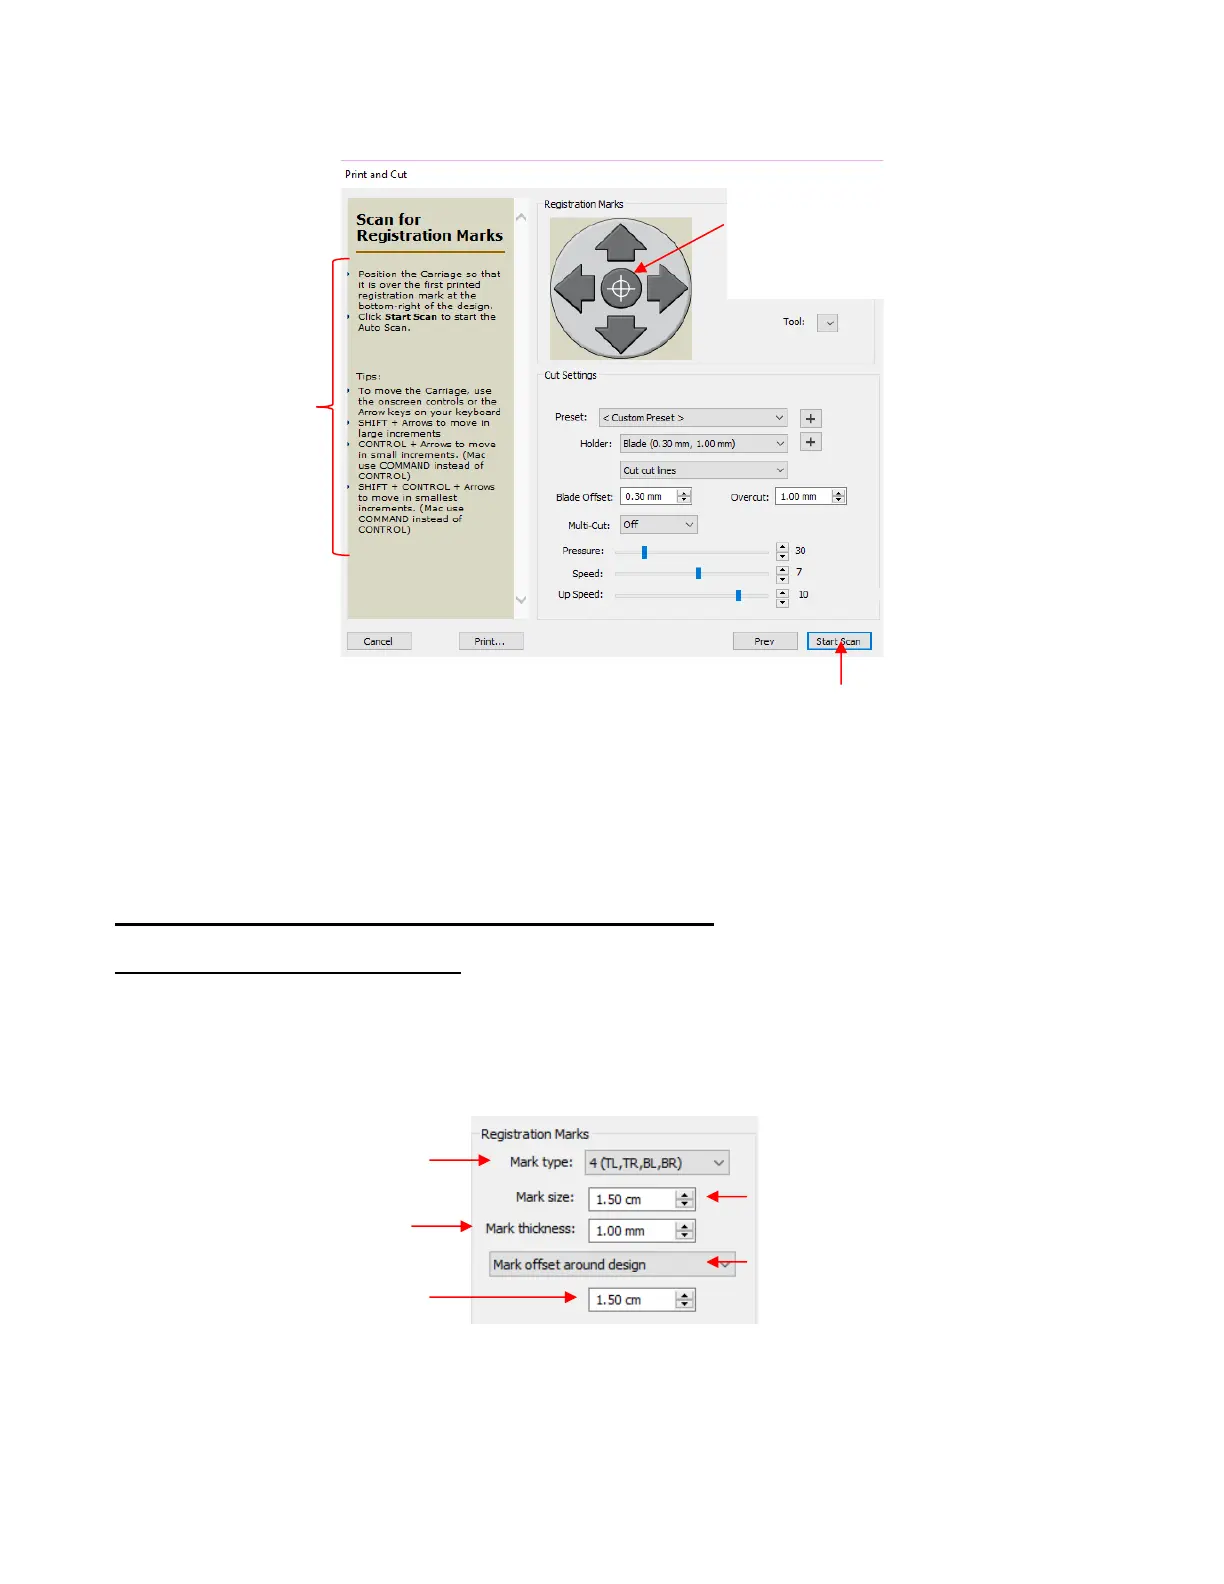
3.05.1 Registration Mark Settings
• You have some control over the size and location of the registration marks. Under Cutter>Cutter Settings,
the upper right section of that window shows the default settings for creating registration marks:
Mark type: The Skycut’s camera uses four marks, thus this option will always remain the same.
Mark size: The default size of 1.50 cm is advisable if the material is angled a bit with respect to the
cutter or if the material isn’t flat. Using a shorter size of, say, 0.5 cm will result in a quicker scan and may
be needed if the printed images are too close to the reg marks or have L shaped corners.
Mark thickness: Testing has shown that the lower limit is about 0.75 mm. Thinner than that and the
camera will fail to see the mark.
Note how this middle button now has a
target. Use this as a reminder that you
can now move the blade holder position
using these arrows buttons or the arrow
keys on your keyboard.

 Loading...
