Large scale printing: Some printing services offer the ability to print a file of repeats such that the offset
between the repeats is set to 0. Thus, the printout would resemble those in the prior screenshots in this
section. Performing a Print to PDF is probably the approach to use. However, contacting the printing
service would be the best first step and always plan to do a full start-to-finish test first before printing a
large number of sheets.
Small scale printing: If you want to use the Array Mark feature for repeats in a project that is small
enough to be printed on your own printer, refer to following tutorial: Adding and Using Intermediate
Registration Marks in SCAL.
3.07.3 Mark Set Options
• The Mark Set window has the following two applications:
Select a specific range of images to cut versus the entire project file.
While the cutting is underway, if you observe that the accuracy is off, you can immediately pause the
cutter and tweak the calibration for just that particular cut.
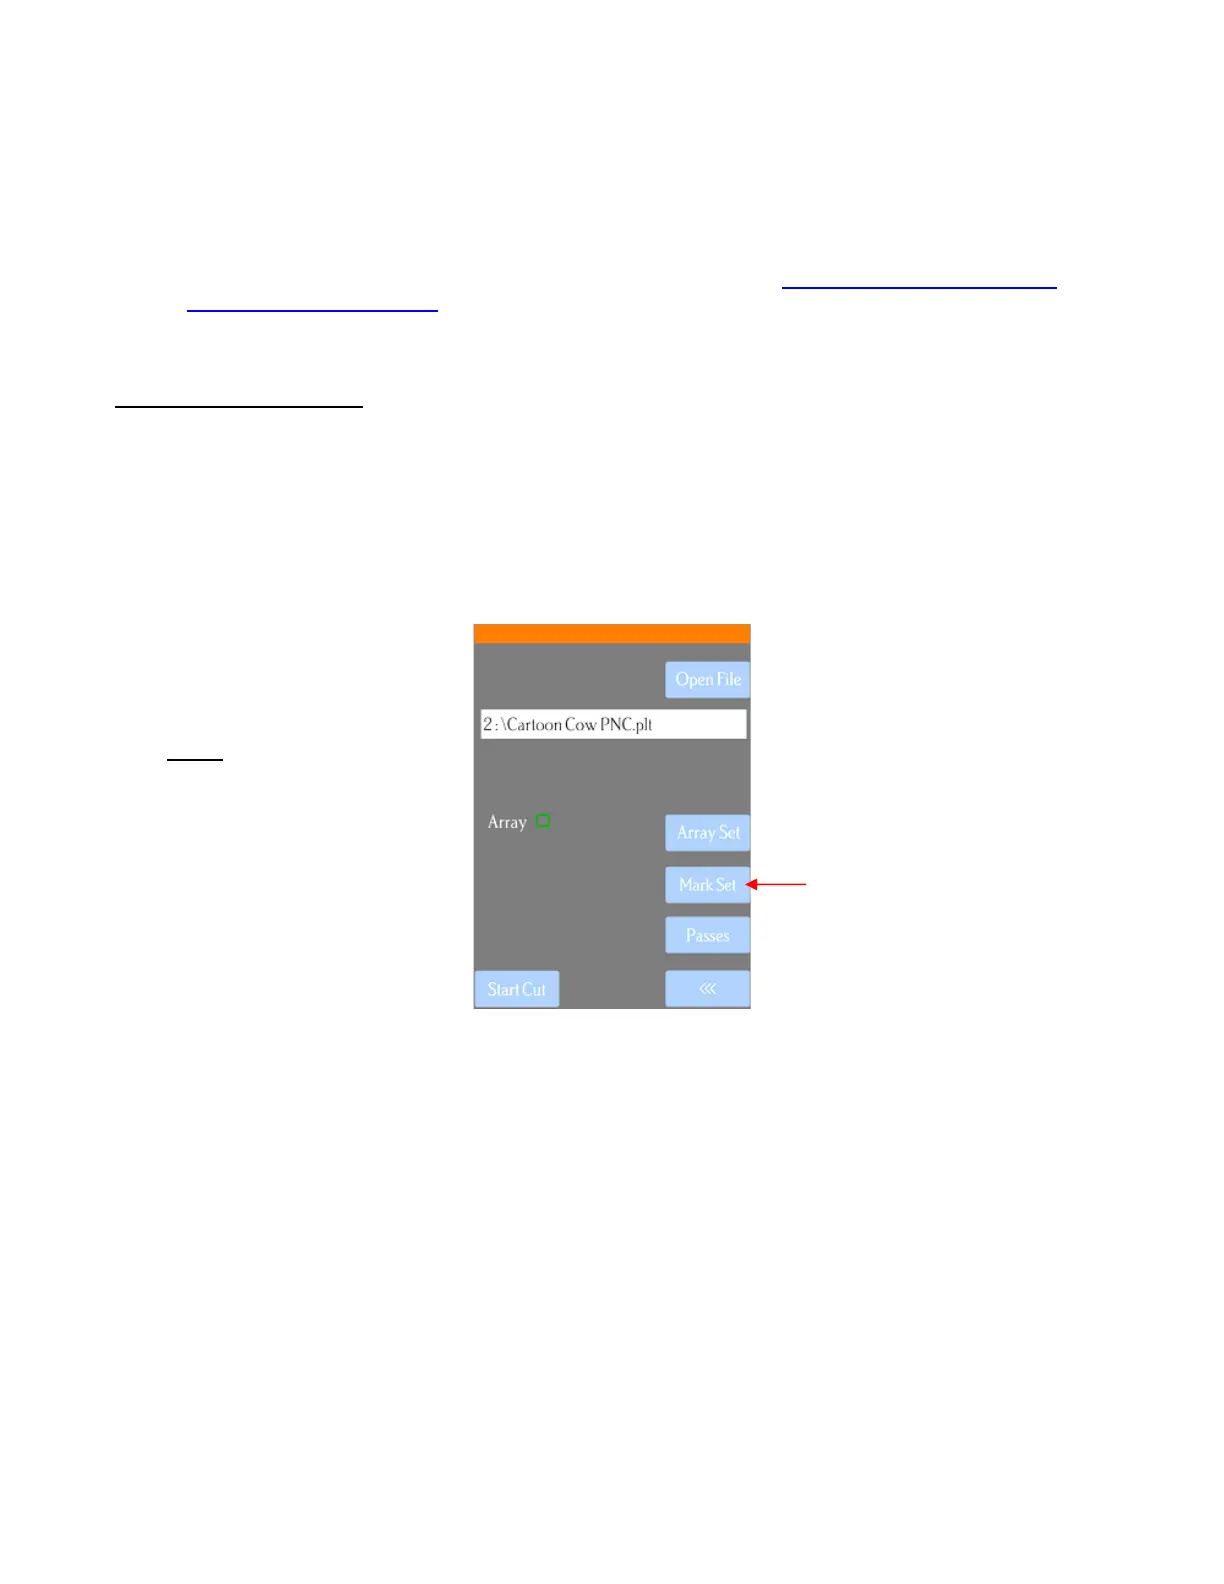
• To open the Mark Set window, press Mark Set on the USB screen:
• To select a specific range of images, note the following:
The first set to cut is referred to as M0 and then subsequent sets are M1, M3, M3, etc.
In the Mark Set window, select Custom and then enter the start and ending sets. For example, if you
want to start with the second set and end with the seventh, you would change to M2 and M7:
NOTE: If your screen does not
have Mark Set displayed, please
go to Appendix E for activation
instructions.


 To Next Page