(7) In the design software, import the PDF file. Make sure the imported cut lines are properly aligned with
the shapes to be printed so that the registration marks will print in the correct location. This is where
having the document sizes match should allow for easy placement. But you may want to do a complete
test print and cut on copy paper before printing on expensive materials.
(8) Before printing the design, make sure the registration marks show but the cut lines do not. Change layer
position or delete cut lines shapes, as needed. In some cases, it might be best to go back to SCAL,
change the Fill to white and the Stroke to None so that the images will be properly hidden from printing.
(9) Print the design. Then place the printout onto your cutting mat and proceed, from SCAL with the cutting
process under Print+Cut. Remember that it’s very important to maintain alignment so do not alter the
shapes to be cut or the Mark Offset setting under Cutter>Cutter Settings.
3.07 PNC from USB Flash Drive
3.07.1 PNC from Flash Drive – Single Cut
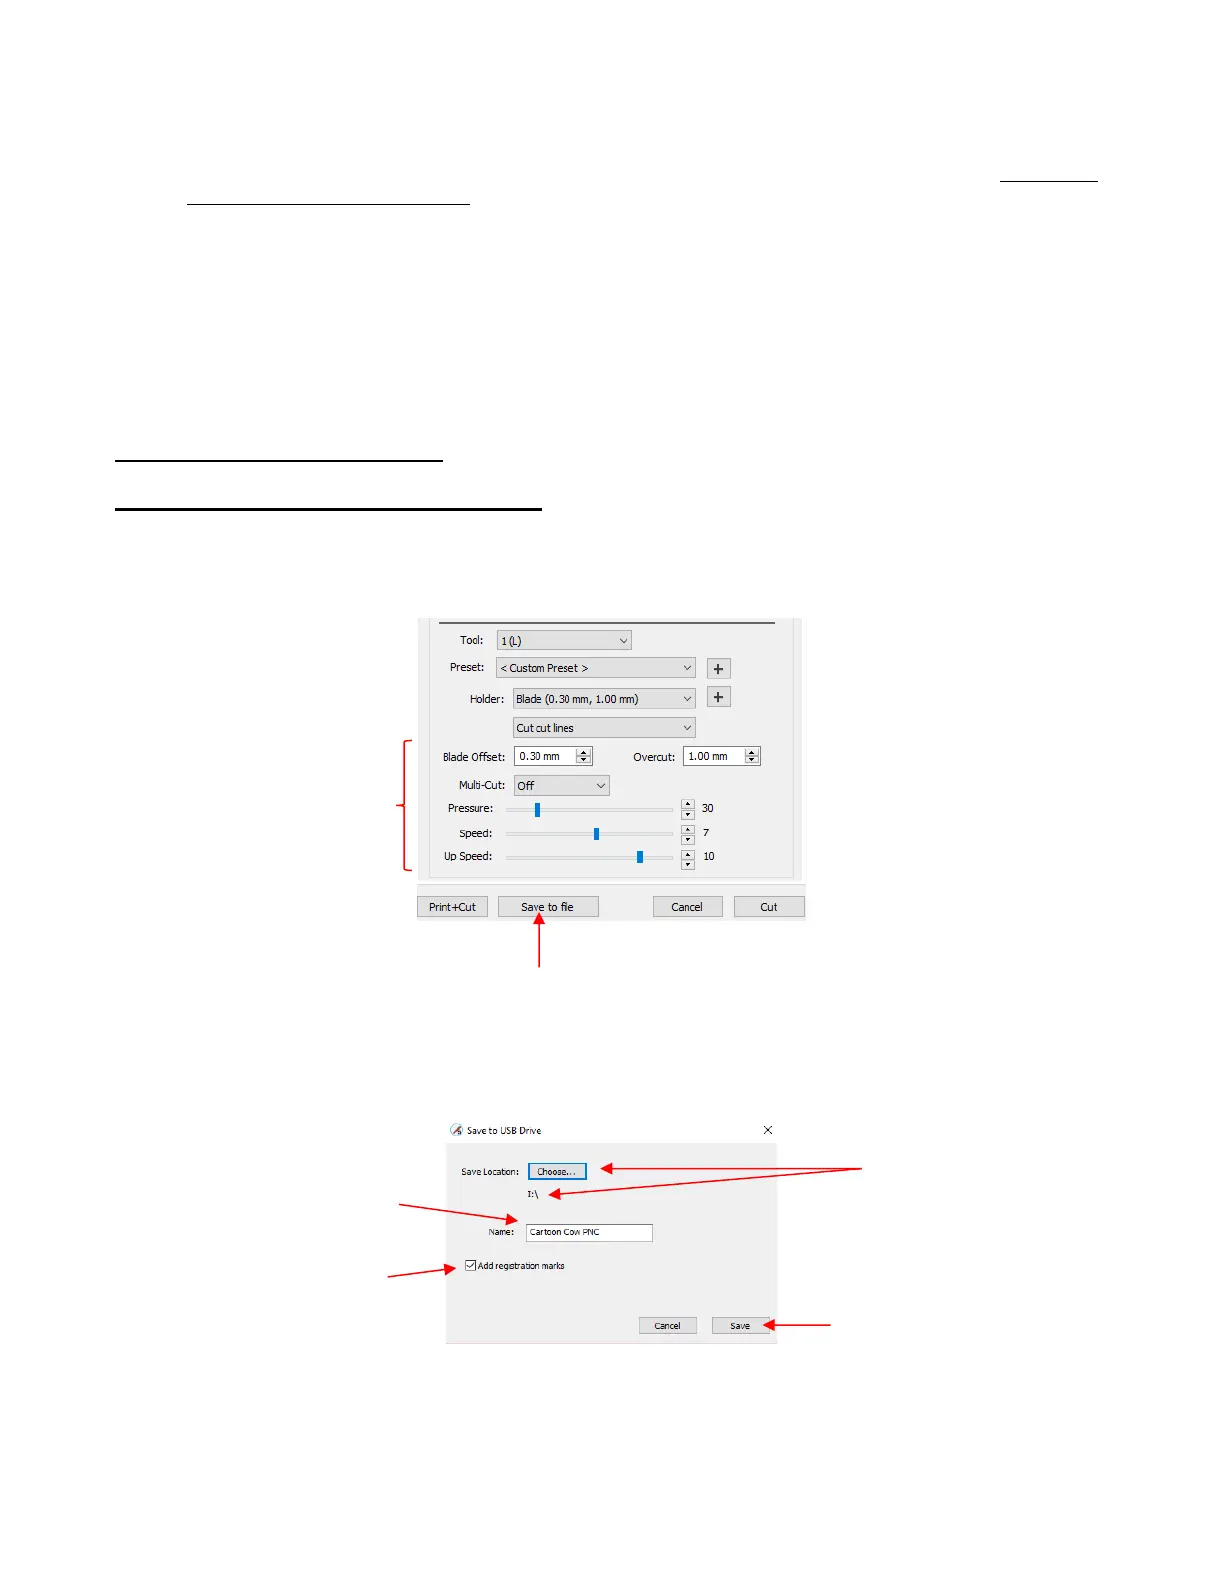
• To perform a print and cut project from the control panel, first perform Steps (1) – (13) from Section 3.04.2.
• Next, instead of clicking on the Print+Cut button, select Save to File instead:
• A window will open and you can name your file, select the location, and indicate the file has registration
marks:
• On the control panel, a few settings should be checked:
• Go to Set>Camera. With Align selected, press Set and the following window will open:


 To Next Page