Drawing Bézier Curves
• Drawing curves is a bit more difficult. The key is to take it one step at a time, practice the technique a lot,
and remember that you can later correct your curves using the Shape Tool (refer to Section 10.10).
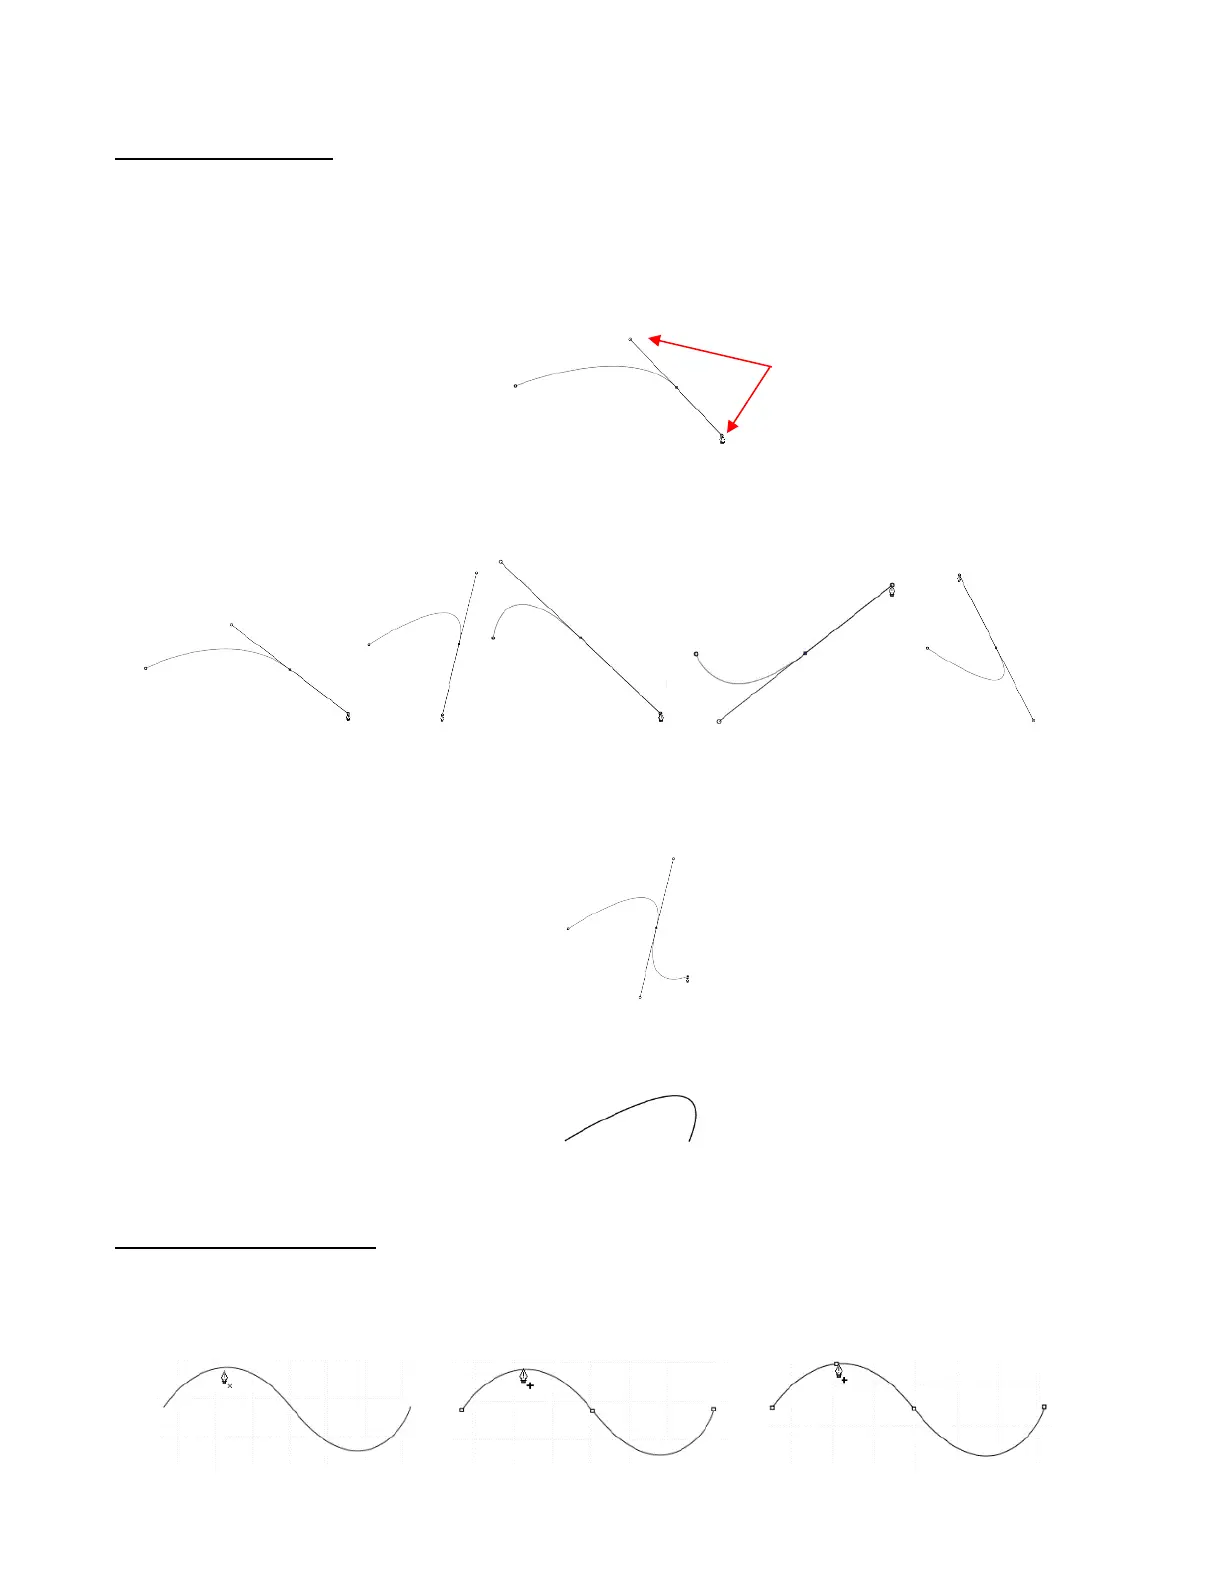
• To draw a curve, use your mouse to left-click once where you want to begin the curve. Then, instead of left-
clicking, hold the left mouse button down and begin dragging the mouse. Continue holding the left button
and notice a second line appears with two circles at either end. These are called Bézier control points:
• As you drag the mouse, you’ll see that you have full control over how long this line will be, as well as where
the control points are positioned. Remember to just keep pressing the left mouse button. Experiment with
longer and shorter control lines, as well as rotating the line to bend the curve in a range of different ways:
• When you are satisfied with the curve, you have two choices at this point:
Release the left mouse button, move the mouse to a new spot, left-click, and you’ll begin creating a new
curve connected to the prior curve:
Release the left mouse button and press the Esc key or press the Enter key to stop the drawing
process:
Adding and Deleting Nodes
• Zoom in on the curve, select it, and then click on the Draw Tool icon.
• To add a node, move the cursor next to the path and watch for the cursor to change. With the cursor right
on the path, left-click to add a node:



 To Next Page