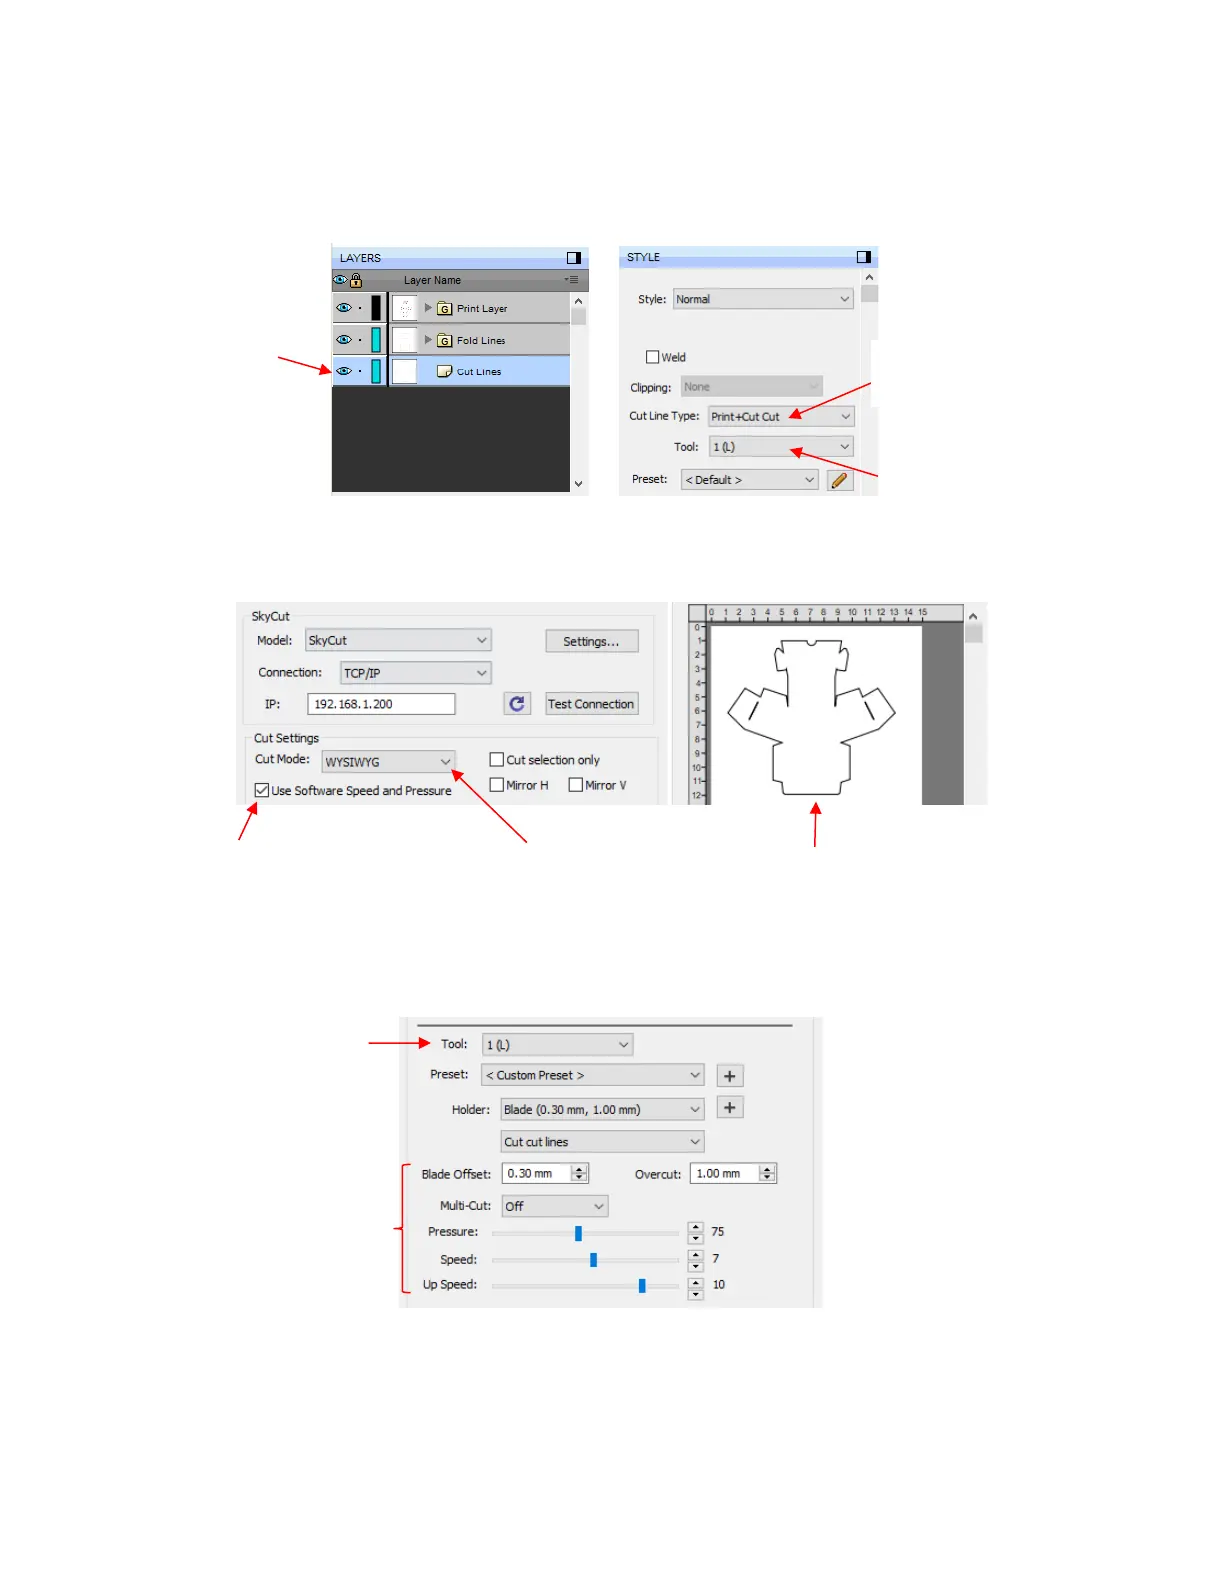
o Note that if you choose Draw (Pen) instead of Print+Cut Cut for this layer, you then need to set the
Stroke to None or White so that the score lines will not show up on the print out (which is typically
what one would prefer).
Cut Lines
• With the layers properly assigned, the project can now be sent to the Cut Settings window. Make sure
WYSIWYG is selected and the cut lines appear in the Preview window:
• Decide if you want to use the Software Speed and Pressure (as indicated above) or assign it on the
Skycut’s control panel. Remember that if you plan to use a different number of passes for left and right
sides, then you must use the control panel instead. Otherwise, if setting within SCAL, mark the box and
enter appropriate cut settings for cutting the printout material:
• Repeat for the right side, keeping in mind that for the lines to show up, you’ll need to change to Draw
draw+cut lines because the score layer was set to Print + Cut Cut:


 To Next Page