84
Operating the Solar-Log 500 and 1000 via the Display
5.6 Using Data Transfer with USB
If your Solar-Log 1000 is not connected to a local area network (LAN), you can use a USB stick to transfer
data, event logs and settings.
The USB connection is located at the top of the Solar-Log 1000 underneath the cover. You also need a
USB stick with the FAT32 format (USB 2.0).
•
Remove the cover from the top of the case by pulling it forward and plug the USB stick in the port
labeled USB.
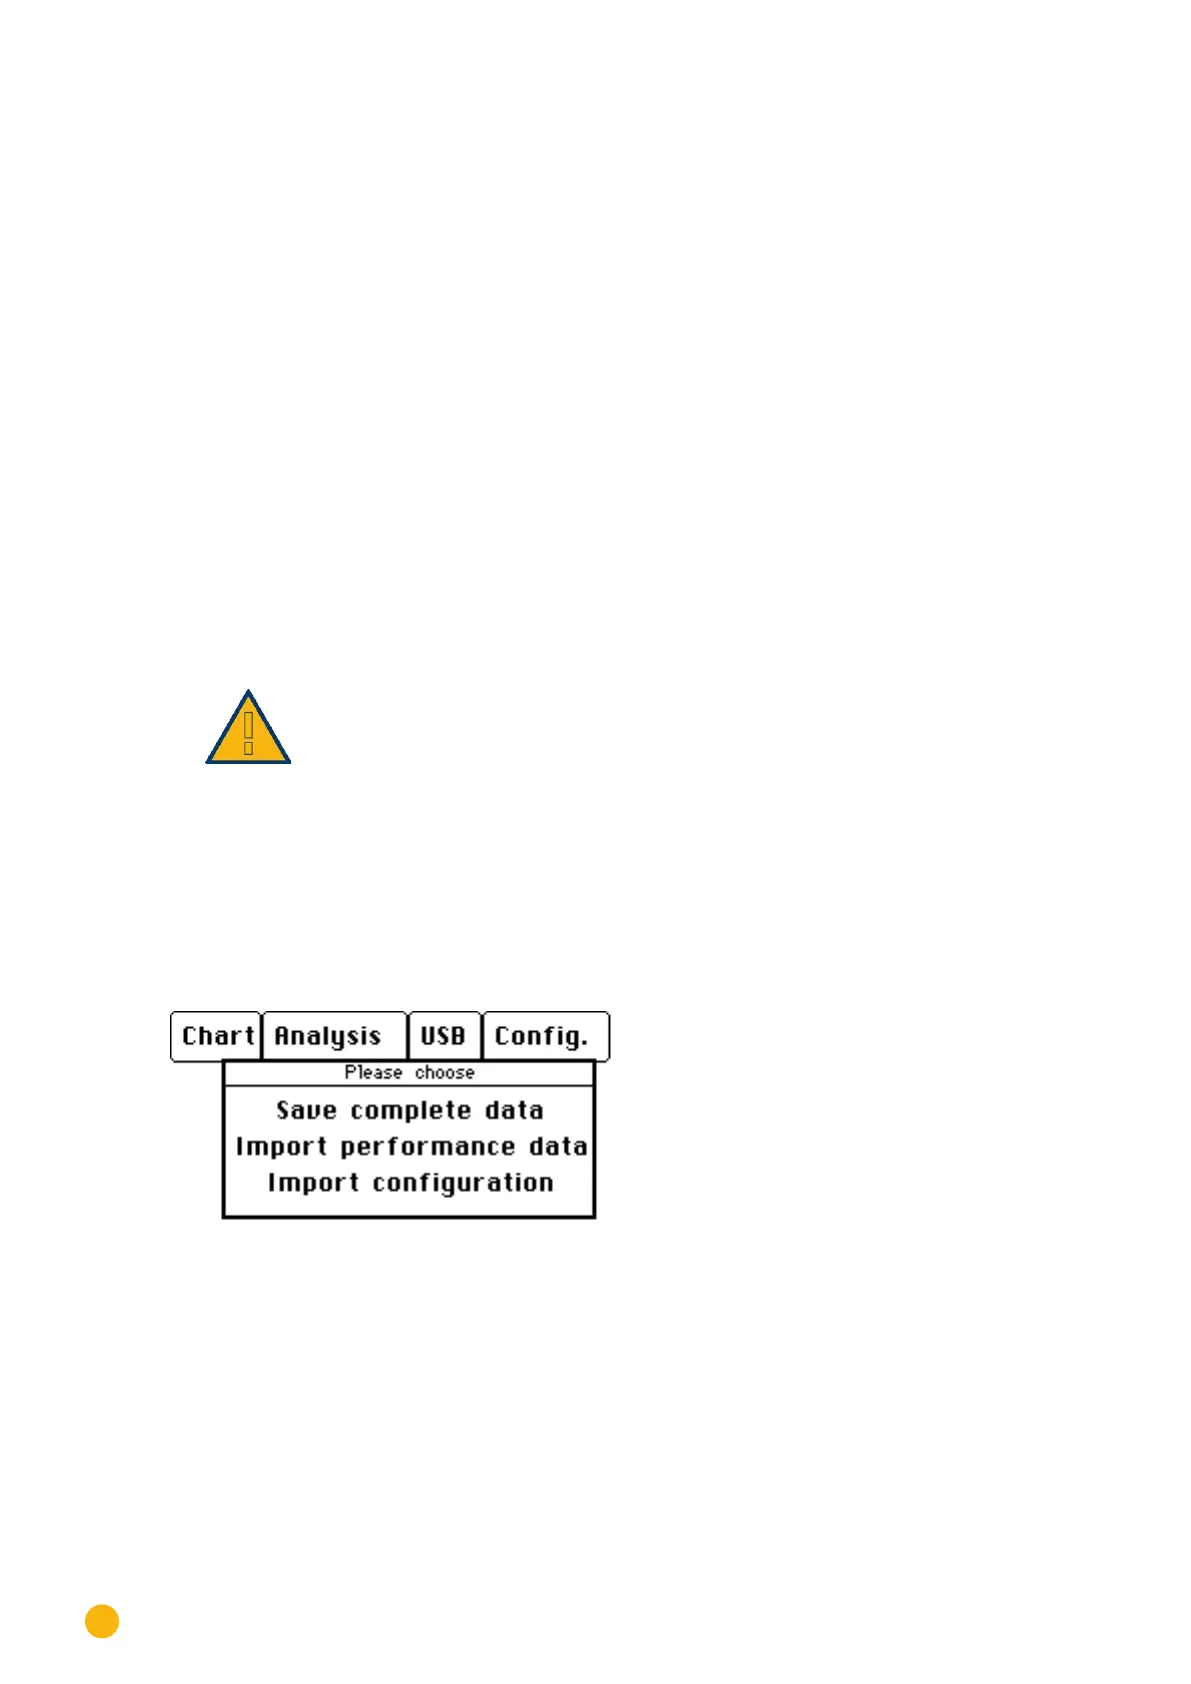
5.6.1 Create a Backup
You can also use a USB stick to create a backup. You have the following selection possibilities:
•
Save the yield and settings data or
•
copy yield data saved on the USB stick to the device or
•
copy settings saved on the USB stick to the device.
Important:
When importing data from the USB stick, all of the data on the device is deleted
and replaced.
Tap your finger on the display again.
The main navigation screen is displayed.
Tap on Diagnosis and then on Backup.
Fig.: USB Backup Selection Menu
Select the desired Option.