Machine maintenance and care
11.9.2 Adjusting / Tightening of conveyor
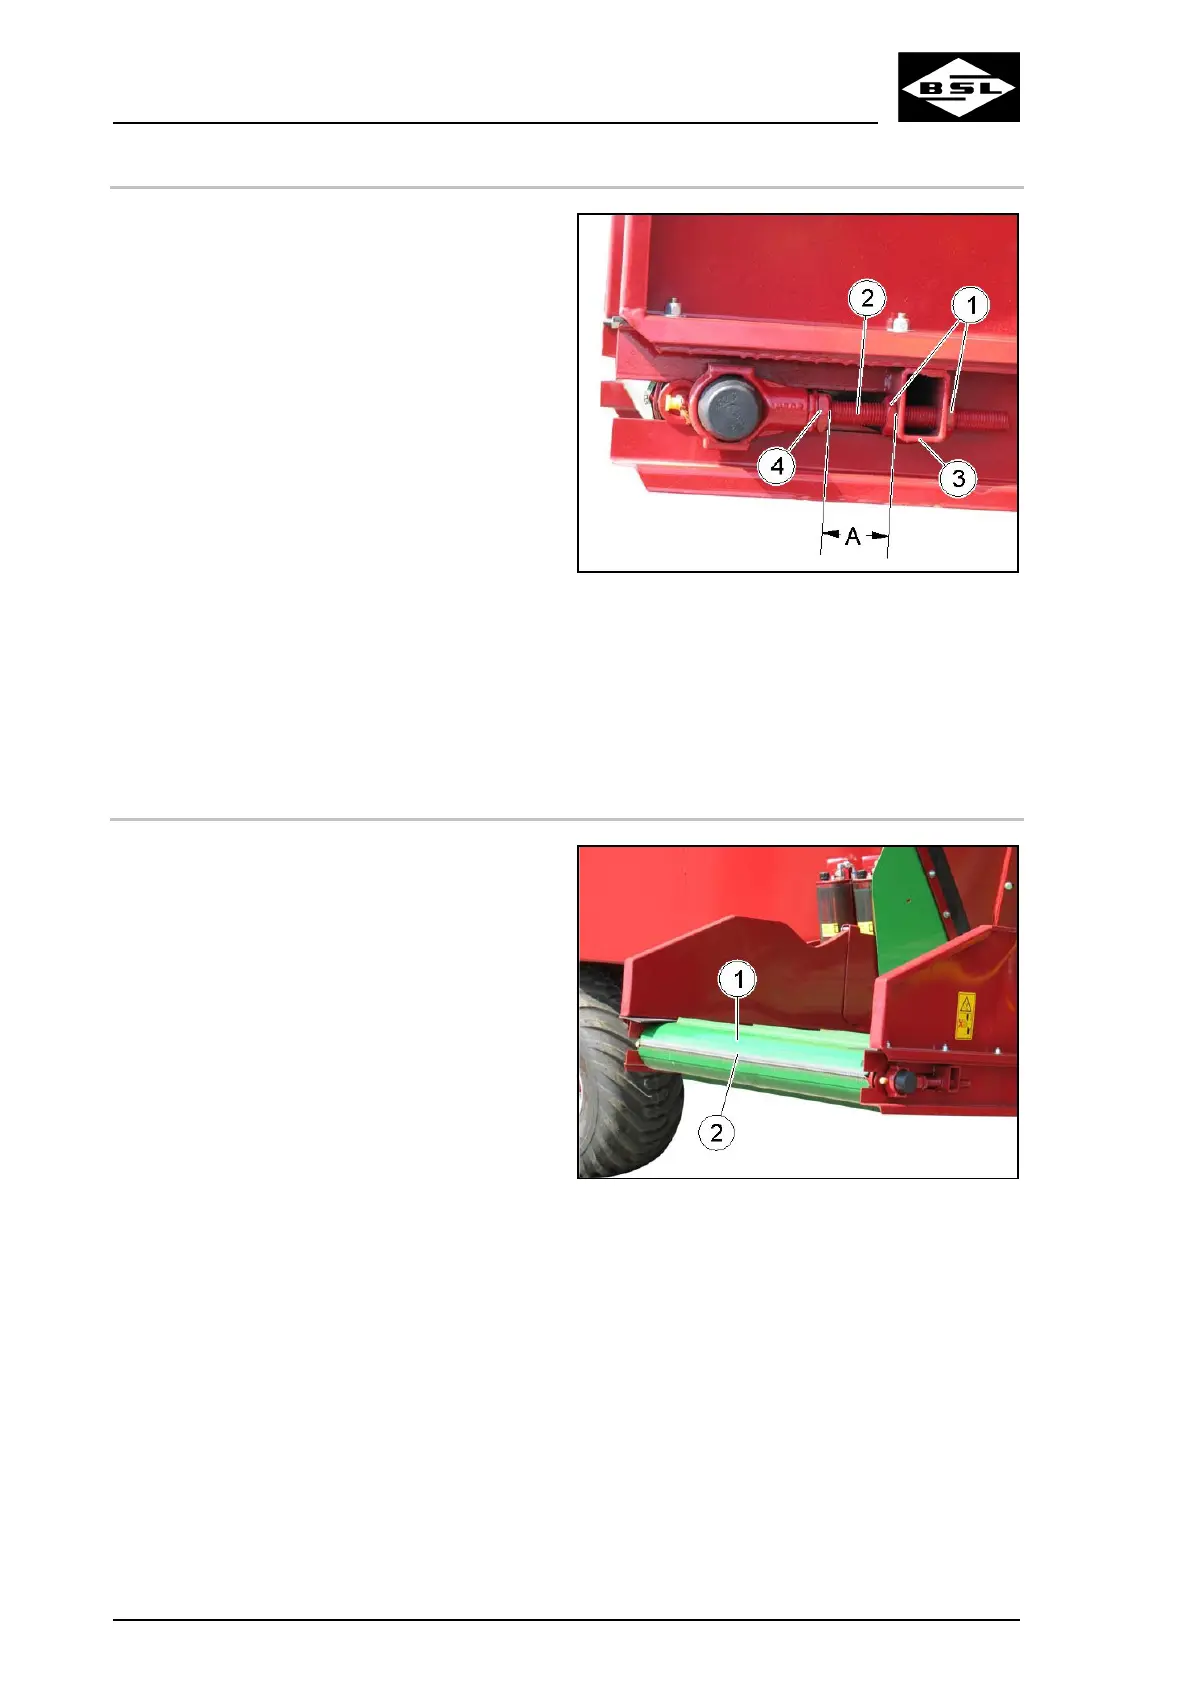
Fig. 95
1. Secure the tractor and the machine against
accidental starting and rolling, see
information on page 126.
. Unscrew the counternuts (1) of the right and
left clamping screw (2).
. Turn the two clamping screws (2) equally:
• such that the conveyor sags by
approx. 10 to 15 mm in its centre,
• the distance A between the square
profiles (3) and the clamping housing
(4) is equal on both sides of the
conveyor.
Only if the distance A is equal on both
sides of the conveyor, the conveyor
runs straight.
4. Carry out a test run to check whether the
conveyor has an equal distance to the
frame at the return rollers on both sides. If
not, correct accordingly by turning the
clamping screws (2).
5. Tighten up all counternuts (1) firmly again.
2
3
8
9
11.9.3 Cleaning of driving, supporting and guide rollers
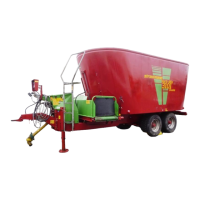
Fig. 96
1. Secure the tractor and the machine against
accidental starting and rolling, see
information on page 126.
2. Release the conveyor (1).
3. Rotate the released conveyor until the side
of the belt fastener (2) is positioned on the
guide roller.
4. Draw the connecting wire out of the belt
fastener.
5. Remove the conveyor.
6. Clean:
• the driving, supporting and guide
rollers,
• the frame,
• the rubber seal strips.
7. Reinstall the conveyor.
Ensure that the rubber seal strips rest on
top of the conveyor.
. Mount the connecting wire.
. Tighten the conveyor.
168
Verti Mix Double K Edition 08.08