30 Netra T2000 Server Installation Guide • September 2006
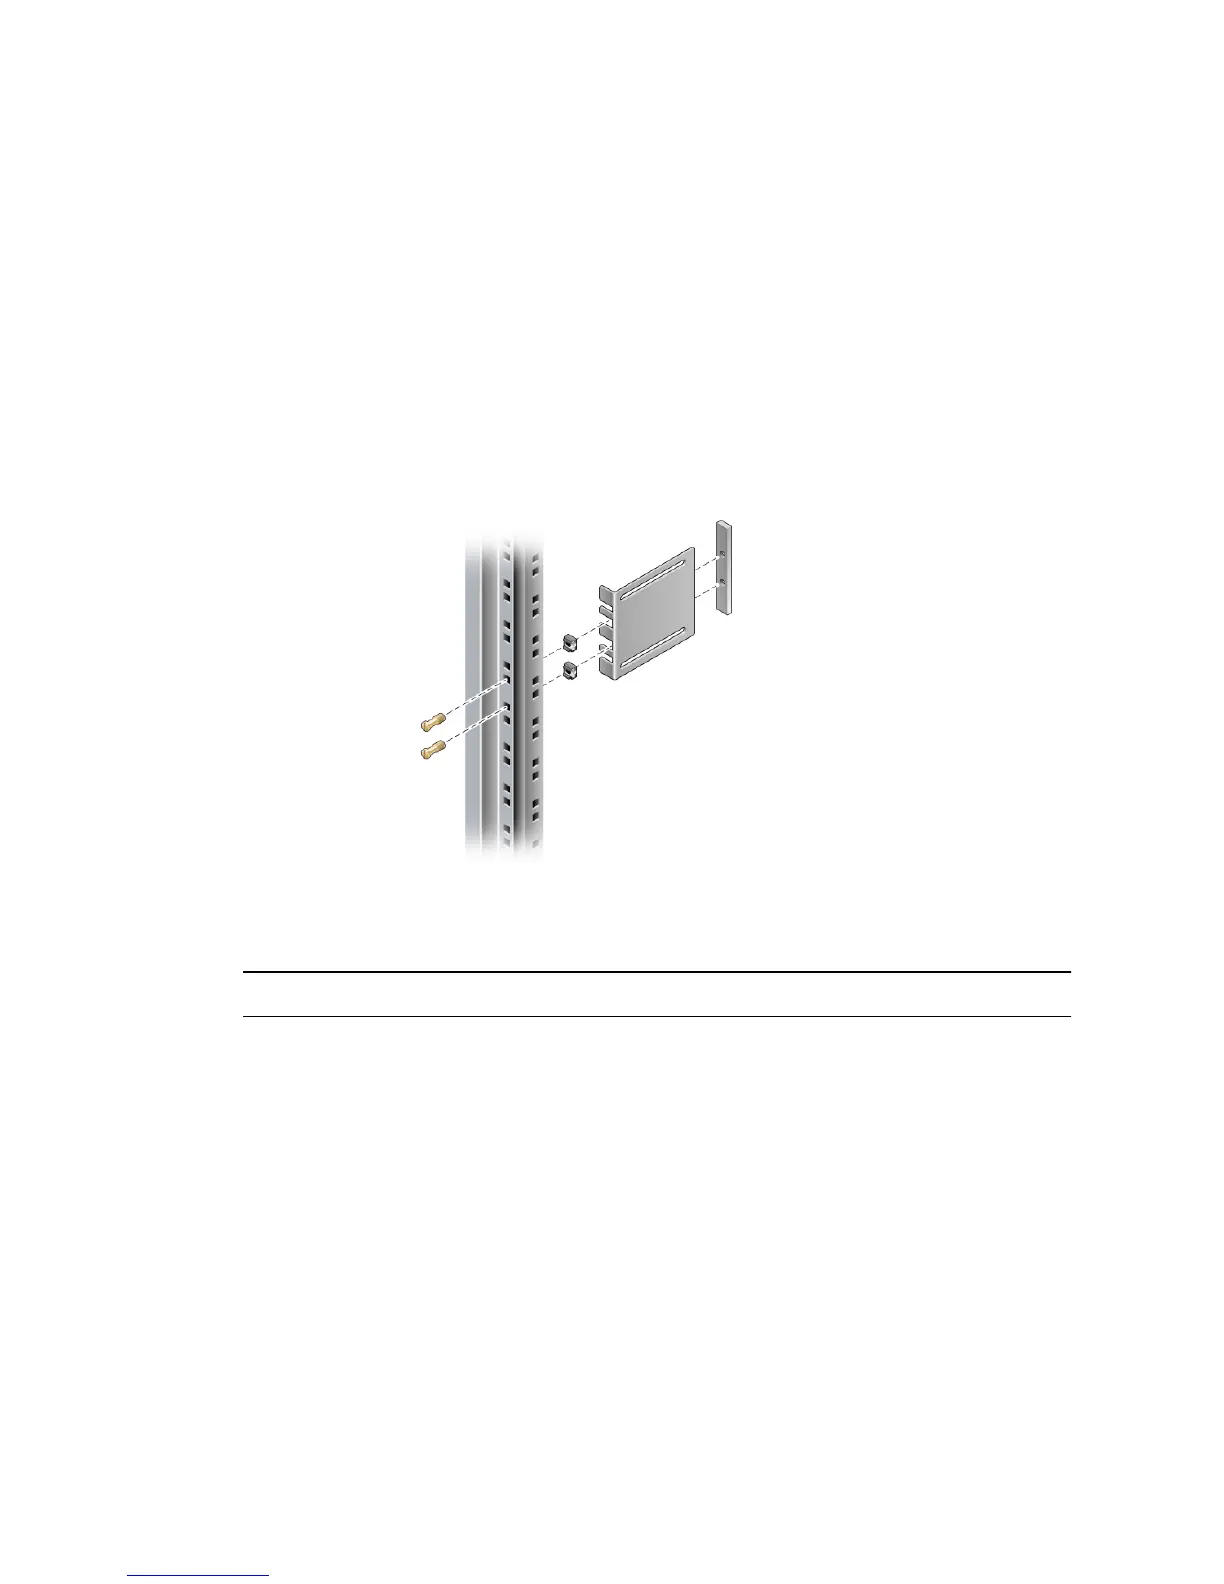
7. Lift each short bracket to the desired position at the front of the rack and attach a
short bracket to each of the front rack uprights (
FIGURE 3-10).
Use two of the brass M6 collar screws and M6 cage nuts (if required), and one
threaded strip, to secure each bracket (
FIGURE 3-10).
8. Lift each long bracket to the desired position at the rear of the rack and attach a
long bracket to each of the rear rack uprights (
FIGURE 3-10).
To secure each bracket, use two of the brass M6 collar screws and M6 cage nuts (if
required) and one threaded strip, exactly as you did for the front rack uprights in the
previous step.
FIGURE 3-10 Securing the Brackets to the Rack
Note – If your rack has 10–32 holes, use the 10–32 collar screws and 10–32 threaded strips.
9. Extend a slide to line up the access holes with the front screw holes.
10. Secure the slide onto the short and long brackets at the front and rear of the rack
(
FIGURE 3-11).
Use the M5 panhead screws from the inside, and the M5 nuts, plain washers, and
star washers from the outside. Use extension brackets instead of the long brackets if
the dimension is greater than 665 mm
.