40 Netra T2000 Server Installation Guide • September 2006
14. Set the rear flanges to the desired depth in the rack, then tighten the single M5 ×
10 SEM screw on each of the flanges to secure them to the adjustable rails
(
FIGURE 3-18).
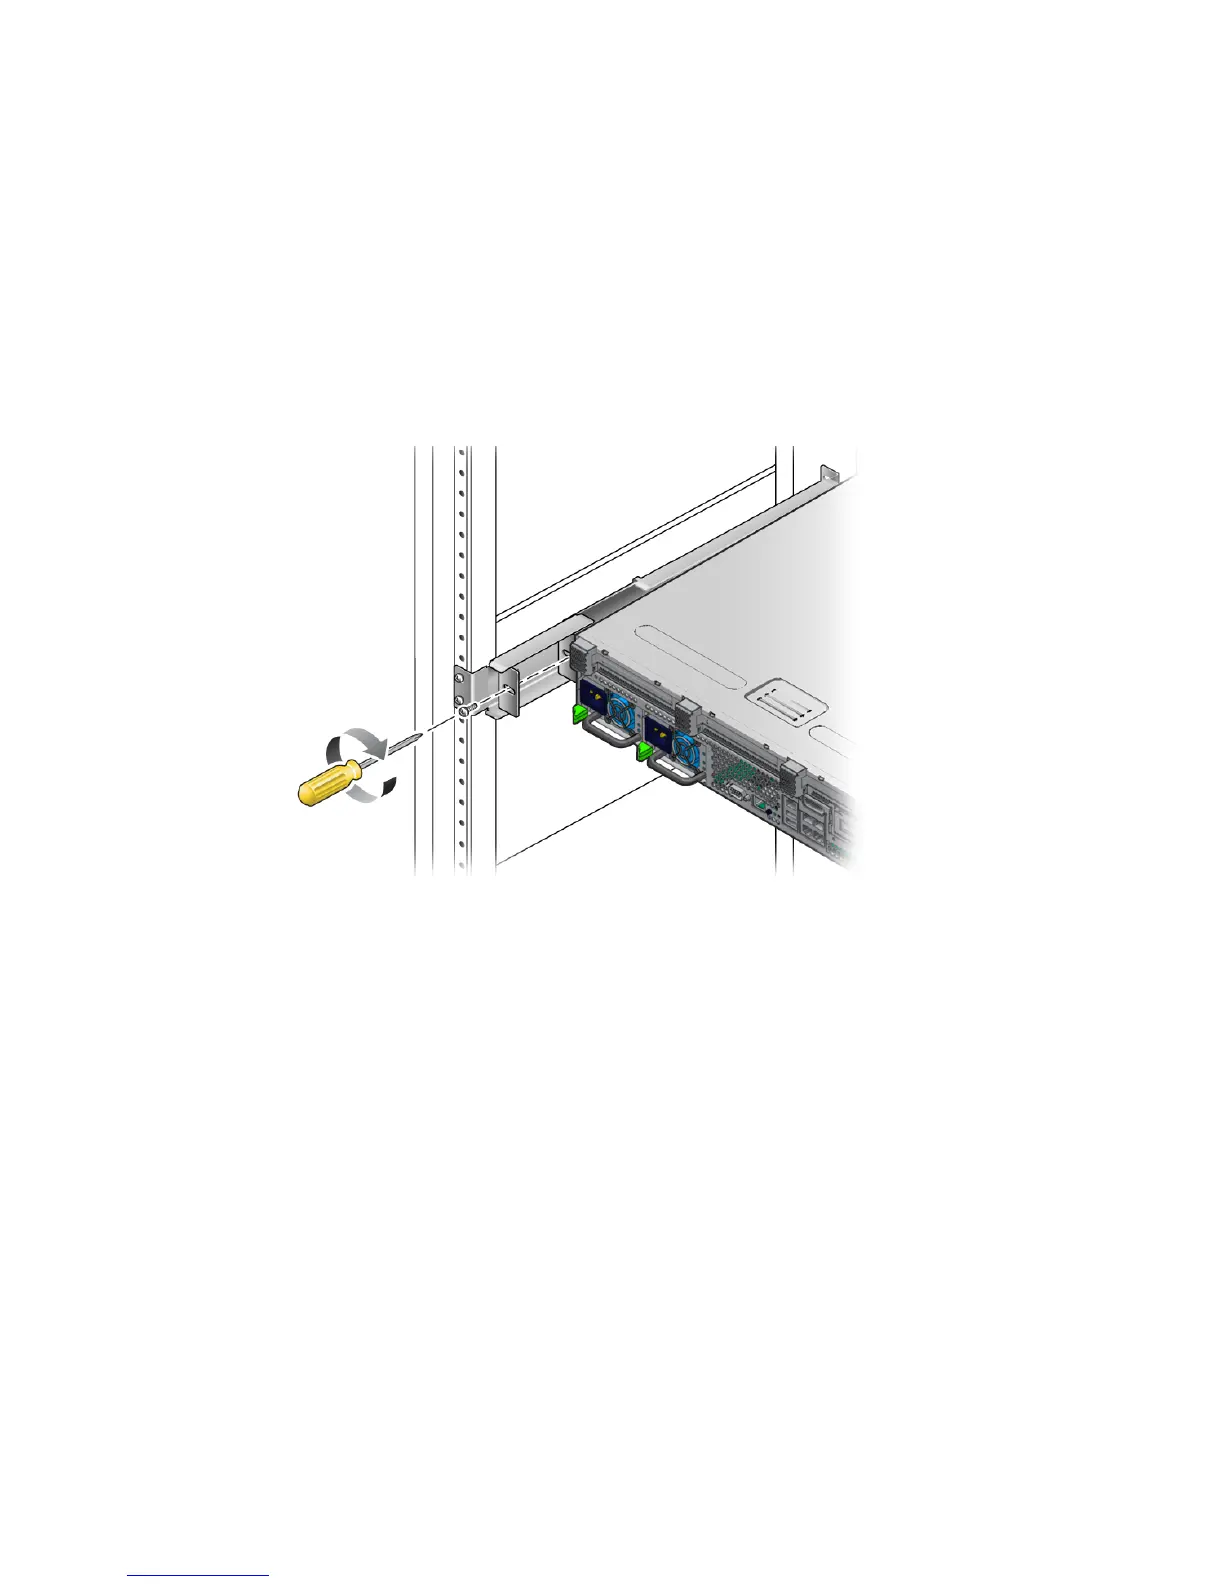
15. Lift the server into the rack and slide it onto the adjustable rails.
16. Push the server backward until it rests flush against the rear flanges, then use one
M5 × 10 SEM screw for each rear flange to secure the rear of the server to the rear
flanges (
FIGURE 3-21).
FIGURE 3-21 Securing the Rear of the Server to the Rear Flanges
17. At the front of the rack, use two screws per side to secure the side rails that are
attached to the server to the front of the rack (
FIGURE 3-22).
The size of the screws varies, depending on your particular rack.