35
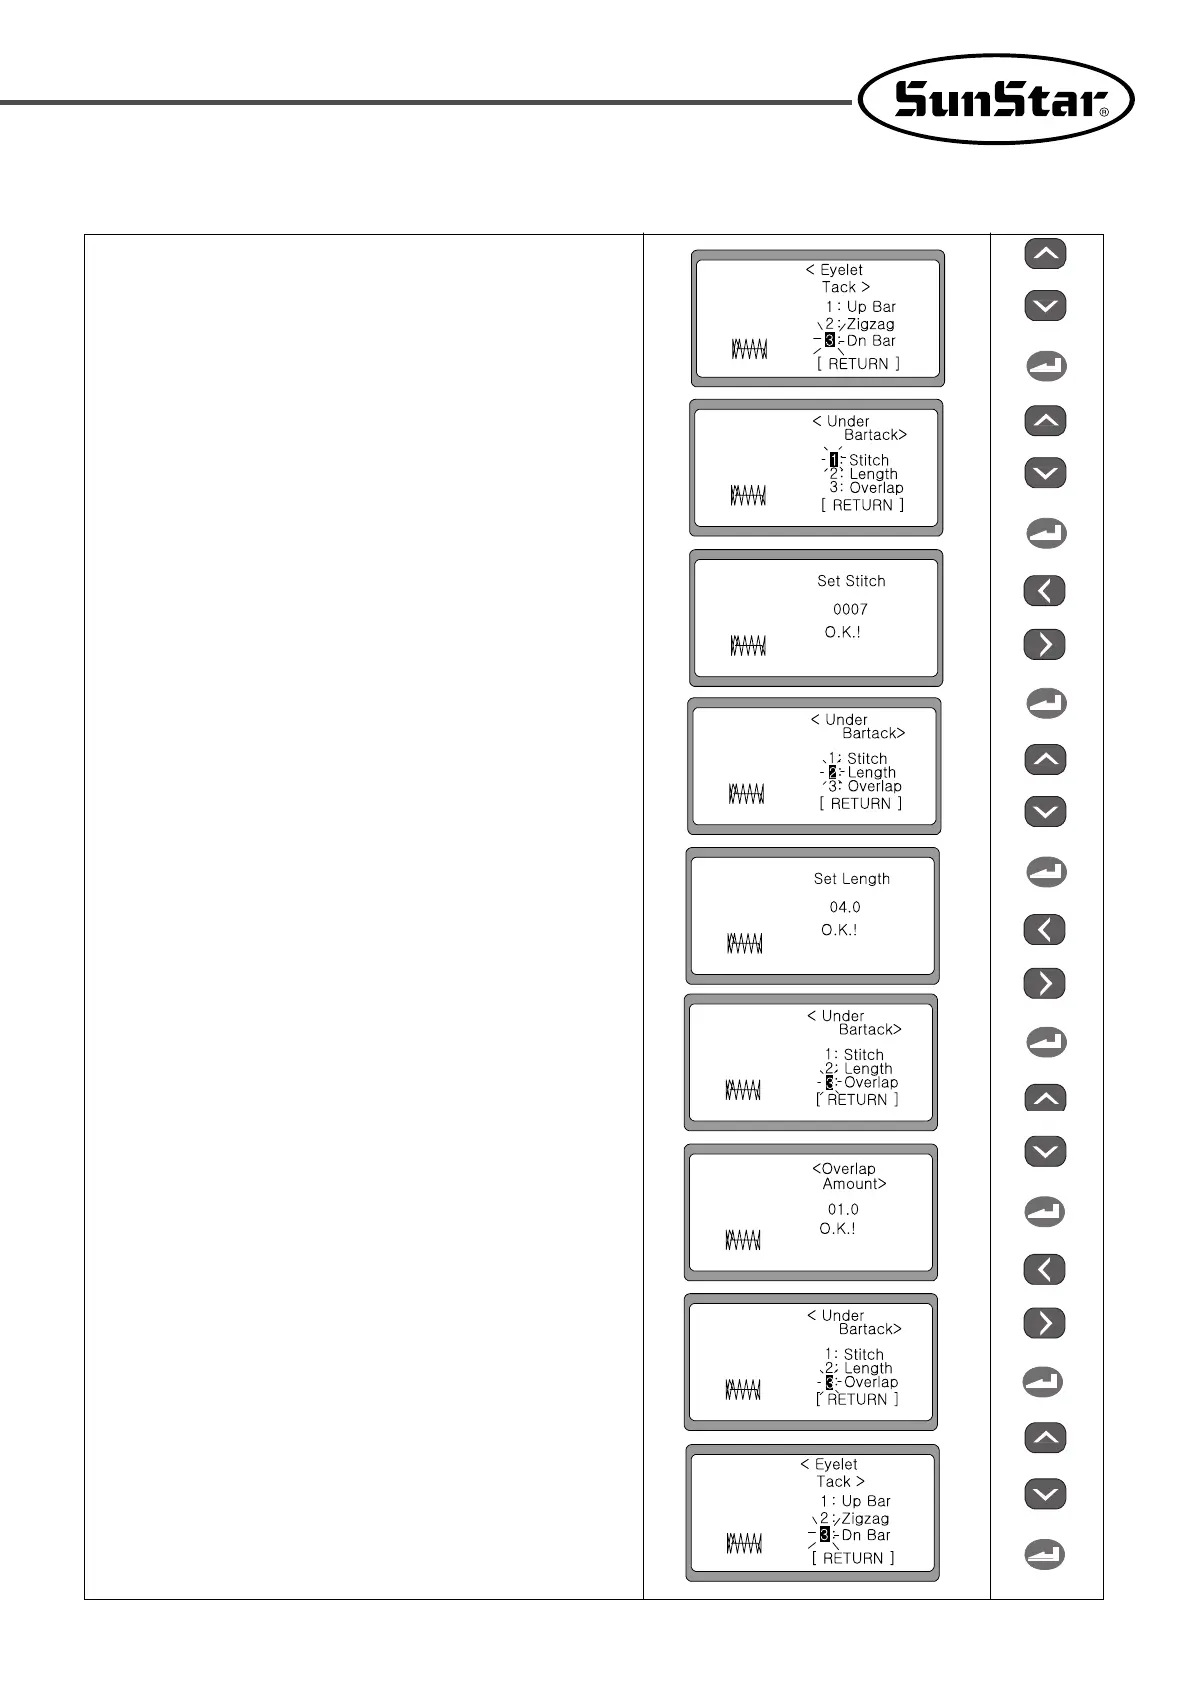
3) Create the down bartack shape
⑤ Select ‘3’by pressing UP or DOWN and press ENTER.
ex) Select ‘3: Dn Bar’
⑥ To create the down bartack, it is necessary to enter the number of
stitches, length and overlap value. Select ‘1’using UP or
DOWN to change the number of stitches, and press ENTER.
⑦ Set the desired value using ◀(+) and ▶(-) and press ENTER.
Then the O.K.! message is displayed.
(ex: 0007)
⑧ In one second, the display automatically moves to the previous
screen. Select ‘2’using UP or DOWN to set the length and press
ENTER.
⑨ Set the desired value using ◀(+) and ▶(-) and press ENTER.
Then the O.K.! message is displayed.
(ex: 04.0)
⑩ In one second, the display automatically moves to the previous
screen. Select ‘3’by pressing UP or DOWN to set the overlap
amount, and press ENTER.
⑪ Set the desired value using ◀(+) and ▶(-) and press ENTER.
Then the O.K.! message is displayed (ex: 01.0)
⑫ In one second, the display automatically returns to the previous
screen. Select [RETURN] by pressing DOWN and then press
ENTER.
⑬ The screen moves back to the initial screen for creating the
up/down bartack and zigzag shapes.
◀Note▶
When READY is pressed, the changed parameter values
are stored in the memory, and the display returns to the
initial sewing screen.