EXCITE + - Crossover: Technical Service guide- Ver. 4.1
Pagina 7.37
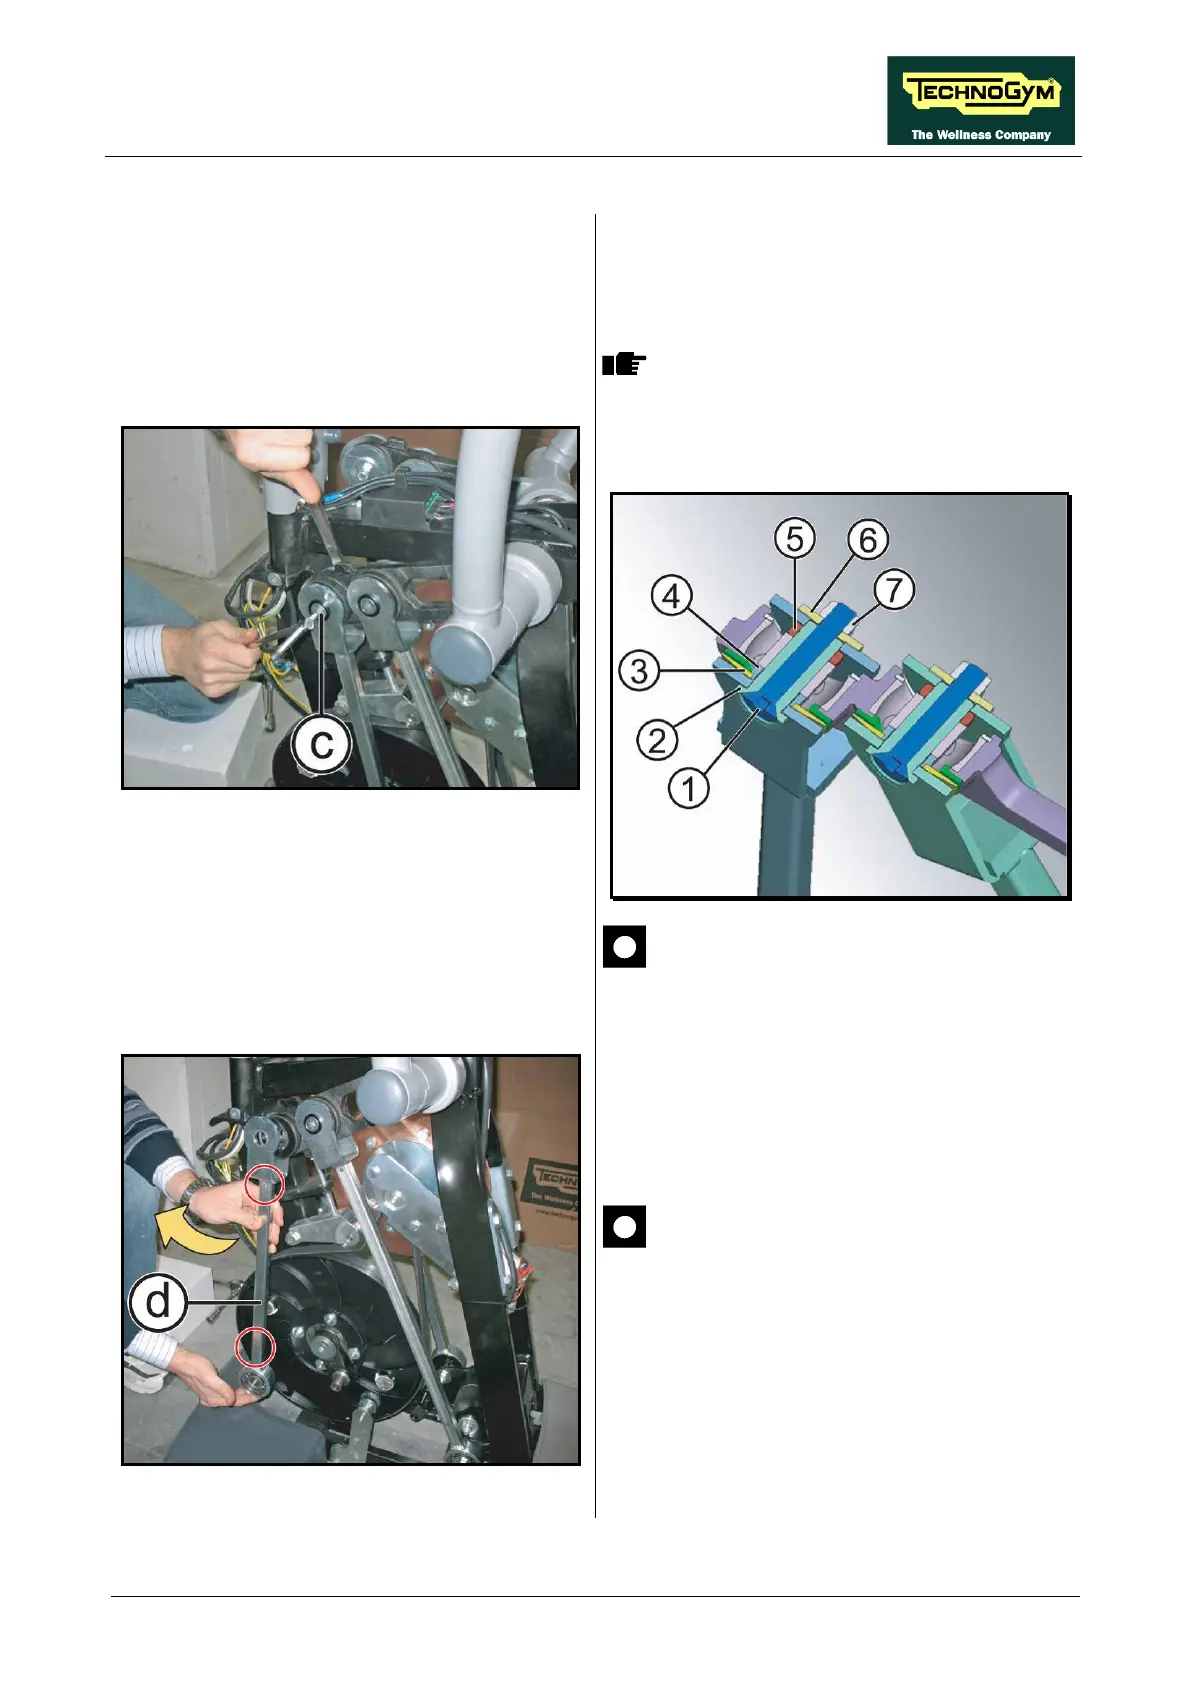
Figure 7.12-3
3. Back off the screw (c) using a 5mm
hexagonal wrench, locking the nut on the
opposite side using a 17mm wrench, as
shown in the figure at the side.
During the reassembly take care of the
parts order, as detailed below; pay
particular attention to the orientation
of particular (3).
CAUTION: During the reassembly
lock down the screw (c) using a torque
wrench set for 44Nm.
Figure 7.12-4
4. Remove the short connecting-rod (d) as
shown in the figure at the side.
CAUTION: During the reassembly
pay attention to position the holes,
highlighted in the figure, outwards as
in the figure.
To reassemble the short connecting-rod, carry
out the above steps in reverse order.