c.
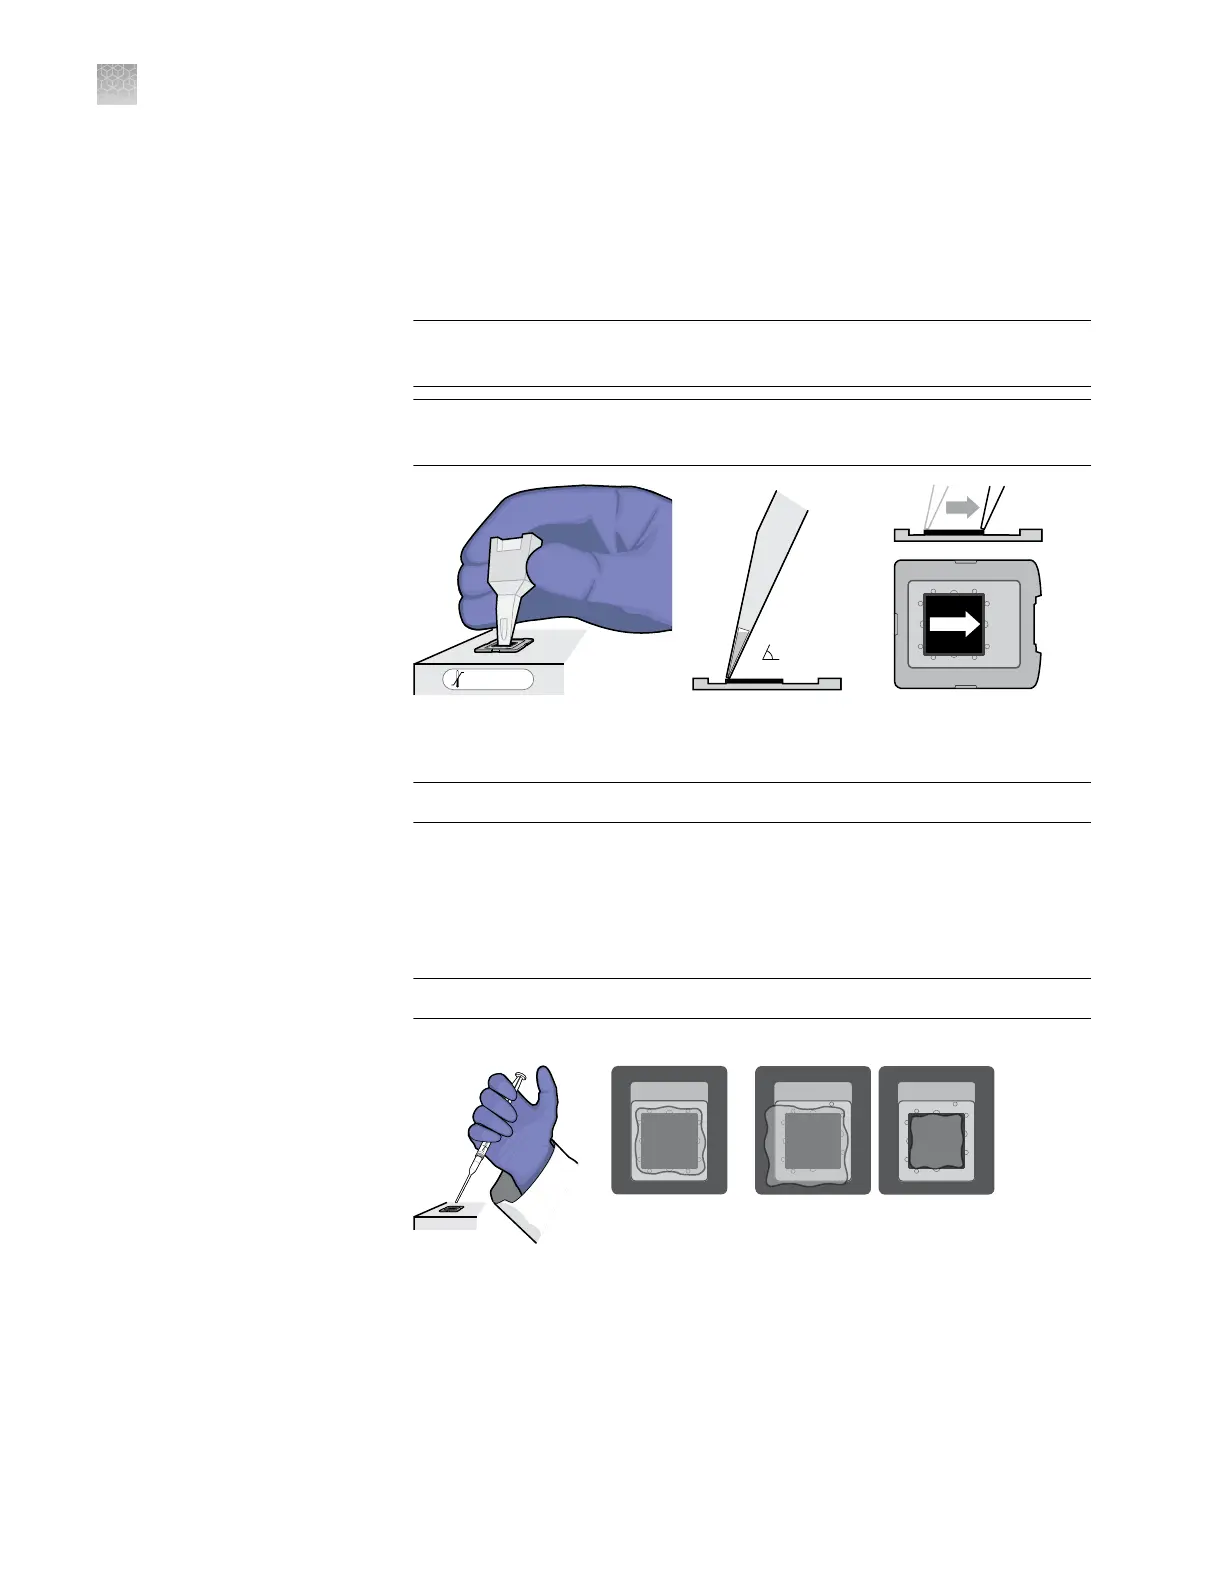
While holding the loading blade at a 70–80° angle relative to the heated
block so that the port faces up, place the edge of the blade at the end of
the chip. Adjust the angle of the blade until you visually conrm that it is
wetting the chip. Then, in one smooth motion, slowly drag the blade across
the chip while applying a slight downward pressure to dispense the
reaction.
IMPORTANT! Move the loading blade slowly. The time required to move
the blade across the chip should be approximately 10–12 seconds.
IMPORTANT! Before you draw the blade across the chip, visually conrm
that the loading blade is wetting the chip. If not, adjust the angle slightly.
d.
Conrm that the loading blade contains no residual uid, indicating that the
reaction has been completely loaded onto the chip.
IMPORTANT! Do not apply the loading blade to the chip more than once.
e.
Allow the chip to sit on the heated block for 20 seconds while the PCR
reaction stabilizes within the chip.
f.
Add several drops of Immersion Fluid directly to the chip so that the uid
covers the entire surface.
IMPORTANT! Do not allow the syringe tip to contact the chip.
Correct
Fluid on
edges
Incorrect
Insufficient
fluid
Fluid over
chip
Note: A small amount of uid running off the surface of the chip is
acceptable.
Appendix E
Load chips manually
Load and seal the chips manually
E
110
QuantStudio
™
3D Digital PCR System User Guide