2.
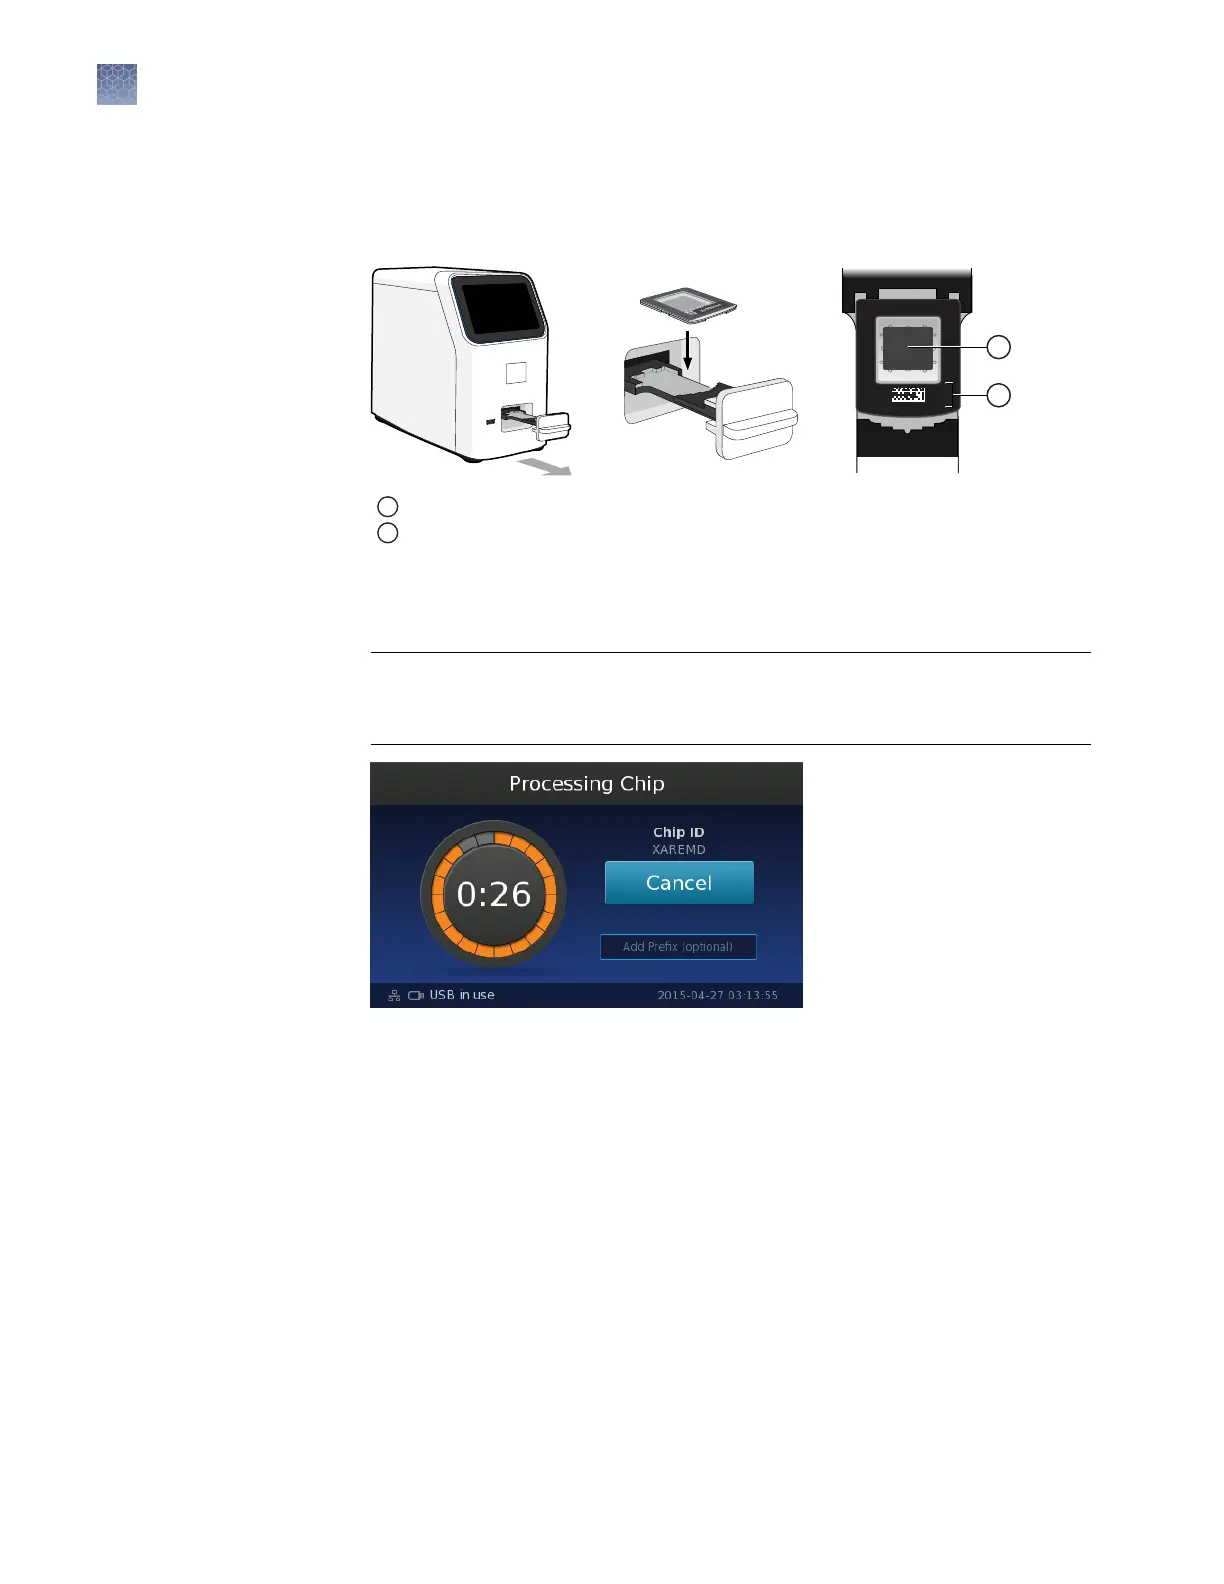
Open the chip tray and load the chip face-up into the tray, with the chip ID and
ll port toward the front of the instrument.
Note: The chip will only t in the tray in one orientation.
1
Orient the chip barcode toward the front of the instrument.
2
Conrm that the chip window is clean and correctly aligned to the chip.
3.
Conrm that the chip is correctly aligned, then close the tray to begin chip
detection and imaging. You can monitor the progress of the run in the
touchscreen, which counts down the time remaining.
IMPORTANT! Do not open the chip tray or remove the USB drive (if present)
while the instrument displays the countdown. Doing so will invalidate the data
and require you to repeat the run.
Note:
You can stop the run at any time by touching Cancel.
4.
(Optional) During the run, touch the Add Prefix eld to enter a prex for each
experiment (.eds) le name.
Note: The le prex is an alphanumeric string that can be used to further
identify and group related experiments after transfer to AnalysisSuite
™
Software.
The le prex:
·
Can be up to 174 characters long.
·
Must consist of alphabetic and numeric characters.
·
Can contain hyphens, but not as the rst or last character.
·
Cannot include spaces or special characters ( ; : " < > * + = \ | ? , ).
Chapter 5
Image and analyze the chips
Chip imaging
5
44
QuantStudio
™
3D Digital PCR System User Guide