FrontRoller
g214676
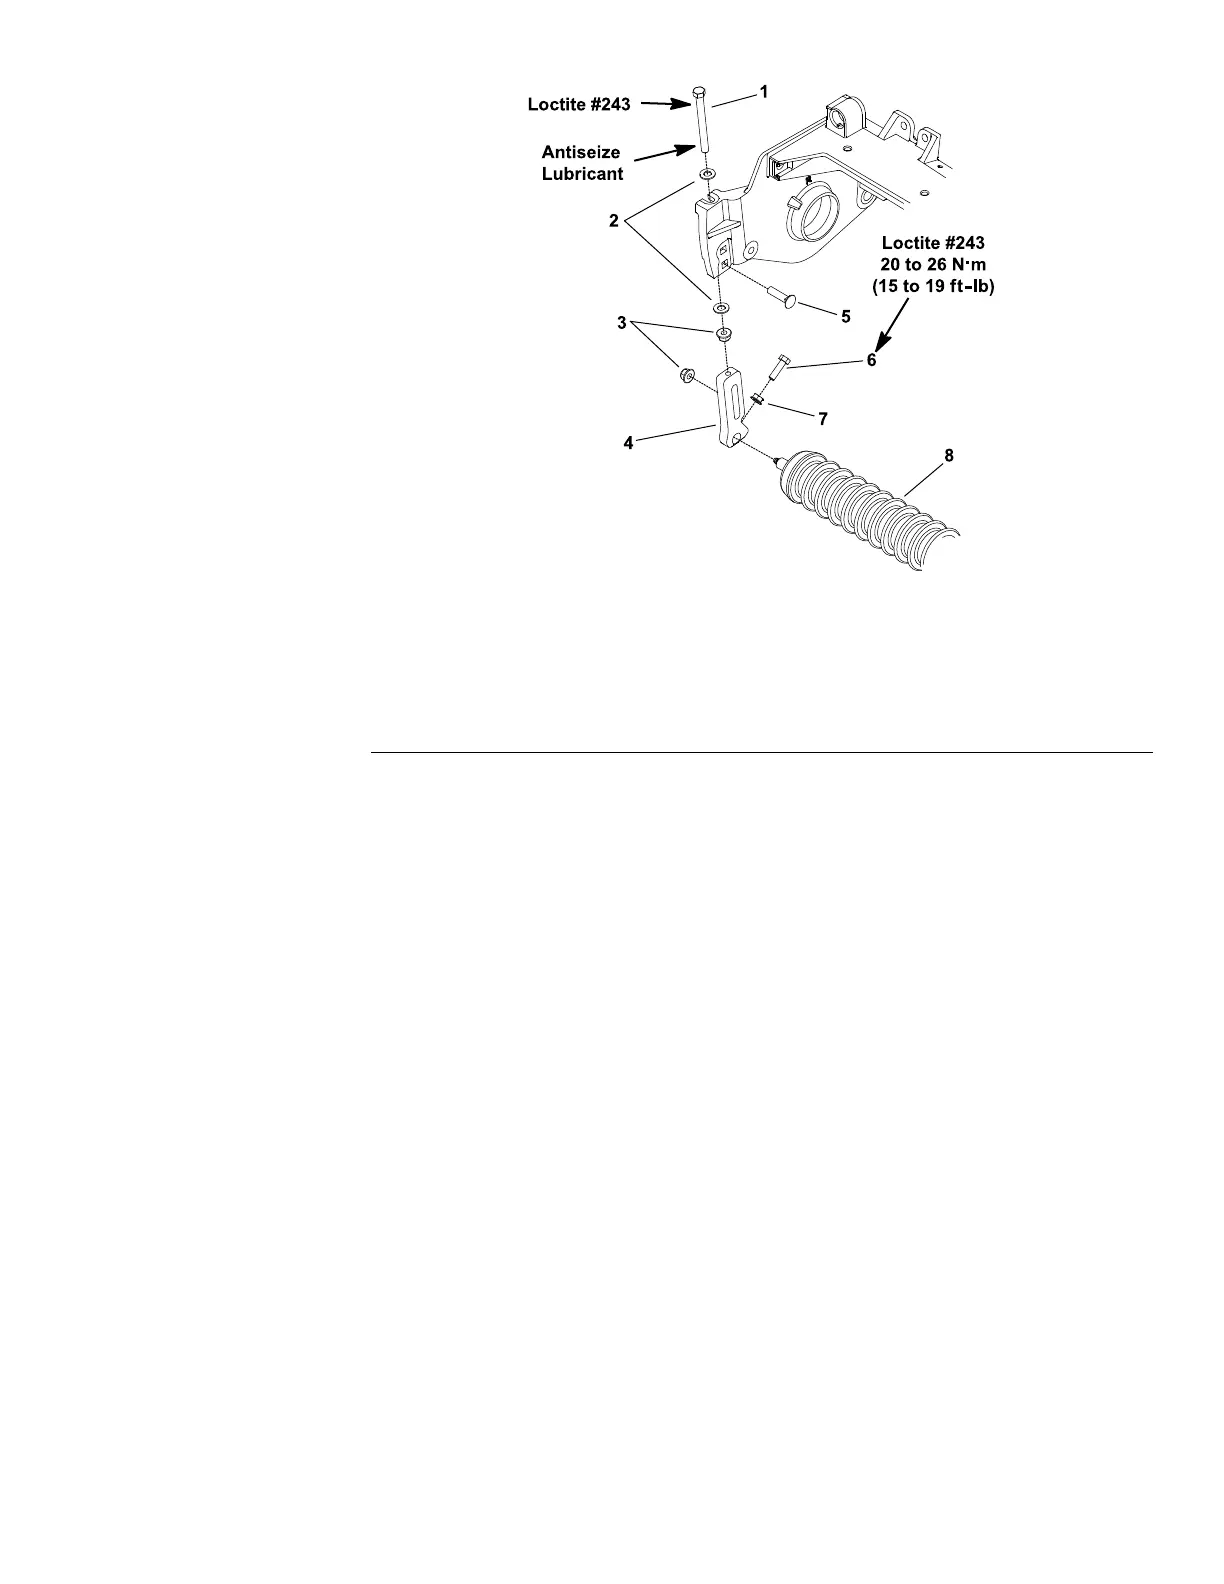
Figure186
1.Capscrew5.Carriagescrew
2.Flatwasher
6.Capscrew
3.Flangenut7.Flangenut
4.HOC(roller)bracket
8.Frontrollerassembly
RemovingtheFrontRoller
1.Positionmachineonacleanandlevelsurface,lowercuttingunits,stop
engine,engageparkingbrakeandremovekeyfromthekeyswitch.
2.Removethecuttingunitfromthemachineandplaceonalevelworking
surface.Usecuttingunitkickstand(refertoSpecialTools(page2–13))to
raisefrontrollerfromworksurface.
3.Loosenangenutandcapscrewsecuringthefrontrollershafttoeachfront
height-of-cut(roller)bracket.
4.Ononeoftheheight-of-cut(roller)brackets:
A.Removeangelocknutandcarriagescrewthatsecurebrackettothe
cuttingunitsideplate.
B.Removetheheight-of-cut(roller)bracketfromthecuttingunit.
5.Slidethefrontrollerassemblyfromtheremainingheight-of-cut(roller)
bracketonthecuttingunit.
6.Ifnecessary,removethesecondheight-of-cut(roller)bracketfromthecutting
unit.
InstallingtheFrontRoller
1.Placecuttingunitonalevelworkingsurfaceandusecuttingunitkickstand
(refertoSpecialTools(page2–13))tosupportcuttingunit.
2.Inspectconditionofcapscrews(item1)inbothheight-of-cut(roller)brackets.
Replacecapscrew(s)ifnecessary:
A.Placetwo(2)atwashersoncapscrewandthreadangelocknutonto
capscrewtoaposition19mm(0.750in)fromscrewhead.
Reelmaster
®
3100-D/3105-D
Page8–31
DPACuttingUnits:ServiceandRepairs
20252SLRevA

 Loading...


