03/2003
4-82
8850/ 510DP
REP 9.9
Repairs and Adjustments
CAUTION
The Media Shields are very fragile and are held in place by five plastic tabs molded on the lead
edge of each shield. Exercise caution when removing and reinstalling these two shields.
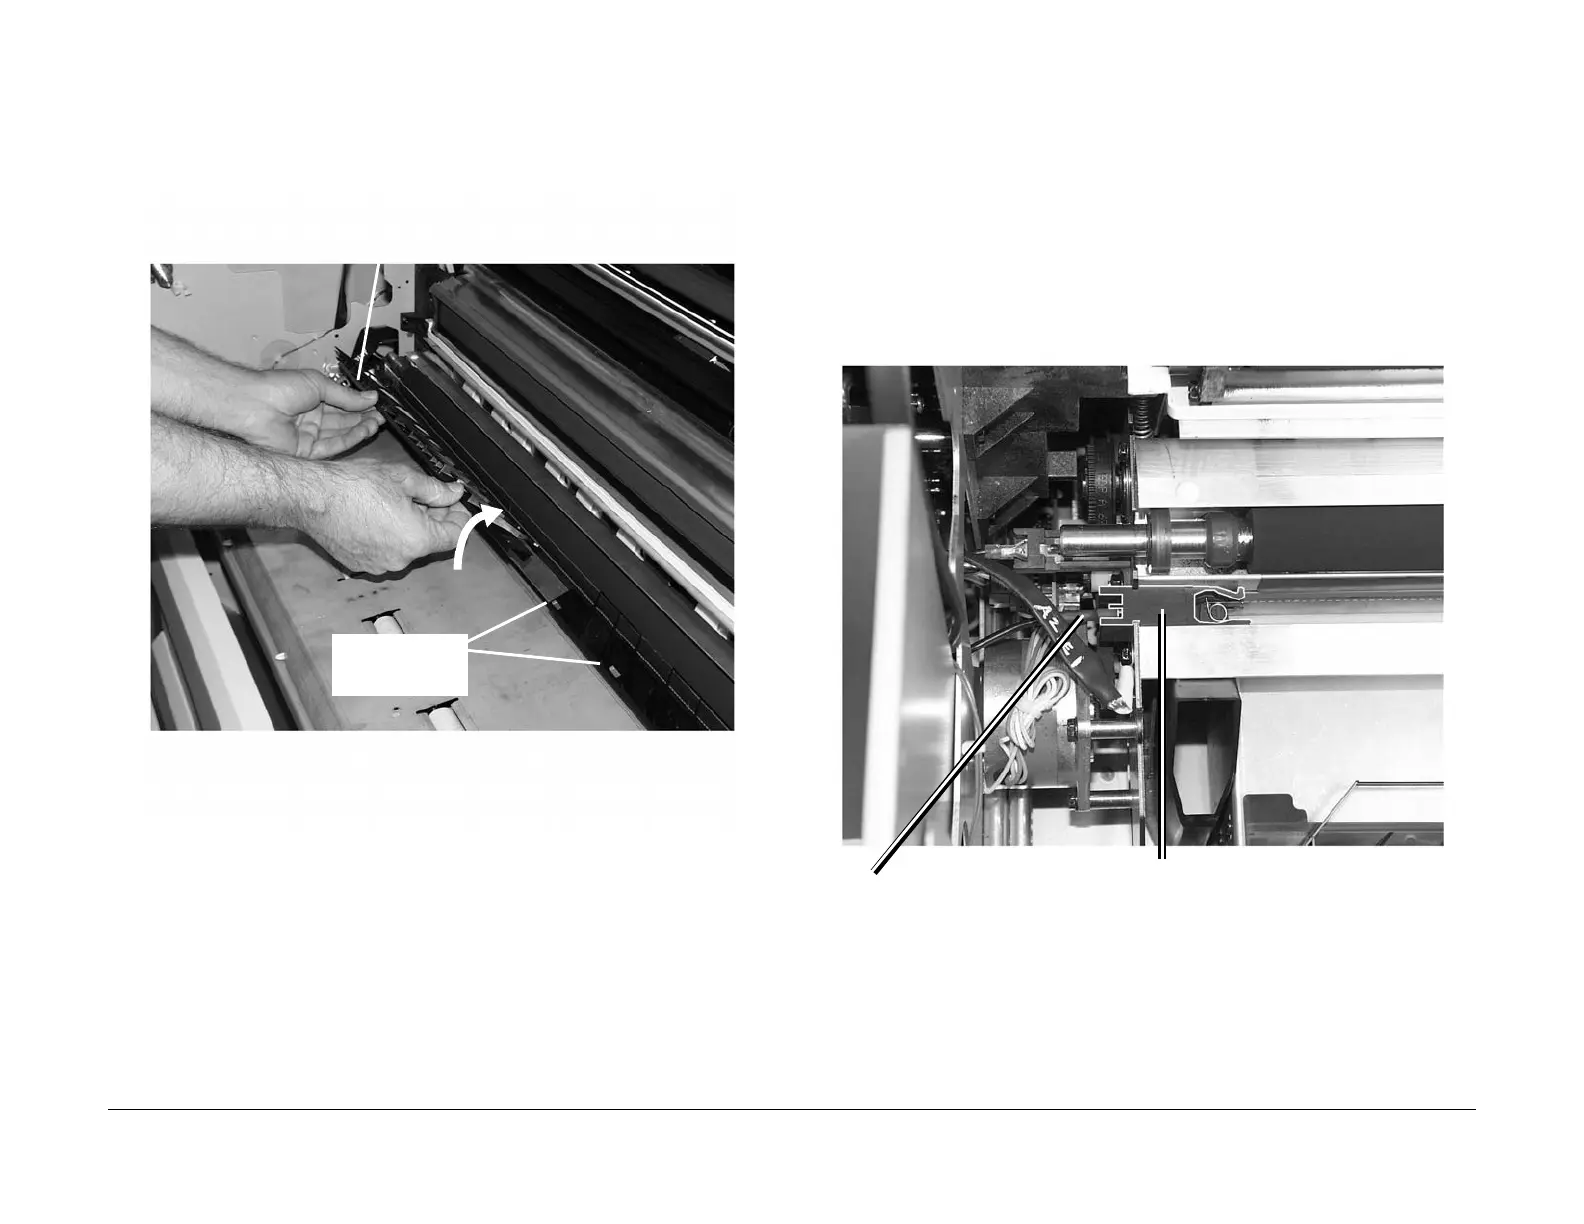
4. (Figure 2): Remove the two plastic Media Shields from the ledge in front of the Bias
Transfer Roll.
Figure 2 Removing the Plastic Media Shields
5. (Figure 3): Remove the Detack Corotron from the Printer. (The Detack Corotron is com-
prised of the Left and Right End Blocks and the Pin Array.)
NOTE: It is possible to resintall the End Blocks upside down. Pay particular attention to
the orientation of the End Block in the following illustration prior to removal from the
Printer.
NOTE: Hold the Detack Corotron by the left and right End Blocks and stretch the Pin
Array to its maximum width prior to removing or reinstalling it on the Printer.
Figure 3 Removing the Detack Corotron
6. Set the Detack Corotron on a clean, flat surface.
1
Grip each Media Shield by its lead edge and
gently work the five molded tabs free
2
Lift the Media Shield free of the lead
edge of the extrusion and remove it
from the Printer
Molded tabs (five
on each shield)
1
Remove the voltage lead from
the Left End Block
3
Slide both the left and right End Blocks
out of the extrusion, freeing the Detack
Corotron
2
Grip the left and right End Blocks
and stretch the Pin Array to its
maximum width
 Loading...


