03/2003
4-55
8850/ 510DP
REP 8.18
Repairs and Adjustments
REP 8.18 Detack Corotron/BTR Extrusion
Parts List on PL 8.3
WARNING
Switch off the Main Power Switch. Disconnect the Power Cord.
Removal
NOTE: In the following steps, the terms “Left” and “Right” describe machine locations as
observed when facing the Printer from the Roll Media Supply Drawer side of the Printer.
1. Remove the Media Transport Module (REP 8.2).
2. Remove the Bias Transfer Roll (REP 9.22).
3. Remove the Detack Corotron (REP 9.9).
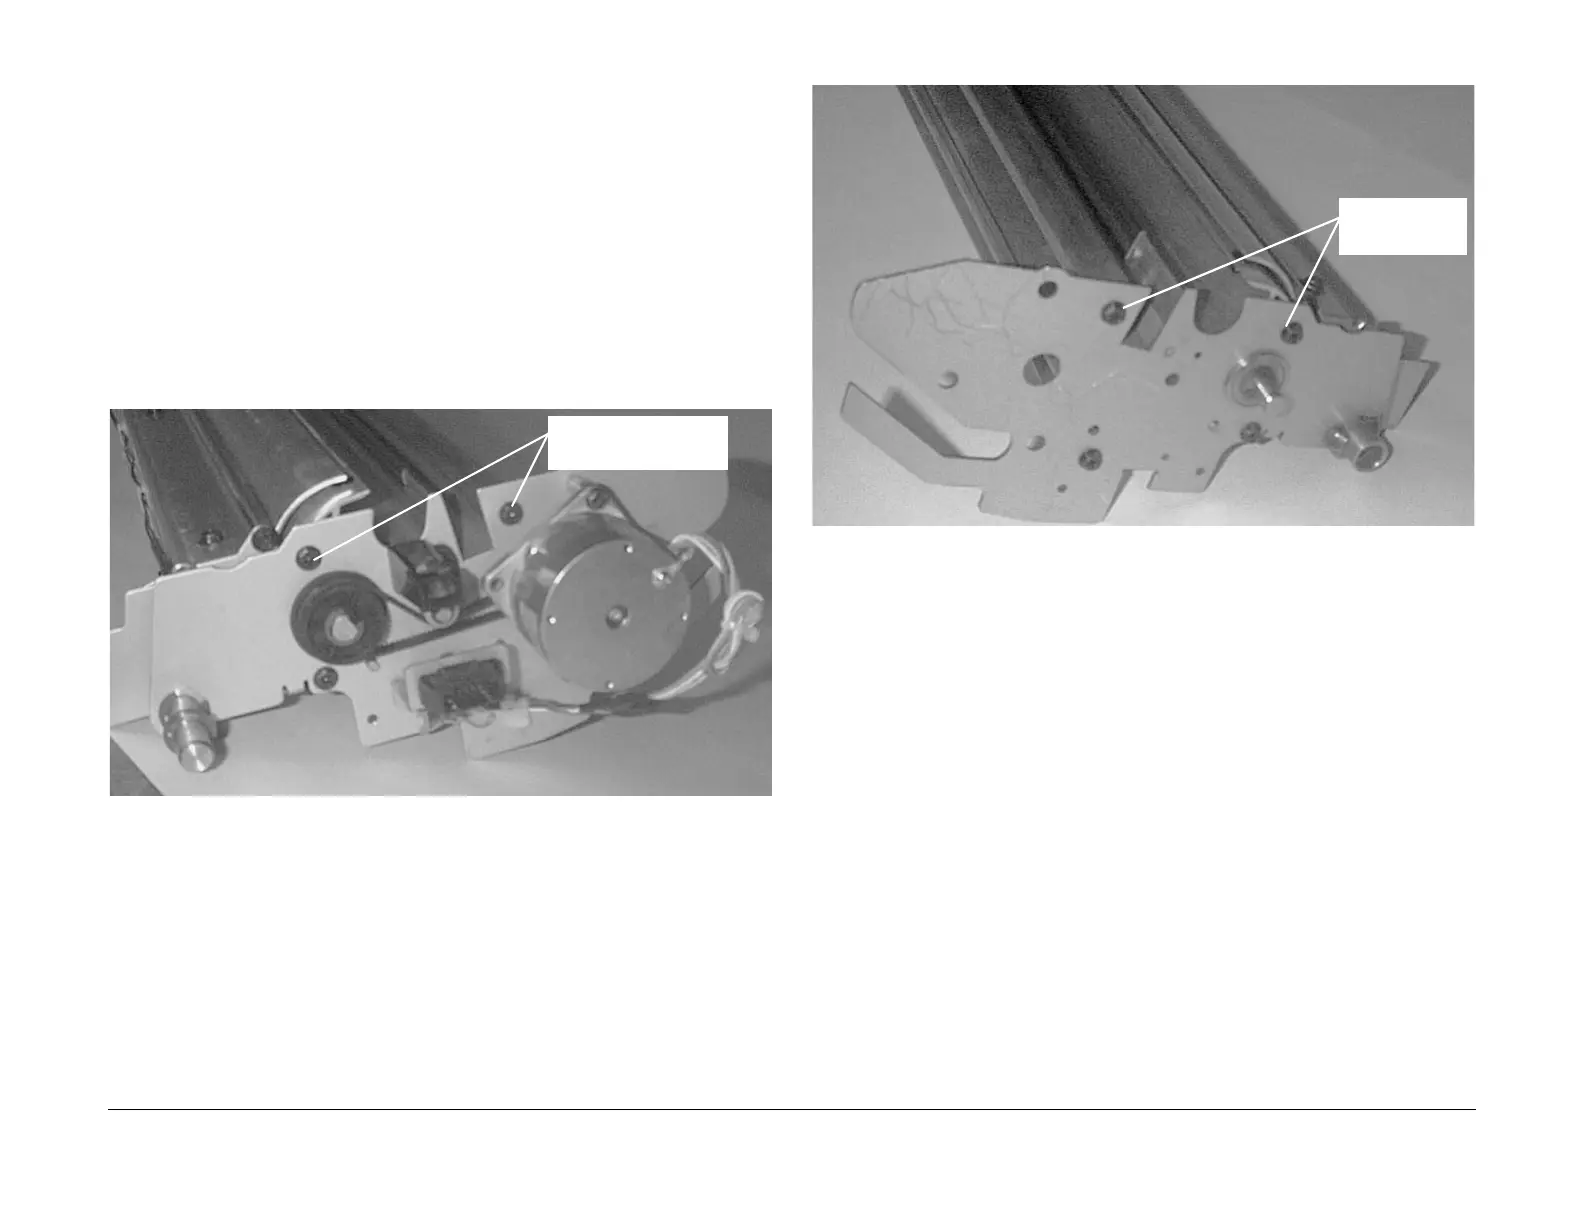
4. (Figure 1): Remove the two screws from the Left Side End Plate.
Figure 1 . Removing the Left Side Screws
5. (Figure 2): Remove the Fthe two screws from the Right Side End Plate.
Figure 2 . Removing the Right Side Screws
1
Remove the 2 Screws
1
Remove the 2
Screws
 Loading...


