03/2003
4-156
8850/ 510DP
ADJ 10.2, ADJ 10.3
Repairs and Adjustments
3. (Figure 2): Perform the adjustment.
Figure 2 Performing the Adjustment
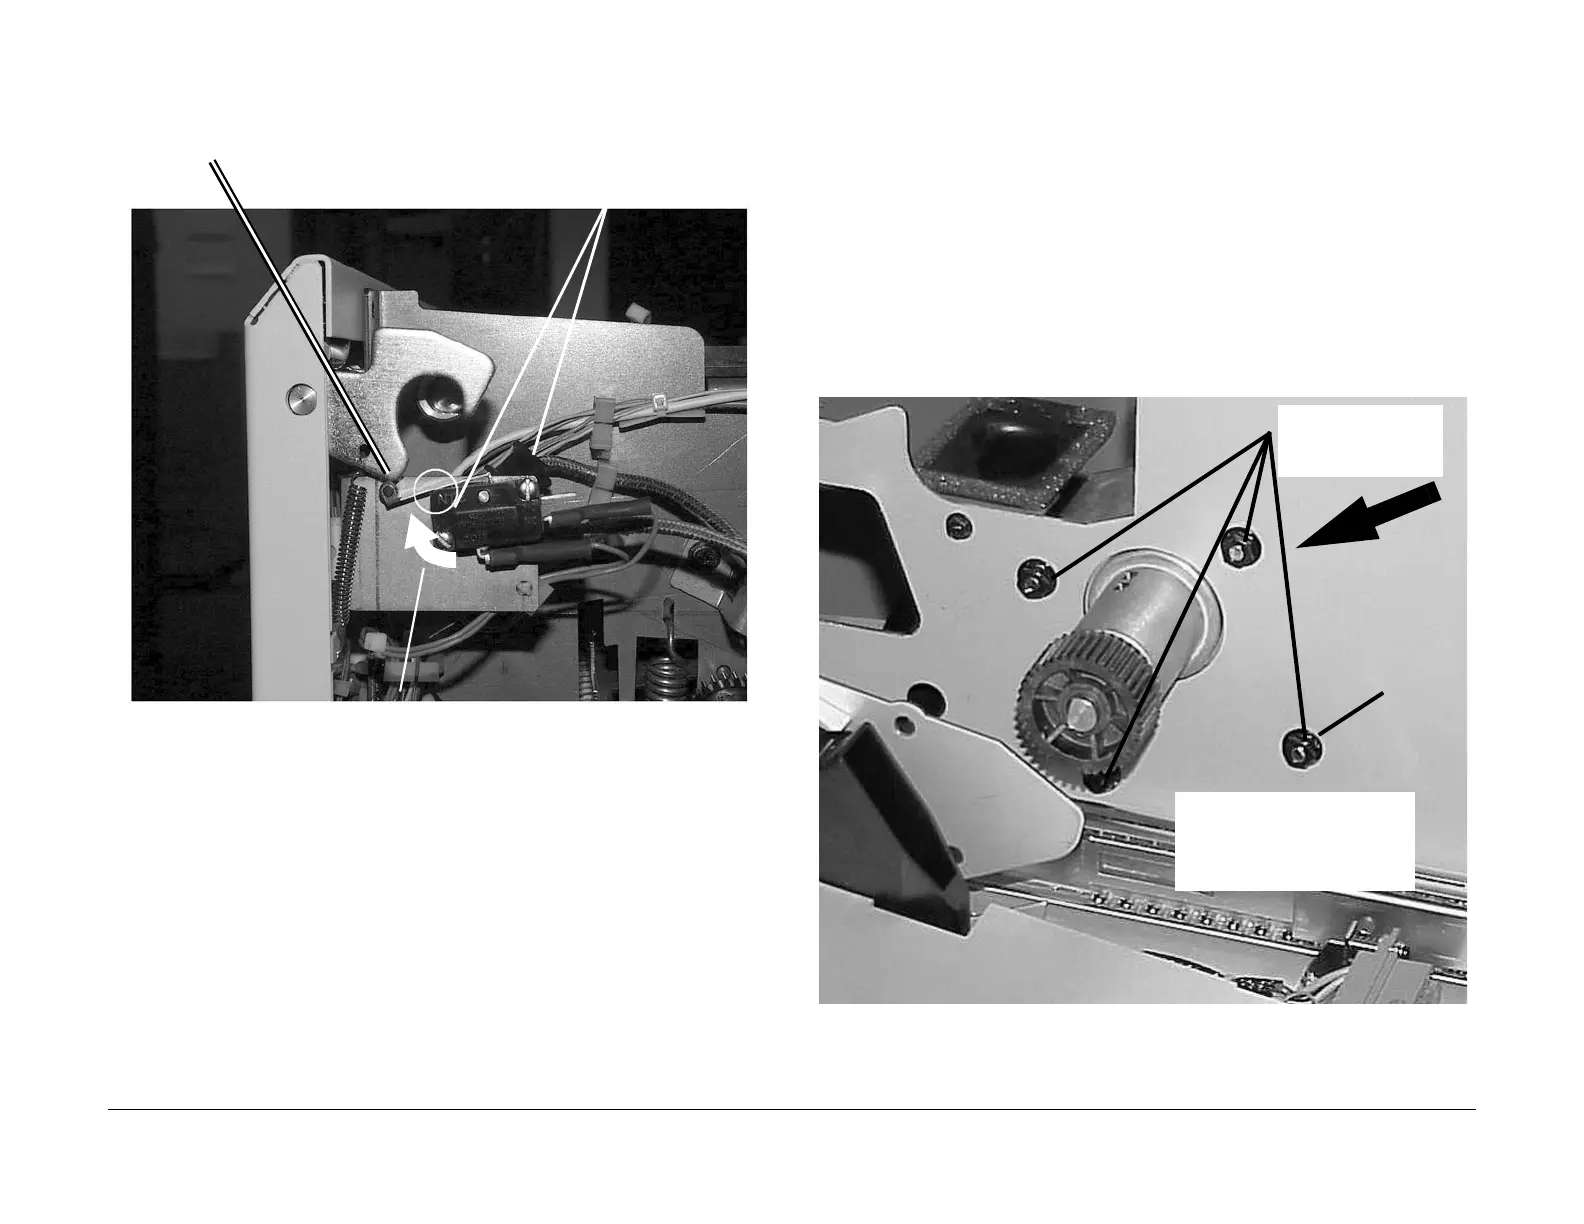
ADJ 10.3 Fuser Drive Motor
Adjustment
The purpose of this adjustment is to adjust the correct mesh between the Fuser Drive Gear
and the gear on the Heat Roll to provide a positive Fuser drive.
WARNING
Switch off the Main Power Switch. Disconnect the Power Cord
1. Cut two strips of 20 lb. (80 gsm) paper into 1.5 by 6 inches (38 by 150 mm) strips.
2. Remove the Xerographic Module (REP 9.1). Leave the Fuser Drawer open in order to
access the Fuser Drive Motor mounting nuts
3. (Figure 1): Prepare the Fuser Motor for adjustment.
NOTE: The pivot point will be around the bottom front nut. The other three mounting
points are in slots in the frame.
Figure 1 Preparing the Fuser For Adjustment
1
Pivot the body of the switch upwards
until it touches the actuator arm
2
Hold the switch in this adjusted
position and tighten down the two
mount screws
Switch Actuator Arm
1
Loosen the four nuts
and rotate the motor
fully down
2
Finger tighten the four nuts so
that the Motor is against the frame
and can just be moved
Pivot Point
 Loading...


