03/2003
4-157
8850/ 510DP
ADJ 10.3
Repairs and Adjustments
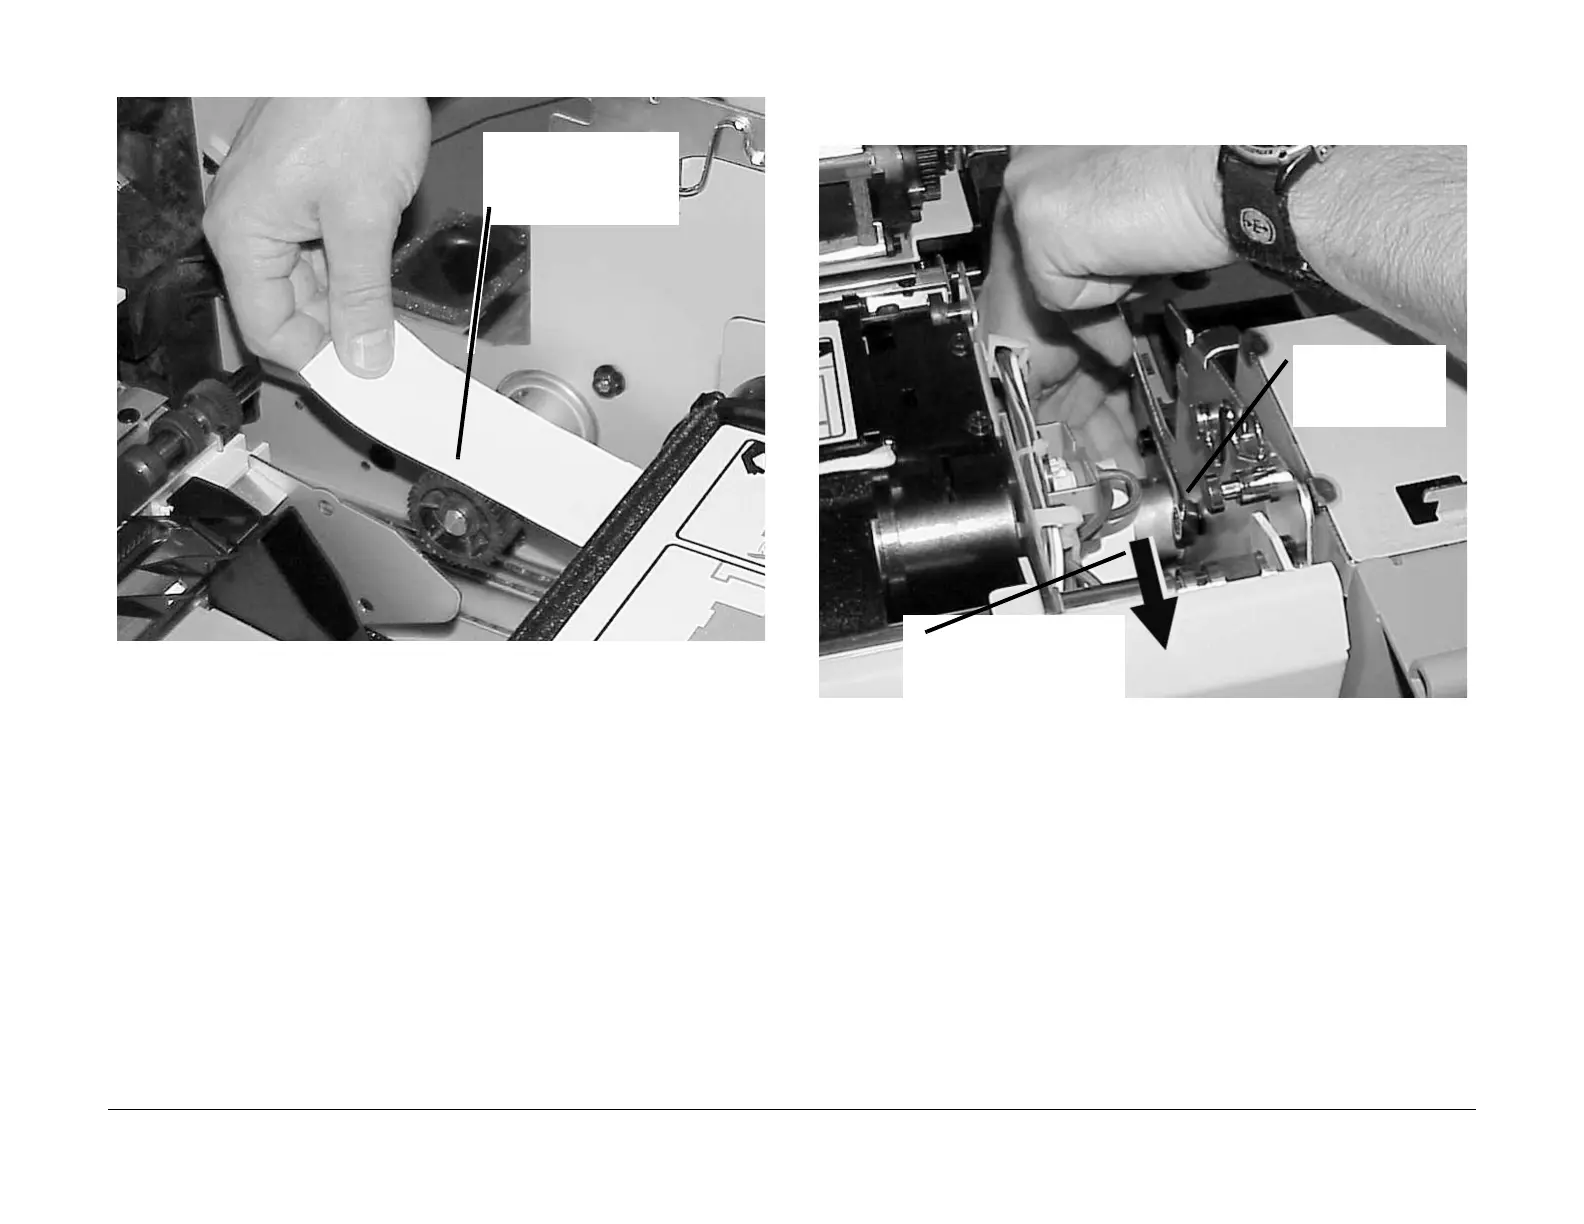
4. (Figure 2): Position the strips of paper.
Figure 2 Positioning the Paper Strips
5. (Figure 3): Adjust the mesh of the Fuser Drive Gears.
NOTE: Do not pull the gears together by pulling on the Fuser Dive Motor. Pull on the alu-
minum extrusion near the drive gear or on the Drive Gear. Pulling on the Motor could
cause an uneven mesh between the gears
Figure 3 Adjusting the Mesh of the Fuser Drive Gears
6. Open the Fuser Drawer and tighten the four nuts.
7. Check the paper, the gears should have indented the paper with out tearing the paper. If
the paper is torn, repeat the adjustment using less force when pulling the gears together.
8. Close the Fuser Drawer.
9. Check for movement between the Fuser Drive gears.
a. Hold the Gear that is on the Heat Roll from moving.
b. Rotate the drive gear on the Fuser Motor, there should only be slight movement of
the gear relative to the gear on the Heat Roll.
c. Rotate the drive gear a quarter turn by spinning the Fuser Motor Shaft and repeat
steps a and b again.
d. Rotate the drive gear another quarter and repeat steps a and b.
1
Hold the two sheets of
paper on the Drive Gear
and close the Fuser Drawer
1
Pull the Fuser Drive Motor by
the casting extension and hold
the against the Fuser Gear
2
Tighten the nut while
holding the gears
together
 Loading...


