October 2012
4-68
ColorQube 8570/8870 Service Manual
REP 4.2
Revised, 3rd Revision - Xerox Internal Use Only
Repairs and Adjustments
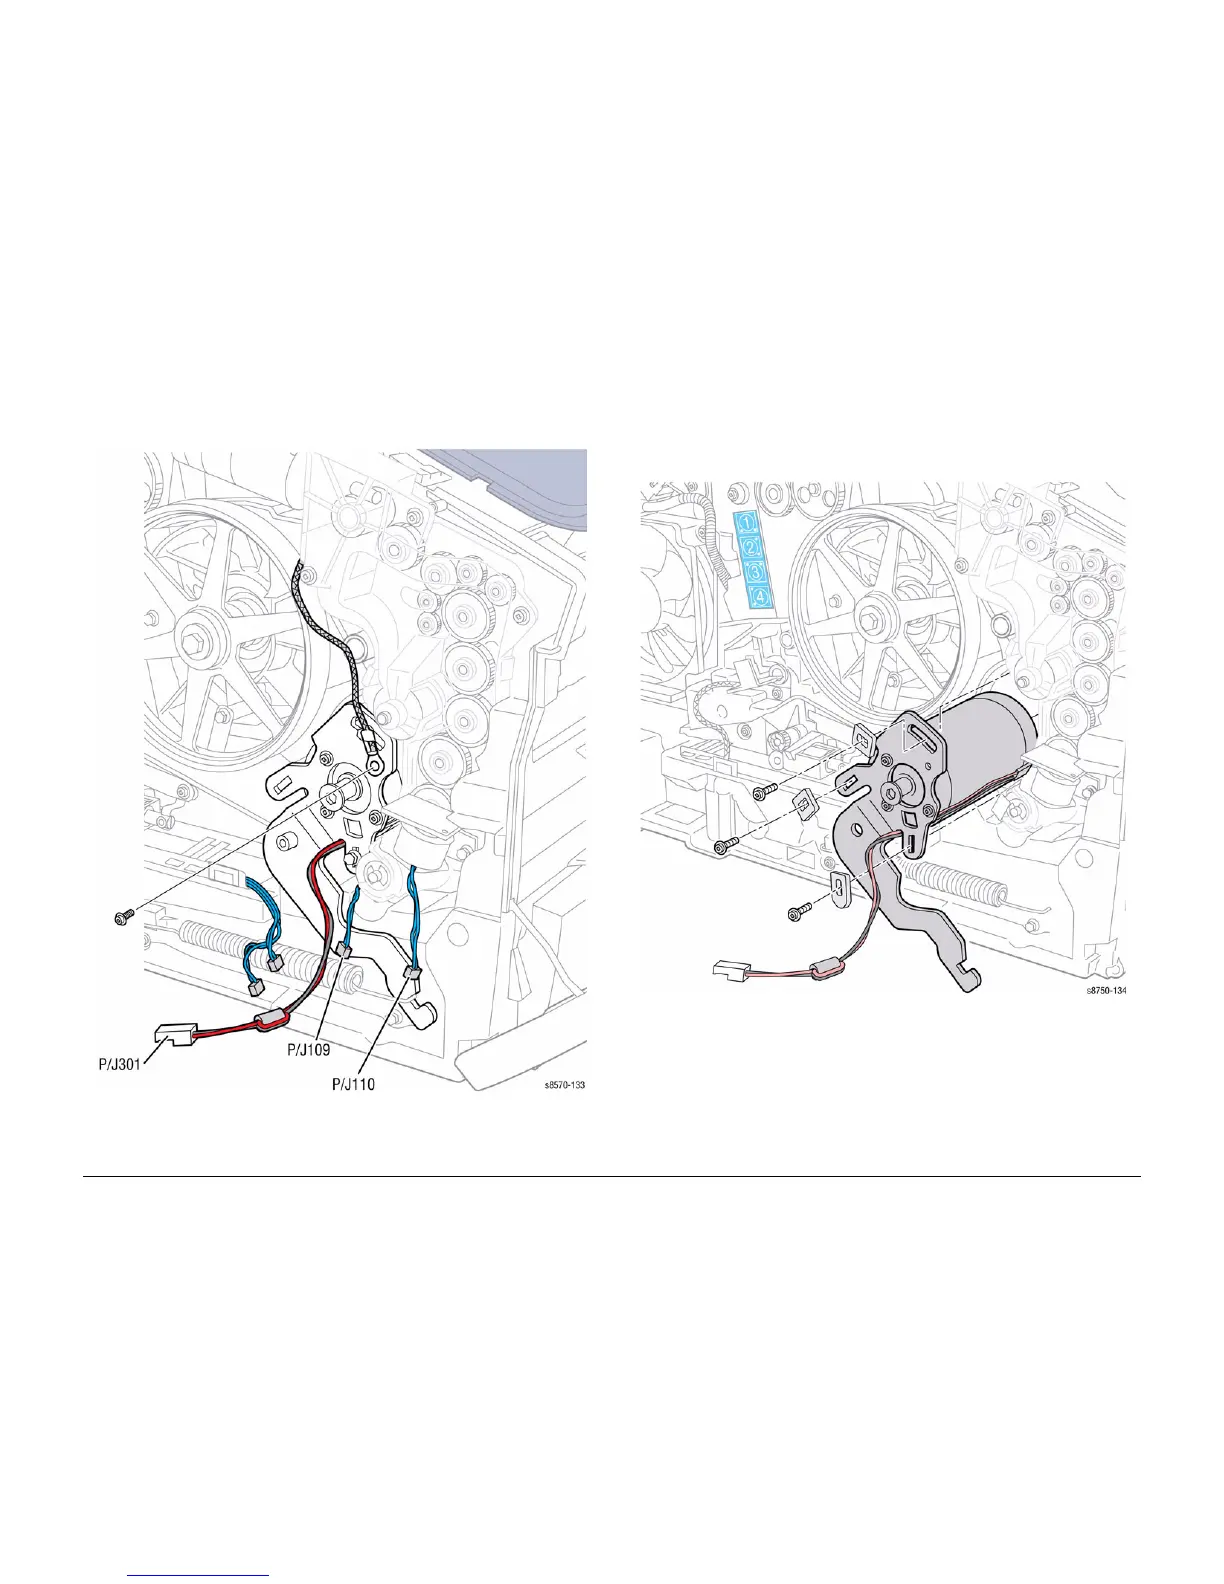
7. Disconnect the Y-Axis Motor wiring harness connector P/J301 from the Electronics Mod-
ule and remove the wiring harness from the cable guide.
8. Disconnect the Tray 2 Pick Clutch wiring harness connector P/J109 and Tray 1 Pick
Solenoid wiring harness connector P/J110 from the Left Side Harnesses.
Figure 2 Y-Axis Disconnecting Wiring Harness Connectors
9. Release the wiring harness from the retainers in the chassis.
NOTE: Observe the routing of the Y-Axis Motor harness. The harness exits the motor
cavity through the notch provided at the bottom of the mount.
10. Remove 3 screws (plastic, T-20), and 2 screws (metal, T-20) with ground connections
from the Spring Arm and slide the Y-Axis Motor Assembly out of the chassis.
Figure 3 Removing the Y-Axis Drive Assembly
 Loading...


