October 2012
3-25
ColorQube 8570/8870 Service Manual
IQ18
Image Quality
Xerox Internal Use Only - Revised, 3rd Revision
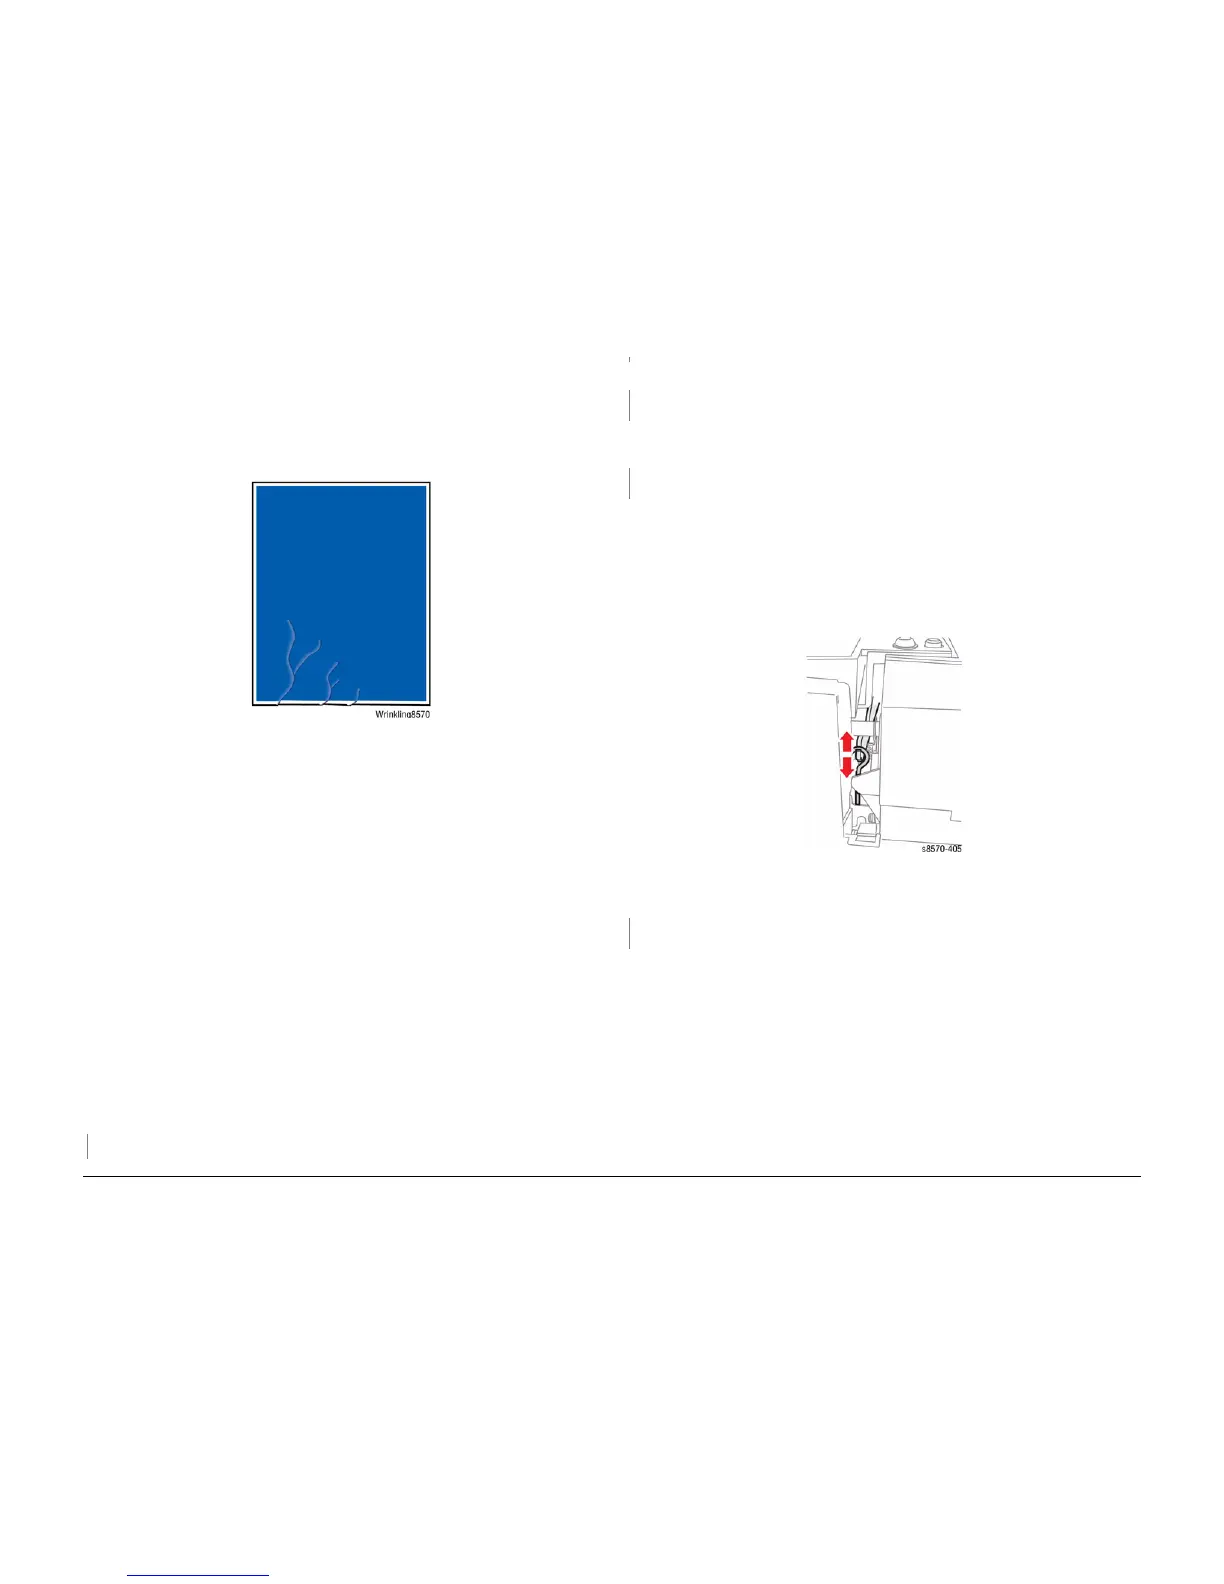
IQ18 Media Wrinkling or Damage
Wrinkling generally appears in areas of solid fill near the image edge. This problem is more
often seen on short-grain media. Some wrinkling of envelope flaps is expected. You may see
wrinkling on the second side of a 2-sided print on solid prints. Wrinkling could indicate a mal
-
function in the Transfix mechanism.
Figure 1 Wrinkling
Initial Actions
1. Check that supported media is being used. Damp, moisture-laden paper may wrinkle and
curl following printing
2. Print several solid-fill test prints as a sample.
3. Print using a higher-quality or heavier media type; try different ream of media.
Troubleshooting Reference
Applicable Parts (Chapter 5 - Parts List)
• Control Panel Cover, PL 1.1 Item 5
• Drum Maintenance Unit, PL 1.1 Item 16
• Transfix Camshaft, PL 2.1 Item 12
• Stripper Carriage Assembly, PL 2.1 Item 13
• Transfix Roller, PL 2.1 Item 14
• Transfix Load Module, PL 2.1 Item 16
• Preheater and Deskew Assembly, PL 2.1 Item 20
• Transfix Arm Kit, PL 2.1 Item 21
• Lower Inner Duplex Guide, PL 3.1 Item 2
Procedure
Suggest increasing the margin size of the image. Does the error persist?
YN
Troubleshooting complete.
Suggest printing high coverage pages as 1-sided job. Does the error persist?
YN
Troubleshooting complete.
Check the Drum Maintenance Unit. Inspect, clean, or replace the Drum Maintenance Unit
(REP 1.16).
Does the error persist?
YN
Troubleshooting complete.
Check the Transfix components. Verify that the Transfix Load is working. Check the Transfix
Arm movement.
1. Remove the Control Panel Cover (REP 1.5).
2. Remove the Lower Inner Duplex Guide (REP 3.2).
3. Close the Front Door. While printing a test print page, look through the gap on each side
between the printer frame and the Front Door and check to see if the Arm moves up or
down. Replace the Load Arms (REP 2.21) if no visible movement.
Figure 2 Checking the Transfix Arm
Does the error persist?
YN
Troubleshooting complete.
Check for media damage caused by the Stripper Carriage Assembly. Replace the Stripper Car-
riage (REP 2.13) if necessary.
Replace the parts in the following order:
• Transfix Roller (REP 2.13)
• Transfix Camshaft (REP 2.12)
• Transfix Load Arms (REP 2.21)
• Transfix Load Module (REP 2.16)
If image is very skewed on the page, replace the Preheater and Deskew Assembly (REP 2.20).
Check the Preheater and Deskew Assembly is operating correctly. The upper plates on the
Preheater should lay flat and not overlap. Replace the Preheater (REP 2.20) if necessary.
A
A
 Loading...


