October 2012
4-78
ColorQube 8570/8870 Service Manual
REP 4.10, REP 4.11
Revised, 3rd Revision - Xerox Internal Use Only
Repairs and Adjustments
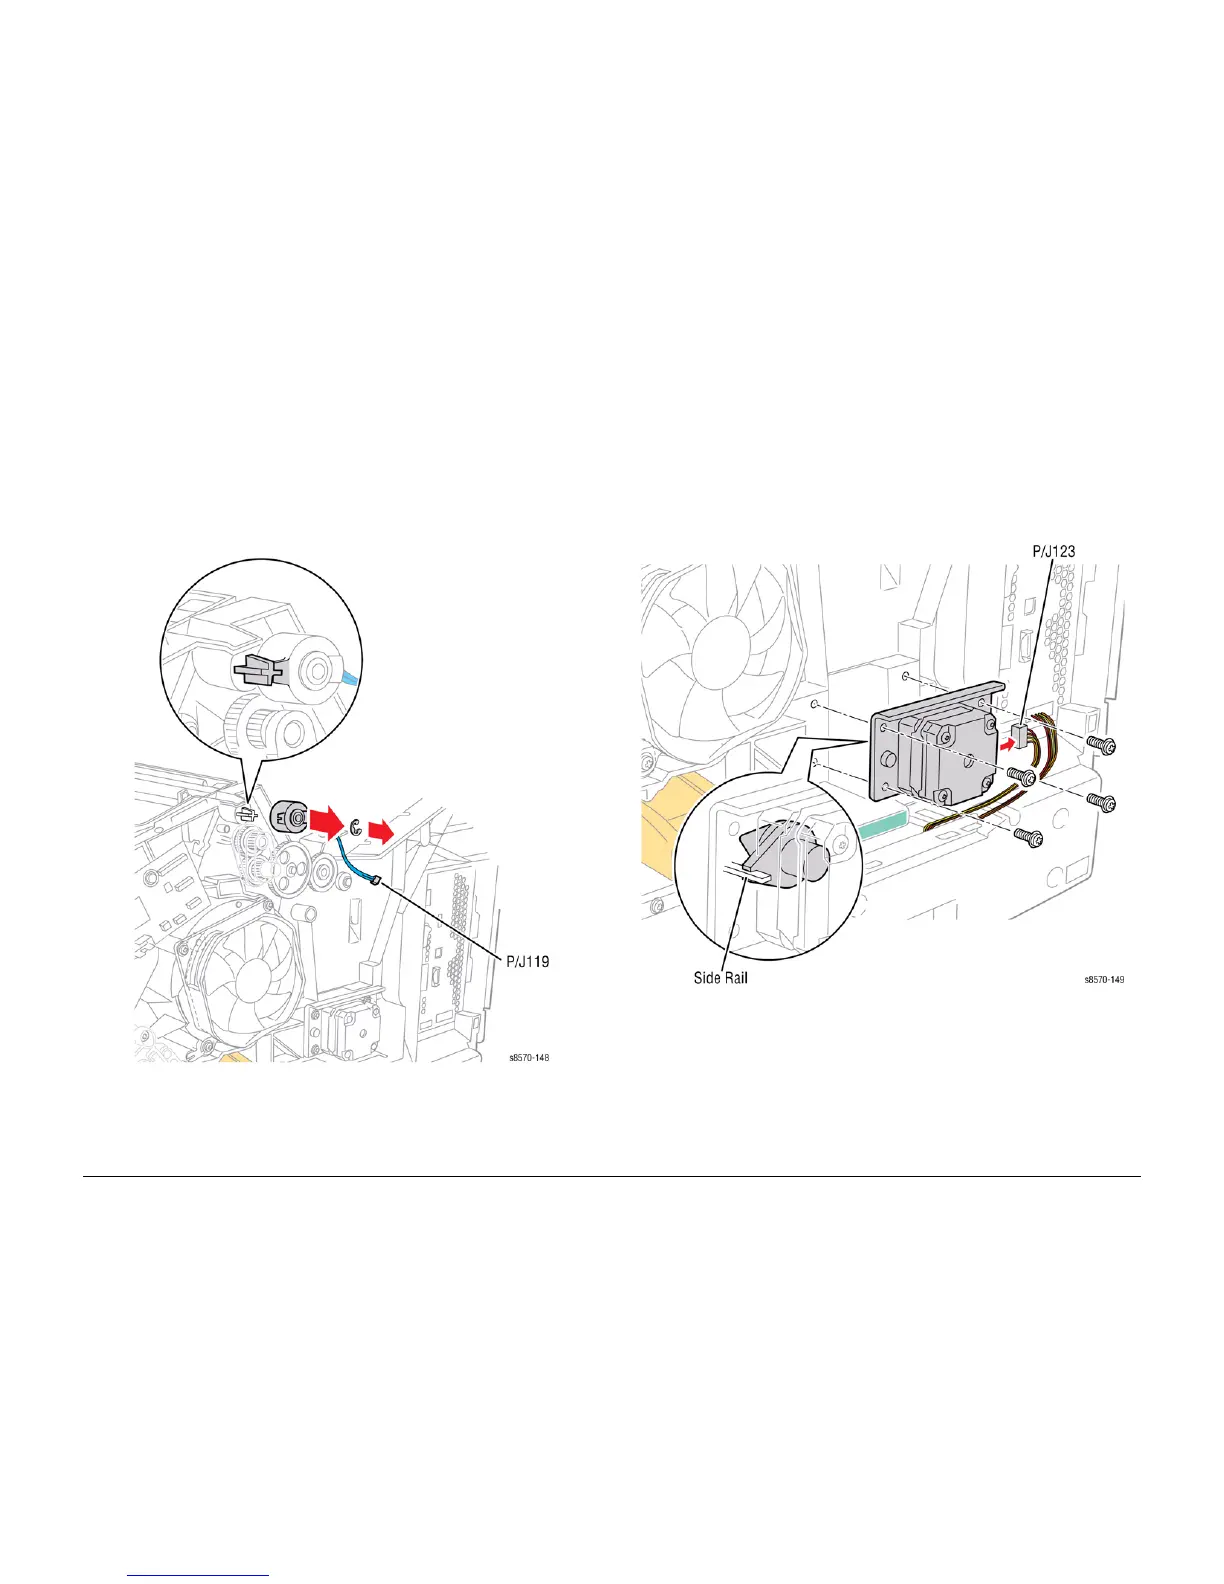
REP 4.10 Head Maintenance Clutch
Parts List on PL 4.1 Item 10
Removal
1. Remove the Control Panel Cover (REP 1.5).
2. Remove the Right Side Cover (REP 1.11).
3. Disconnect the Head Maintenance Clutch wiring harness connector P/J119 from the wir-
ing harness.
4. Remove the KL-Clip.
5. Remove the Head Maintenance Clutch.
Figure 1 Removing the Head Maintenance Clutch
Replacement
Perform the Homing the Printhead Forward to Print Position procedure (ADJ 1.2) and Process
Drive Alignment procedure (ADJ 1.3) before restoring printer power.
REP 4.11 X-Axis Motor
Parts List on PL 4.1 Item 11
Removal
1. Remove the Control Panel Cover (REP 1.5).
2. Remove the Right Side Cover (REP 1.11).
3. Disconnect the X-Axis Motor wiring harness connector P/J123 from the Motor.
4. Remove 4 screws (plastic, T-20) that secure the motor to the frame.
5. Remove the X-Axis Motor.
Figure 1 Removing the X-Axis Motor
Replacement
Engage the fork extending from the cone-nut of the Motor Assembly with the chassis rib as
shown in Figure 1. Also, slip the mounting plate behind the ground strap and replace the cable
retainer on the lower right screw. Perform the Homing the Printhead Forward to Print Position
procedure (ADJ 1.2) and Process Drive Alignment procedure (ADJ 1.3) before restoring printer
power. Note, do not over tighten the screws as the holes in the chassis strip out easily.
 Loading...


