5-37
POWR
E
CRANK SHAFT AND PISTON
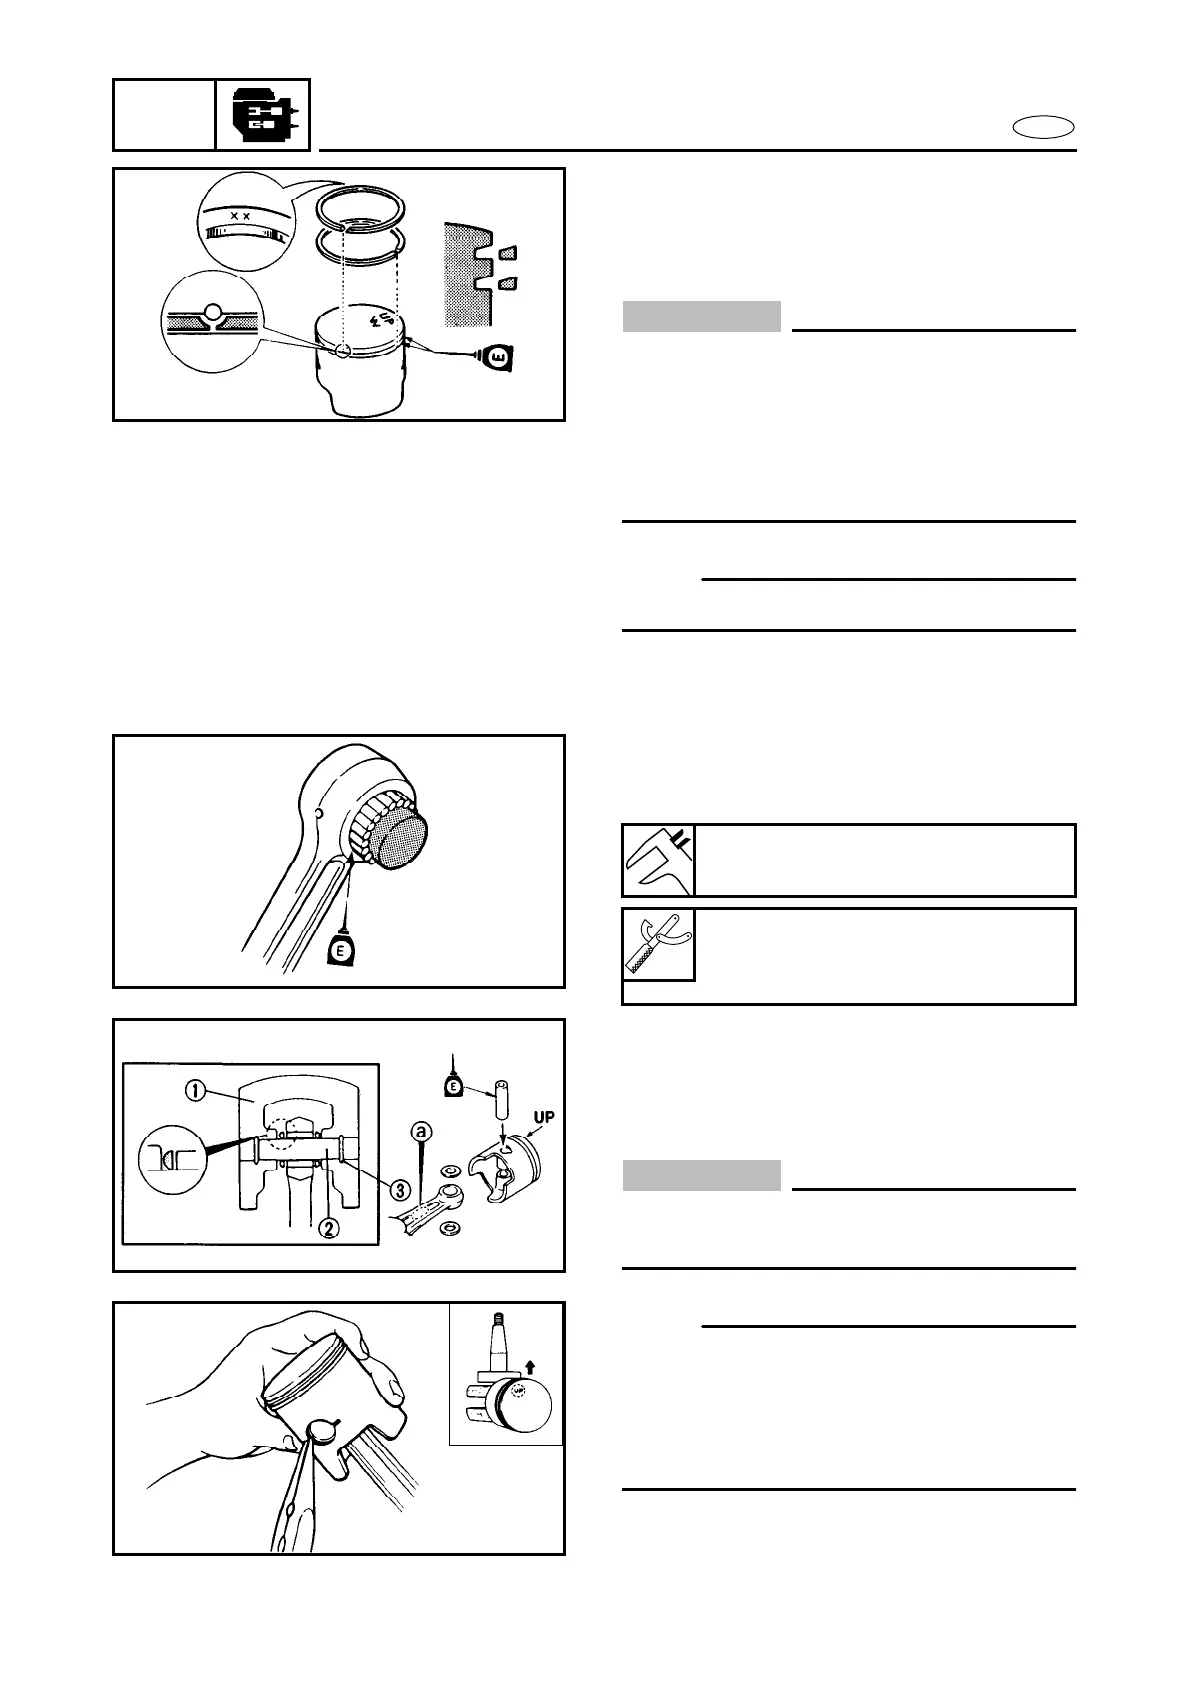
Piston and piston ring installation
1. Install:
●
Piston ring (2nd)
●
Piston ring (top)
CAUTION:
●
Take care not to scratch the piston or
break piston rings.
●
Align the each ring end gap with their
locating pins.
●
After fitting the rings, check that they
move smoothly.
NOTE:
Piston rings should be replaced as a set.
Crankshaft and piston installation
1. Install:
●
Small end bearing needle
2. Install:
●
Piston
1
●
Piston pin
2
●
Piston pin clip
3
CAUTION:
Do not allow the clip open ends to meet
the piston pin slot.
NOTE:
●
Mold mark
a
faces in the same direction
as the “UP” mark on the piston.
●
When no piston is replaced, be sure to re-
install the pistons in their original cylin-
der.
Needles per piston:
31 pieces
Small end bearing needle
installer:
YB-06106/90890-06526