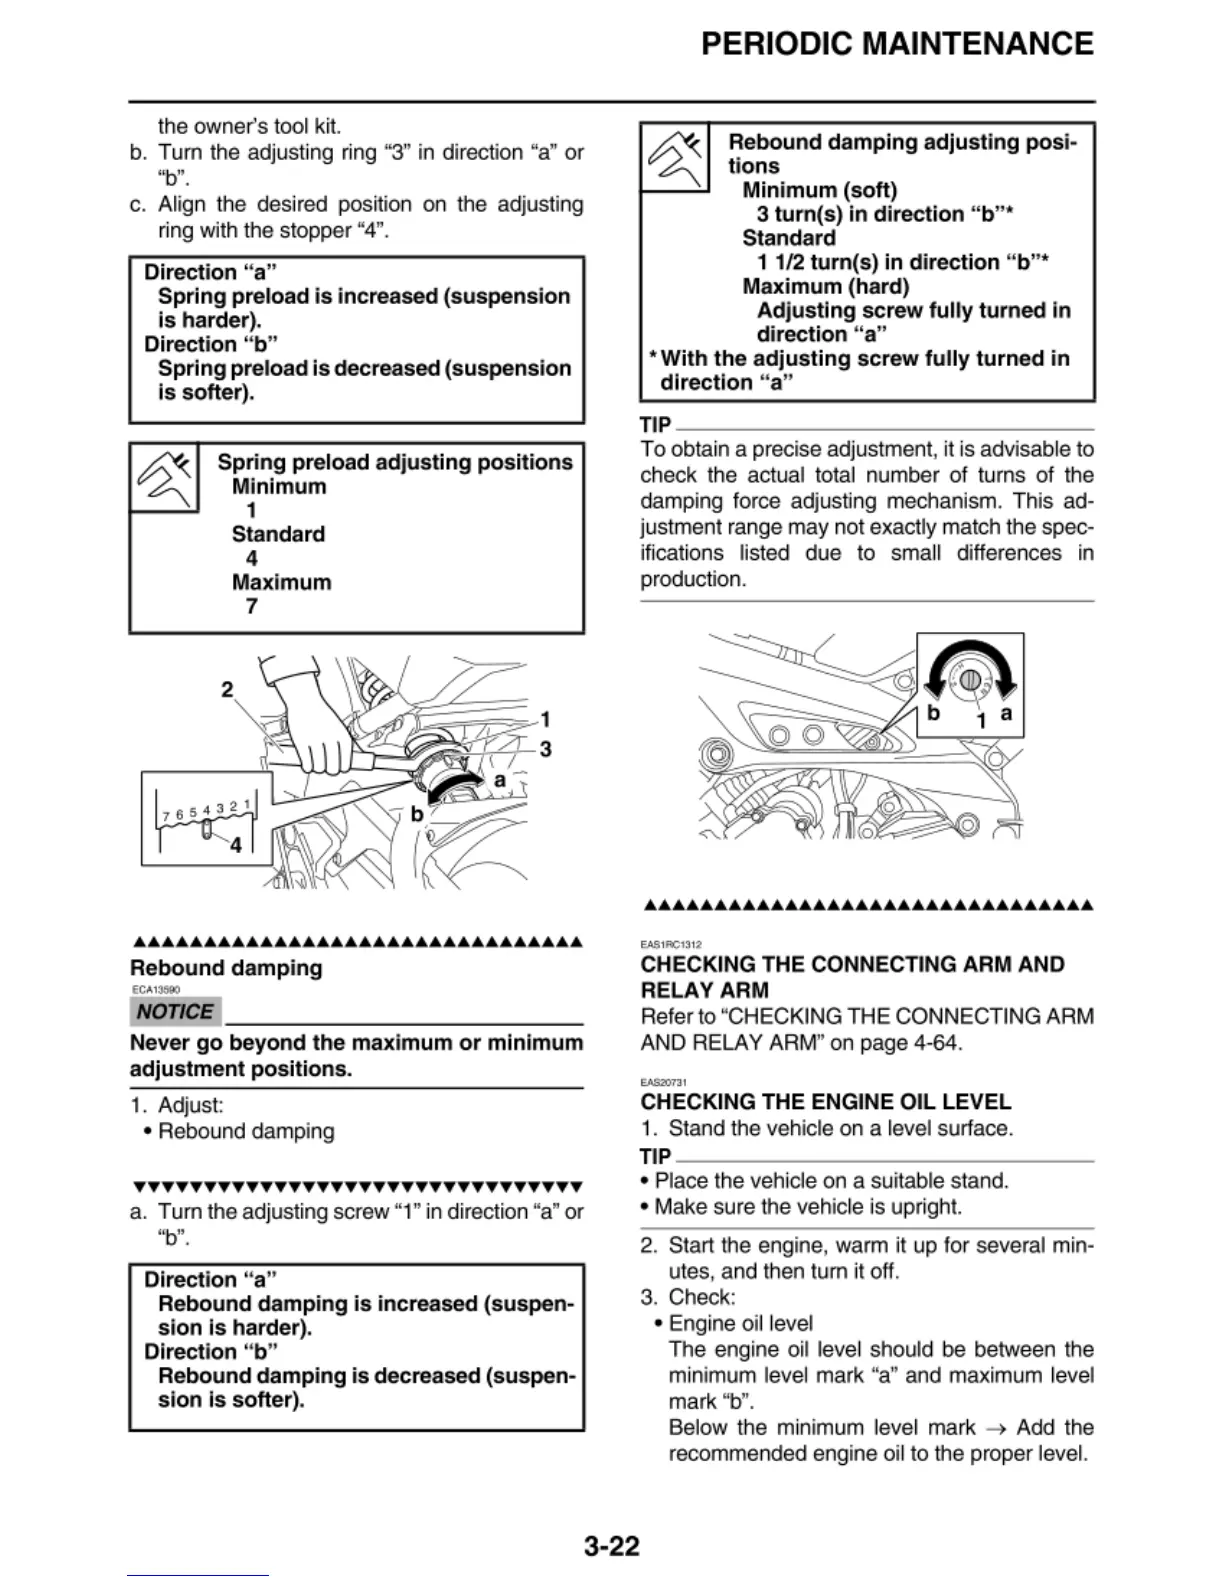
the owner's tool ki
t.
b. Tum the adjusting ring "3" in dir
ec
tion "a" or
"b".
c. Align t
he
desired position on t
he
adjusti
ng
ri
ng with the stopper
"4".
Direction "
a"
Spring
preload
is
increased (suspension
is
harder).
Direction "b"
Spring
preload is decreased (suspension
is
s
ofter
).
Spring
preload adjusting
positions
Mi
nimum
1
Standard
4
Maxi
mum
7
••••••••••••••••••••••••••••••••
Rebound
damping
NOTICE
~~~~~~~~~~~~~~
Never
go
beyond
the maximum
or
minimum
adjustme
nt
positions.
1. Adjus
t:
• Rebound damping
YYTTTYTTTYYTTTYTTTYYTTYYTTTYTTTY
a. Tum the adjusting screw "1"
in
direction "a" or
''
b
".
Direction "a"
Rebound
damping
is
increased (suspen-
sion
Is
harder
).
Direction "b"
Rebound
damping
is decreased (suspen-
sio
n
Is
softer).
PERIODIC MAINTENANCE
Rebound damping adjusting
posi
-
tions
Minimum (soft)
3
turn(s
)
in
d
irect
ion
"b
"*
Standard
1 1/2
tu
rn(s)
in
direction " b" *
Maximum (hard)
Adjusting screw
fully
tu
rned In
di
rect
ion
"
a"
*
With
th
e
adjusting
screw
fully
turn
ed
in
direction
"a"
TIP
~~~~~~~~~~~~~~
To obtain a precise ad
ju
stment, it is advisable to
check the actual total number of turns of the
damping force adjust
in
g mechani
sm
. This ad-
ju
stment range may not exactly match t
he
spec-
ifications listed due to sma
ll
differences in
production.
E.A$1AC1:)12
CHECKING THE CONNECTING ARM AND
RELAY ARM
Refer to "CHECKING THE CONNECTING ARM
AND RELAY ARM" on page 4
-64.
''
'"'°"'
CHECKING THE ENGINE OIL LEVEL
1.
Stand the vehicle on a level surface.
TIP
~~~~~~~~~~~~~~
• Place the vehicle on a
su
itable stand.
• Make sure the vehicle is uprigh
t.
2.
Start the engine, warm it up f
or
several min-
u
tes,
and then tum it off.
3. Check:
•
Eng
ine oil level
3-22
The engine oil level should be between the
minimum level mark "a" and maximum level
mark
"b".
Be
low the m
in
imum level mark -> Add the
recommended engine oil to the proper leve
l.



 To Next Page