<11. MAINTENANCE>
11-4
IM 01E30D01-01EN
11.2.2 AmplierReplacement
IMPORTANT
Incaseofamplierreplacement,itisnecessary
to perform the parameter resetting.
For parameters, Read Chapter 6.
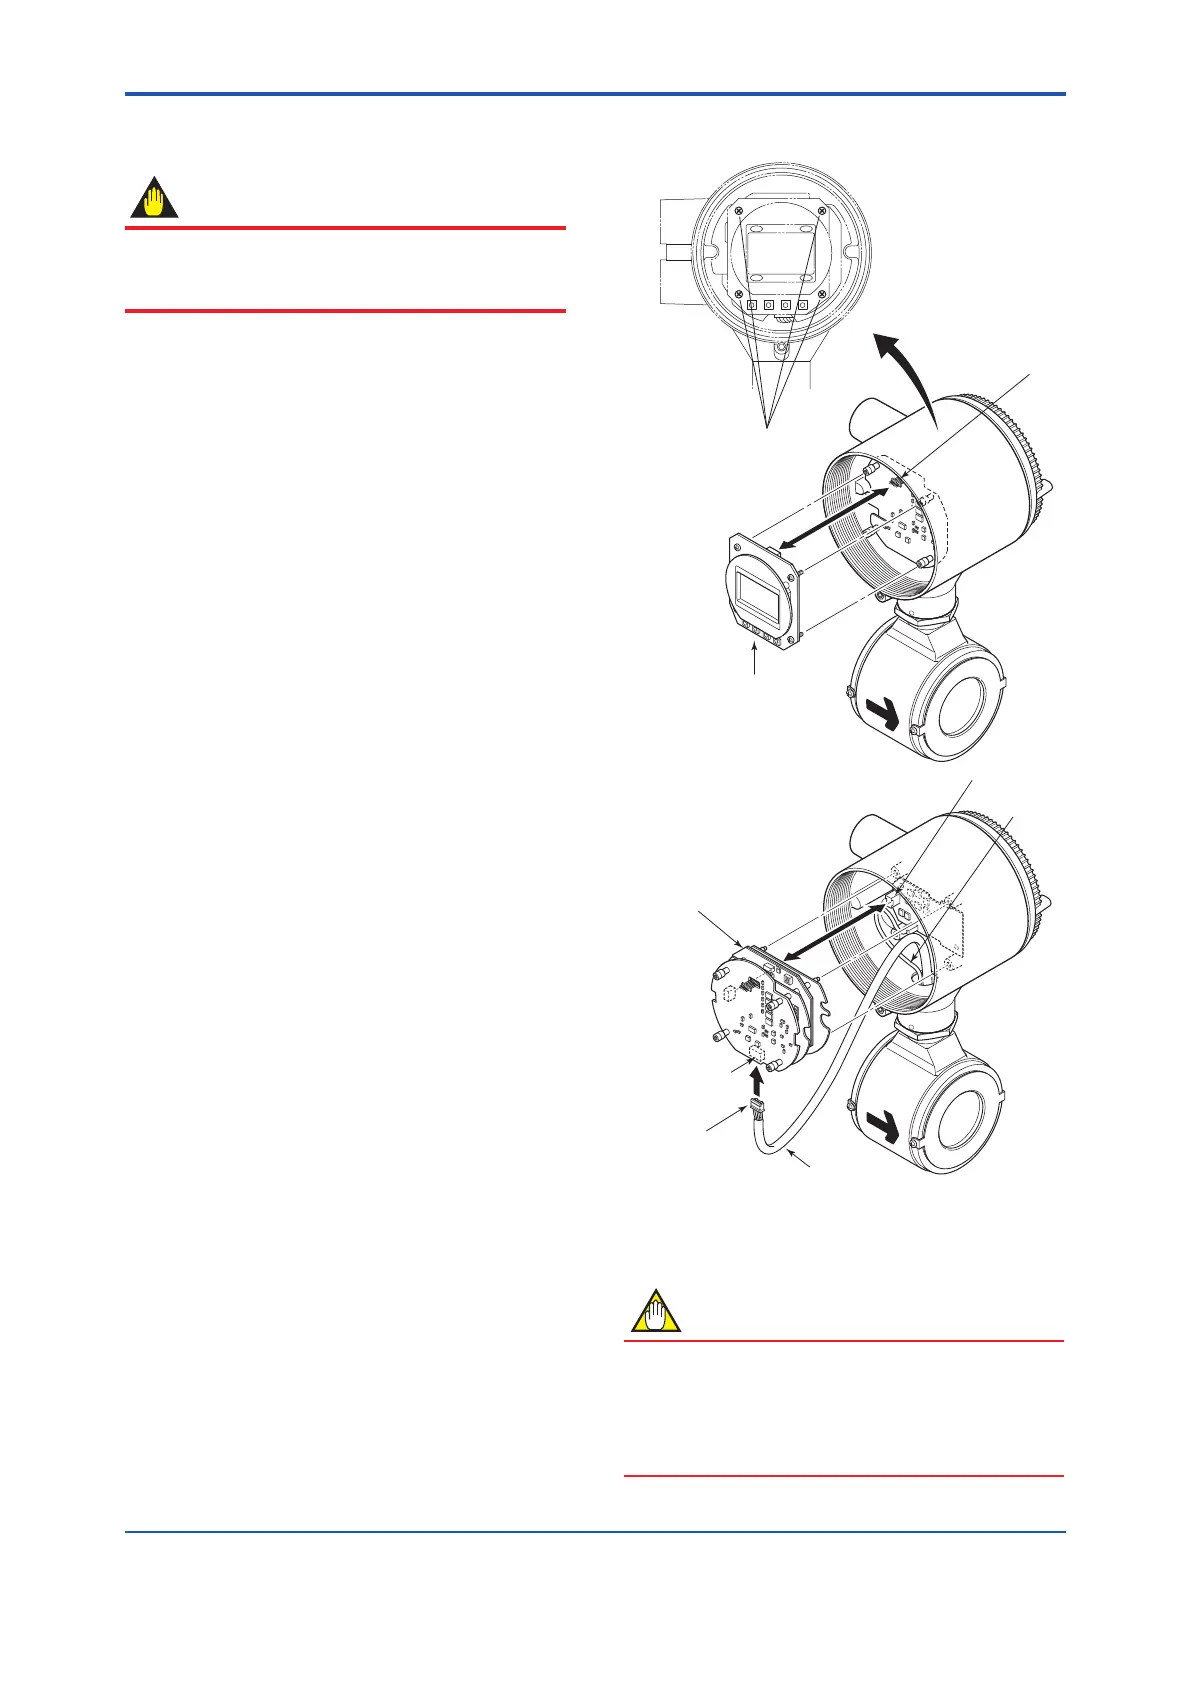
(1) RemovingtheAmplierAssembly
(1) Turn off the power.
(2) Remove the cover.
(3) Hold the display unit with your hand and
loosen the four mounting screws. Remove the
connector 1 by pulling it in a straight, taking
care not to damage it (Read Figure 11.2.5).
(4) Loosen the four mounting hexagonal screws
using a hexagonal socket driver (nominal size
5.5).
(5) Removetheamplierassemblycarefullyata
crawl in a straight, taking care not to damage
the connector 2 and 3.
(6) Holdtheamplierassemblywithyourhandand
remove the connector 3 carefully by holding
bothsidesofitwithyourngers(claws).
Do not apply excessive force to the connector 4
during this work at this time.
(2) AssemblingtheAmplierAssembly
(1) Toreplacetheamplierassembly,followthe
procedures used to remove it in the reverse order.
(2) Carefully connect the cable 1 to the connector
4, making sure that the connectors’ direction
are correct.
(3) Replacetheamplierassemblybypushingitin
the converter with folding back the cable 1 and
2, taking care not to entangle these tow cables
during installing the hexagonal screws.
(4) Align the display unit in a straight with the
connector2facingtheconnectorofamplier
assembly and then make the required connection.
Take care not to entangle the connector 1 to the
shield board and the front cover when they are
installed.
(5) Install the four hexagonal screws on the
amplierassemblyusingahexagonalsocket
driver (nominal size 5.5).
(6) Align the display unit in a straight with its
connector located its backside facing the
connector 1 and then make the required
connection.
(7) Secure the display unit using its four mounting
screws.
F1107.ai
Display
Assembling the display
(4 screws)
Connector 1
Connector 2
Amplifier assembly
Cable 2
Cable 1
Connector 4
Connector 3
Figure11.2.5 AssenblingtheAmplier
NOTE
Secure to display unit steadily when attaching to
theamplierassembly.
The instrument may damage caused by
vibration of piping, etc… under its operation if the
screwing up work was not enough.
 Loading...