40 Start-up
Note: The language selected on the Language tab is used only in the web UI of the
NETA-21. Monitored devices can have their own independent language selectors.
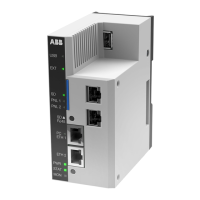
Setting the location of the NETA-21
Note: You can change the locale settings, if you have the access rights of Drive expert,
Network admin or Tool admin.
To set the location of the NETA-21, go to Settings –> Locale –> Location.
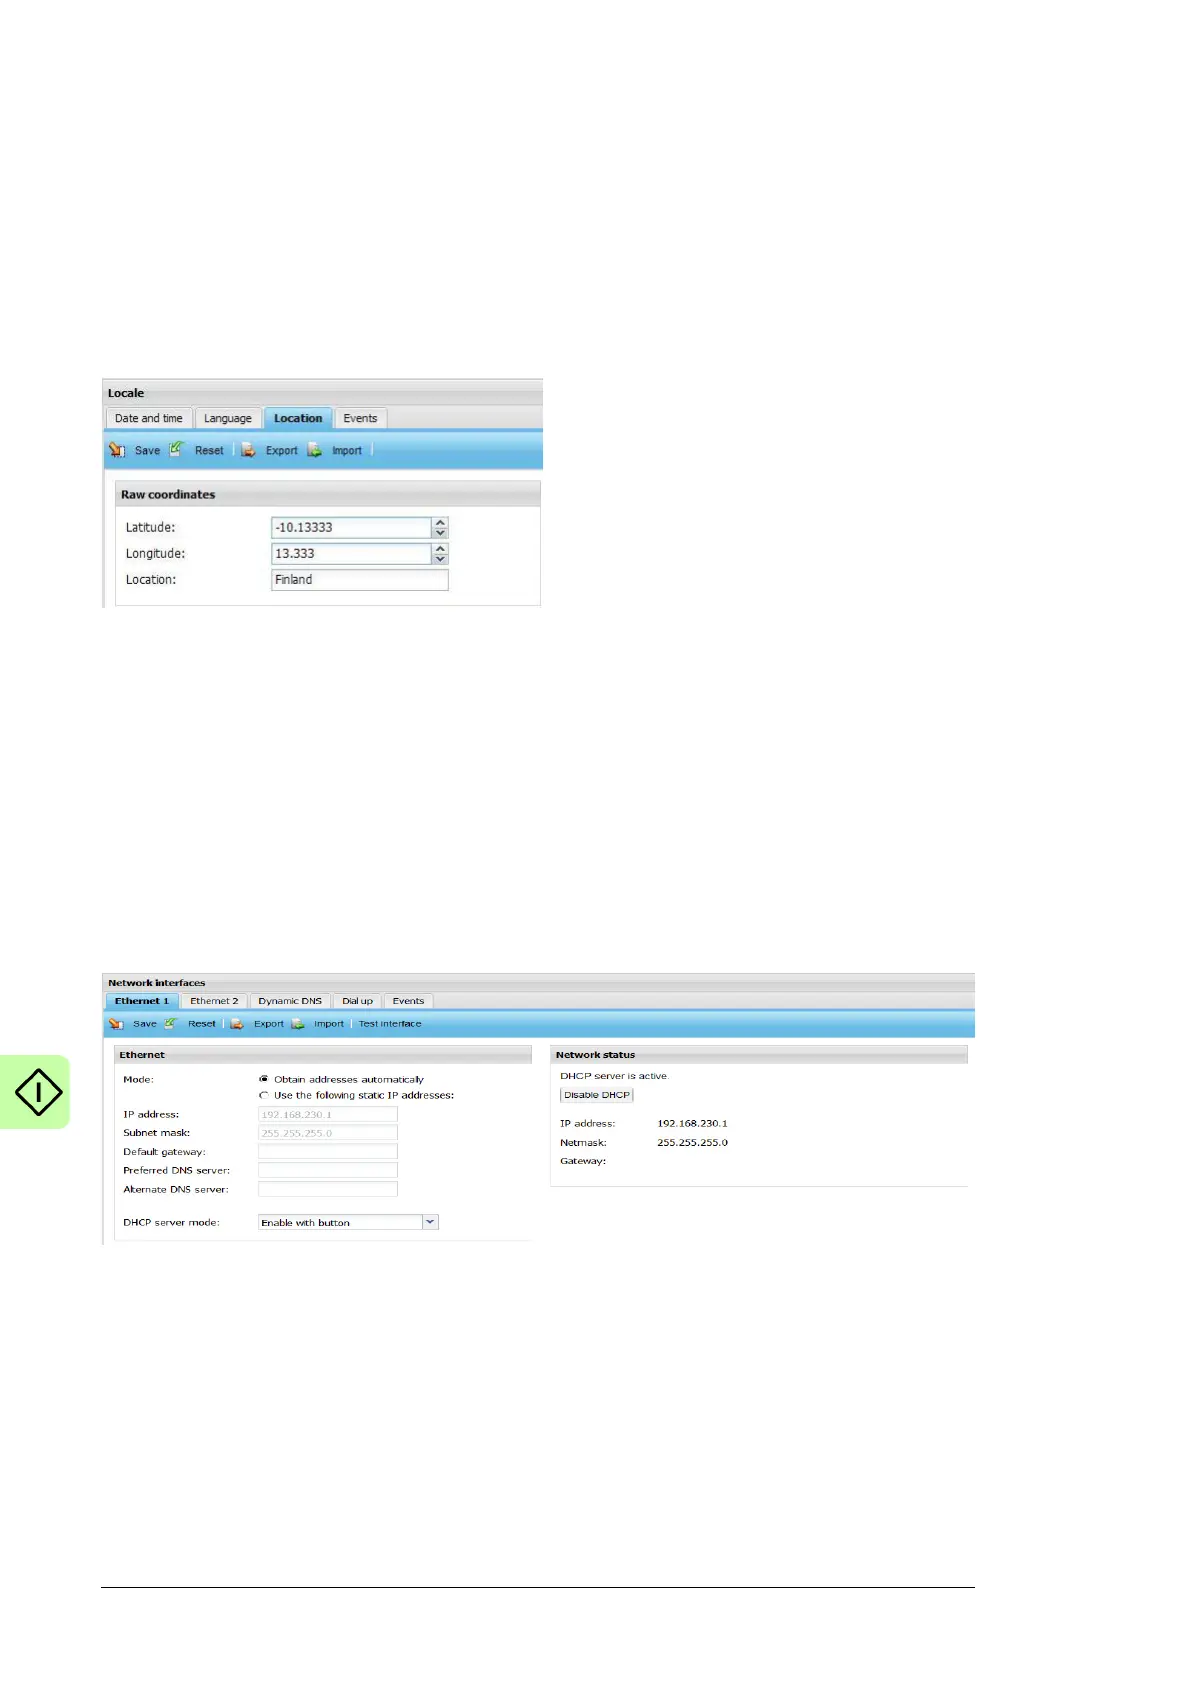
Defining the Ethernet network settings
1. Go to Settings –> Network interface and enable the Obtain DNS server
automatically function.
The NETA-21 adjusts the communication settings automatically. Individual attributes
can be set separately.
Enable the function both for local Ethernet 1 connected to the PC ETH 1 connector
and external Ethernet 2 connected to the ETH 2 connector.
Note: From firmware version 2.12 onwards, the Ethernet settings are taken into use
directly after the settings have been saved. The NETA-21 shows a warning explaining
that connection can be lost if the IP address of the currently active connection is
changed.
2. From the DHCP server mode drop-down list, select the desired DHCP server mode.
The available options are:
• Disabled always
• Enable with button
• Enable during next reboot
• Enable always
3. Check the LAN settings of your PC.
Activate the following functions: Obtain an IP address automatically and Obtain
DNS server address automatically.