FOCUS 200 PLUS Installation and Setup Guide
5-8
Setting the Hard ID Number
Remember that the Hard ID number is not the system point number, but is used for communication with the
PID gateway. The Hard ID will be linked to a system point number during the programming of the point.
Also, once the Hard ID is programmed, it is permanent.
A DIP shunt is used to set the PID or COPID’s Hard ID number, which serves to identify the PID or
COPID to its gateway. The DIP shunt consists of a series of six conductive straps. The straps come in a
closed circuit condition, and are “broken” to produce an open circuit. Once programmed, the Hard ID
number is permanent. To change a Hard ID number, the DIP shunt must be removed from the socket
and another DIP shunt with the new Hard ID number must be inserted.
When assigning the Hard ID numbers, always start with the number 1 and continue numbering
consecutively (2, 3, 4, and so on). This will provide a faster gateway interrogation process.
The straps in a DIP shunt are numbered 1 through 6, with number 1 designated by a hole next to it
through which the shunt strap material can be seen. As an aid to proper positioning of the DIP shunt in
the socket, the strap numbers are printed on the PID board next to the socket.
Program the Hard ID by breaking the straps to produce a sum equal to the desired PID address.
Example:
Program address 16 by breaking straps 1 ,2, 3, 4, and 6. Strap 5 (16) would remain
unbroken.
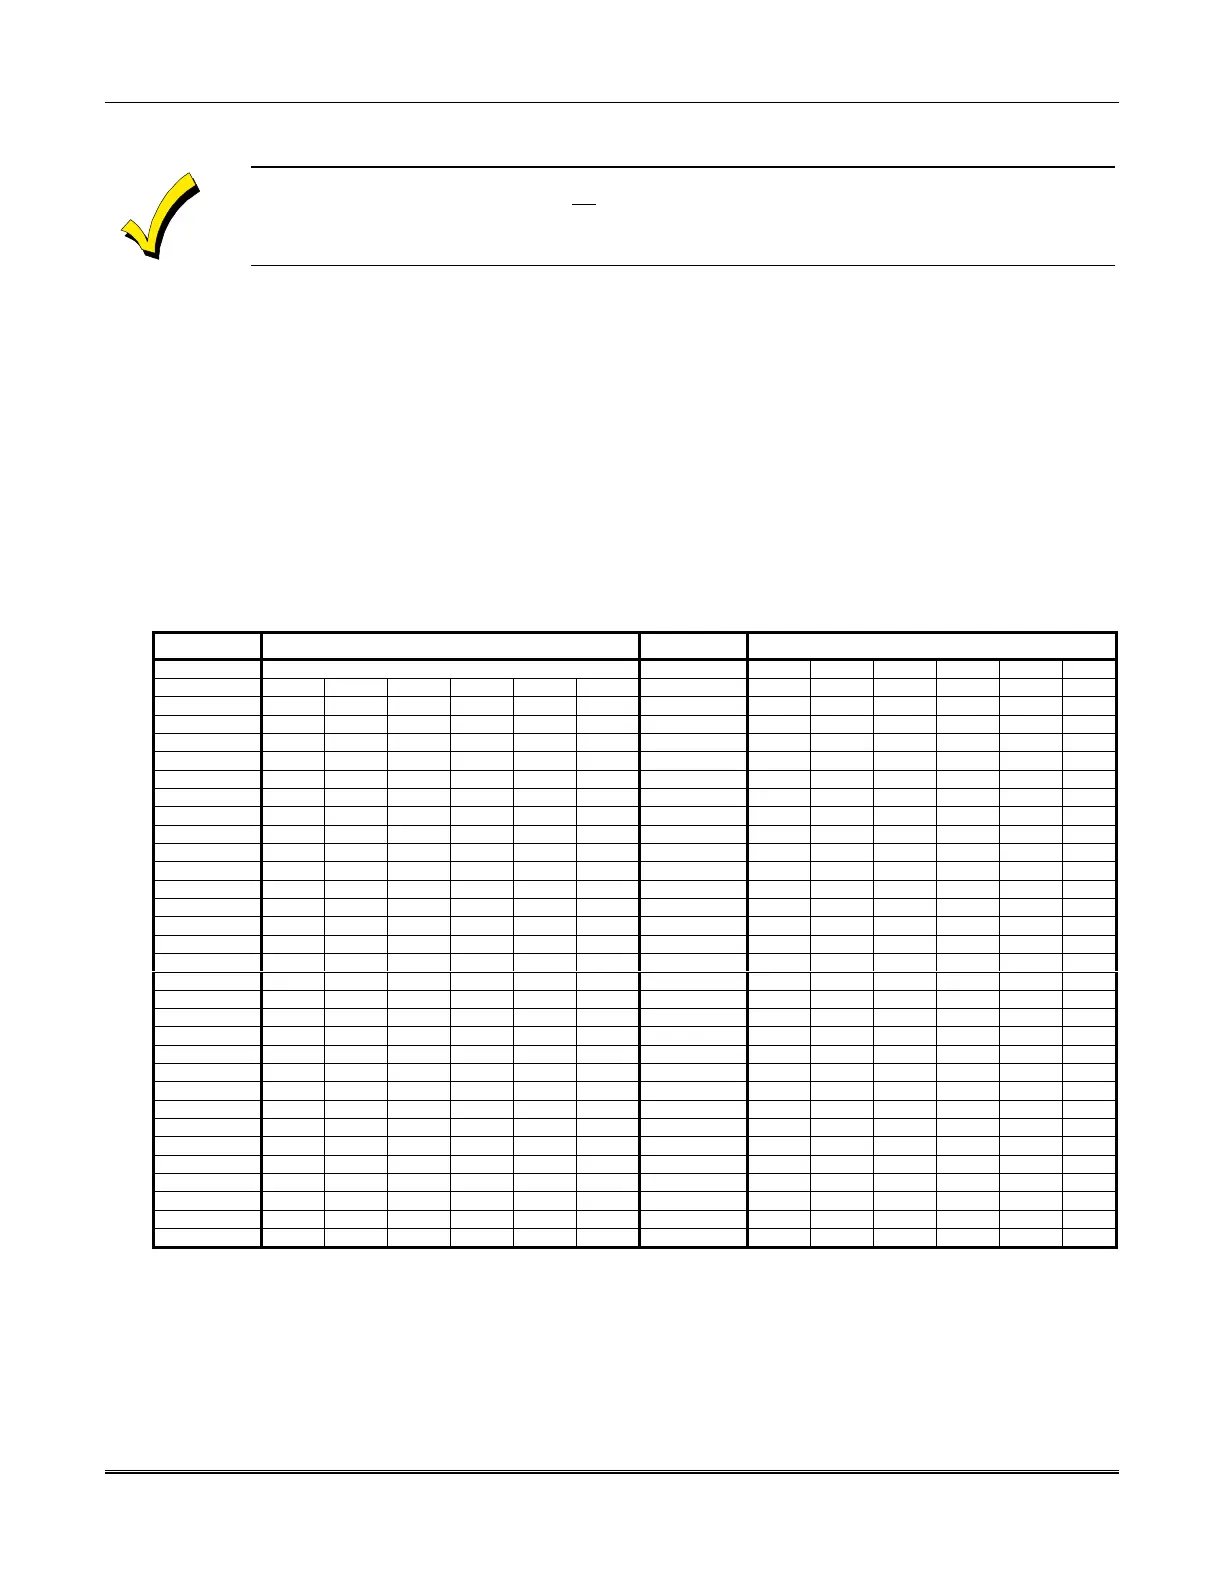
Table of DIP Shunt Numbers
Hard ID# Break DIP Shunt Number(s) Indicated Hard ID# Break DIP Shunt Number(s) Indicated
00 NOT USED 32 1 2 3 4 5 —
01 —23456 33 —2345—
02 1—3456 34 1—345—
03 ——3456 35 ——345—
04 12—456 36 12—45—
05 —2—4 5 6 37 —2—4 5—
06 1 — — 4 5 6 38 1 — — 4 5 —
07 — — — 4 5 6 39 — — — 4 5 —
08 123—56 40 123—5—
09 — 2 3 — 5 6 41 — 2 3 — 5 —
10 1—3—5 6 42 1—3—5—
11 — — 3 — 5 6 43 — — 3 — 5 —
12 12——56 44 12——5—
13 — 2 — — 5 6 45 — 2 — — 5 —
14 1 — — — 5 6 46 1 — — — 5 —
15 ———— 5 6 47 ———— 5—
16 1234—6 48 1234——
17 —2 3 4—6 49 —2 3 4——
18 1 — 3 4 — 6 50 1 — 3 4 — —
19 — — 3 4 — 6 51 — — 3 4 — —
20 1 2—4—6 52 12—4——
21 —2—4—6 53 —2—4——
22 1——4—6 54 1——4——
23 ———4—6 55 ———4——
24 1 2 3 — — 6 56 1 2 3 — — —
25 —2 3——6 57 —2 3———
26 1—3——6 58 1—3———
27 — — 3 — — 6 59 — — 3 — — —
28 1 2 — — — 6 60 1 2 — — — —
29 —2———6 61 —2————
30 1 — — — — 6 62 1 — — — — —
31 ————— 6 63 ——————
Notes:
•
Do not break DIP shunts indicated by dashes. Break only number(s) shown above. The Hard ID number of any
unused PID must be set to 63 (unbroken) DIP shunts.
•
For identification, mark the hard ID number and the system point number on the Housing Unit cover on the
writing surface provided using an indelible marker.
 Loading...