BRAKES
8-9
1. Clean reservoirs cover thoroughly.
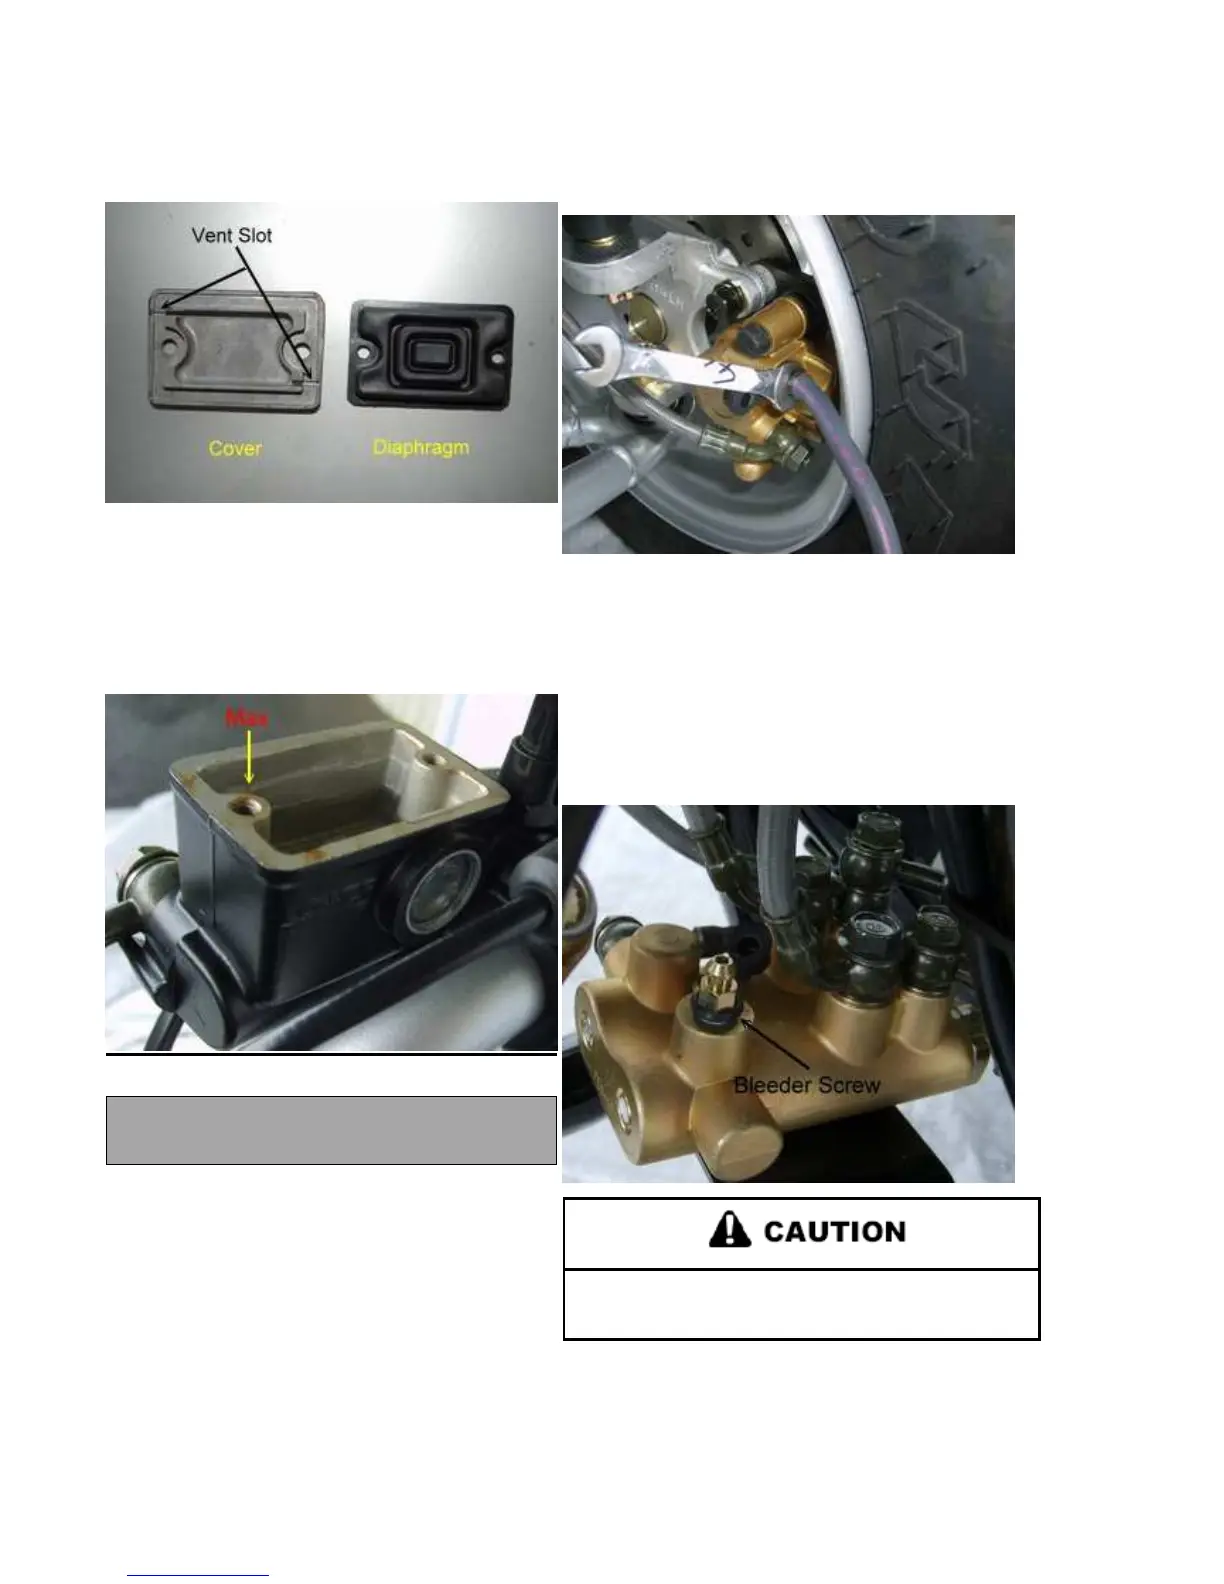
2. Remove screws, cover, and diaphragm from reservoir.
3. Inspect vent slots in cover and remove any debris or
blockage.
4. If changing fluid, remove old fluid from reservoir with a
Mighty Vacuum or similar tool.
NOTE: Do not remove brake lever when reservoir
fluid level is low.
8. While maintaining lever pressure, open bleeder screw. Close
bleeder screw and release brake lever.
NOTE: Do not release lever before bleeder screw is tight
or air may be drawn into caliper.
9. Repeat procedure until clean fluid appears in bleeder hose and all
air has been purged. Add fluid as necessary to maintain level in
reservoir.
NOTE: If brake pressure is hard to built, repeat breeding
procedure with shunt breeding screw.
Maintain at least 2 cm of brake fluid in the reservoir
to prevent air from entering the master cylinder.
10. Tighten bleeder screw securely and remove bleeder hose.
Torque bleeder screw to 3 Nm (27 in.lbs.).
11. Repeat procedure Steps 5-9 for the remaining caliper(s).
5. Add brake fluid to the upper level mark on reservoir.
RECOMMEND BRAKE FLUID
DOT 4 BRAKE FLUID
6. Begin bleeding procedure with the caliper that is farthest
from the master cylinder. Install a wrench on the top caliper
bleeder screw.
Attach a clean, clear hose to fitting and place the other end
in a clean container. Be sure the hose fits tightly on fitting.
NOTE: When brake lever is pumped. Place
diaphragm in reservoir to prevent spills. Do not
install cover.
7. Slowly pump brake lever until pressure builds and holds.
 Loading...