BRAKES
8-12
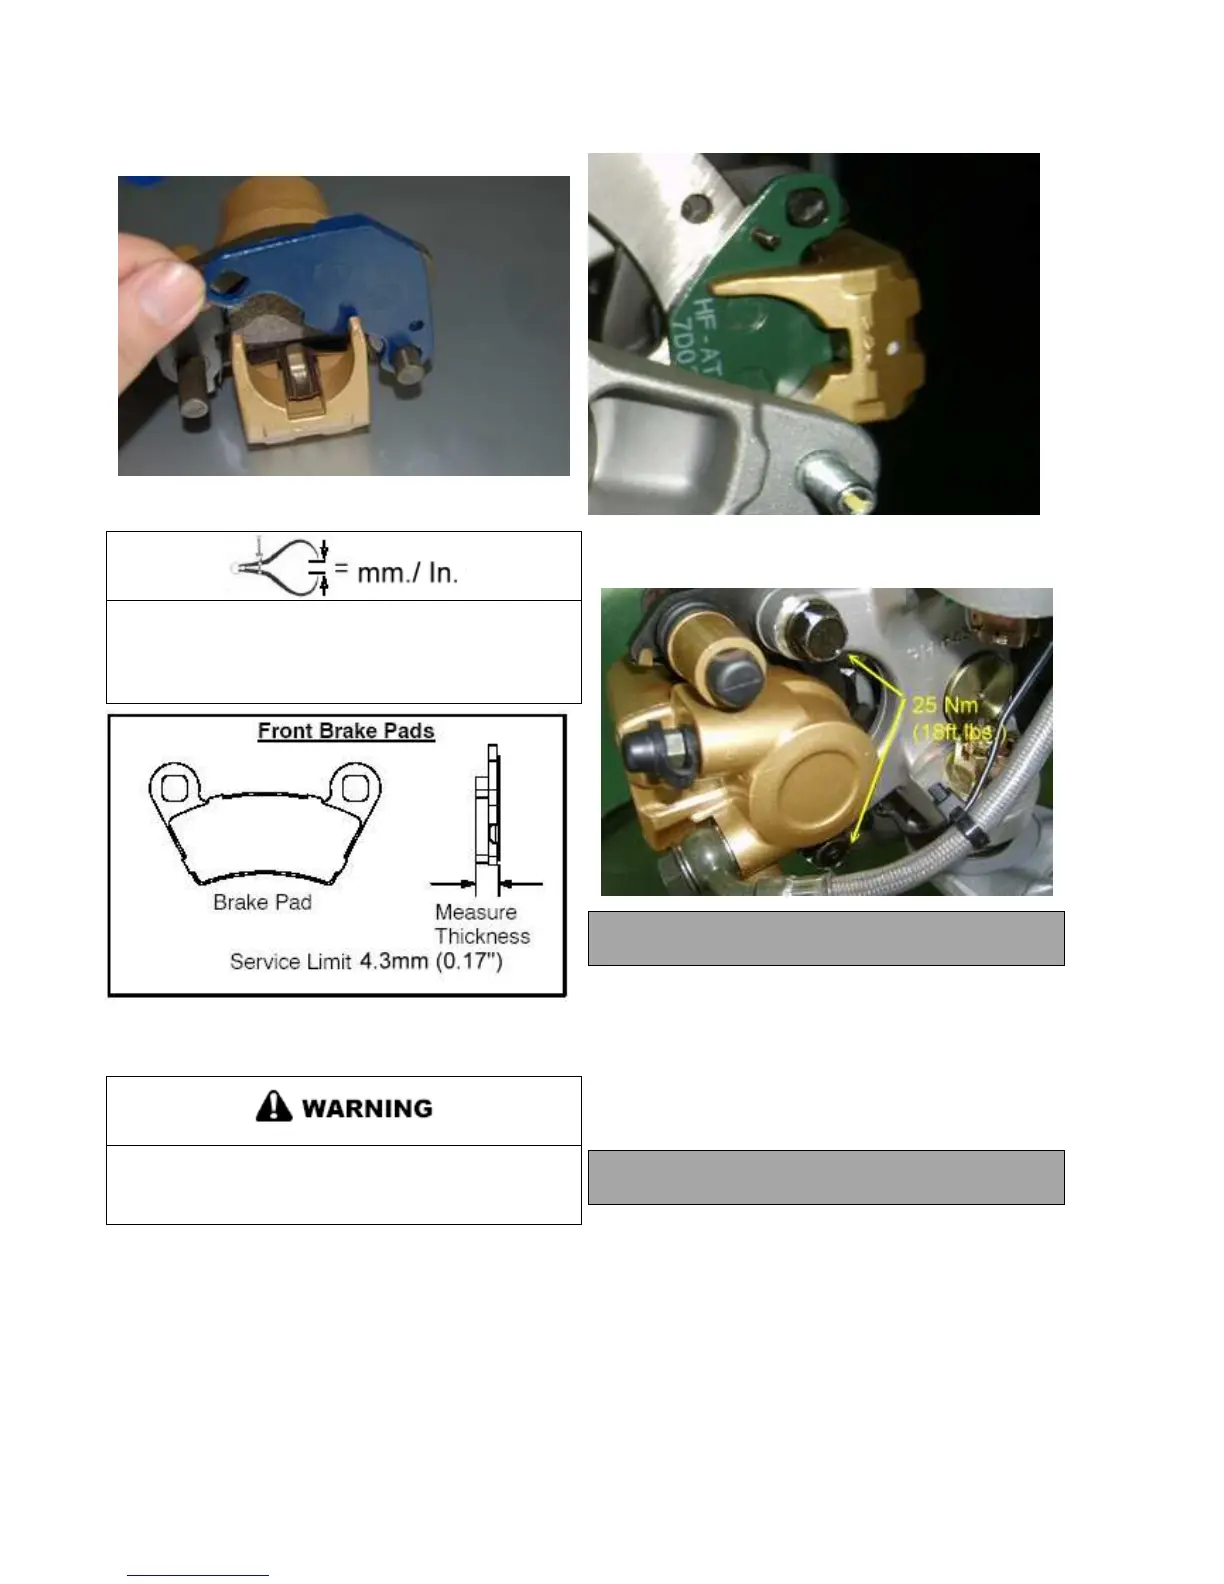
3. Remove the brake pads out of the caliper assembly.
4. Measure the thickness of the pad material.
Replace pads if worn beyond the service limit.
Front Brake Pad Thickness
New 7.6mm( 0.298〃 )
Service Limit 4.30mm ( 0.170〃 )
FRONT PAD ASSEMBLY
If the brake pads are contaminated with grease, oil,
or liquid soaked do not use the pads, use only new
clean pads.
1. Install pads with friction material facing each other. Install
the brake pads. Be sure pads and disc is free of dirt or grease.
2. Install caliper on the steering knuckle, and torque mounting
bolts. (If previously removed.)
Front Caliper Mounting Bolts
Torque: 25 Nm (18 ft. lbs.)
3. Slowly pump the brake lever until pressure has been built
up. Maintain at least 20 mm of brake fluid in the reservoir to
prevent air from entering the brake system.
4. Be sure fluid level in reservoir is between MIN and
MAX lines and install reservoir cap.
5. Install wheels and torque wheel nuts.
Front Wheel Nut Torque
40 Nm (30 ft. lbs.)
6. BRAKE BURNISHING: It is recommended that a
burnishing procedure be performed after installation
of new brake pads to extend service life and reduce
noise. Start machine
km. Gradually apply brakes to stop machine. Repeat
this procedure 10 times, allowing brakes to cool
sufficiently after each run.
 Loading...