BRAKES
8-18
7. Repeat procedure until clean fluid appears in bleeder hose
and all air has been purged. Add fluid as necessary to maintain
level in reservoir.
NOTE: If brake pressure is hard to built, repeat
breeding procedure with shunt breeding screw
8. Repeat procedure to 2 front caliper, foot brake lever and
shunt until foot brake pressure built.
NOTE: Pump up the foot brake system pressure with
the brake lever until lever resistance is felt.
Ensure the vent slot ring must face with cover when
install oil tank diaphragm, vent slot ring and cover.
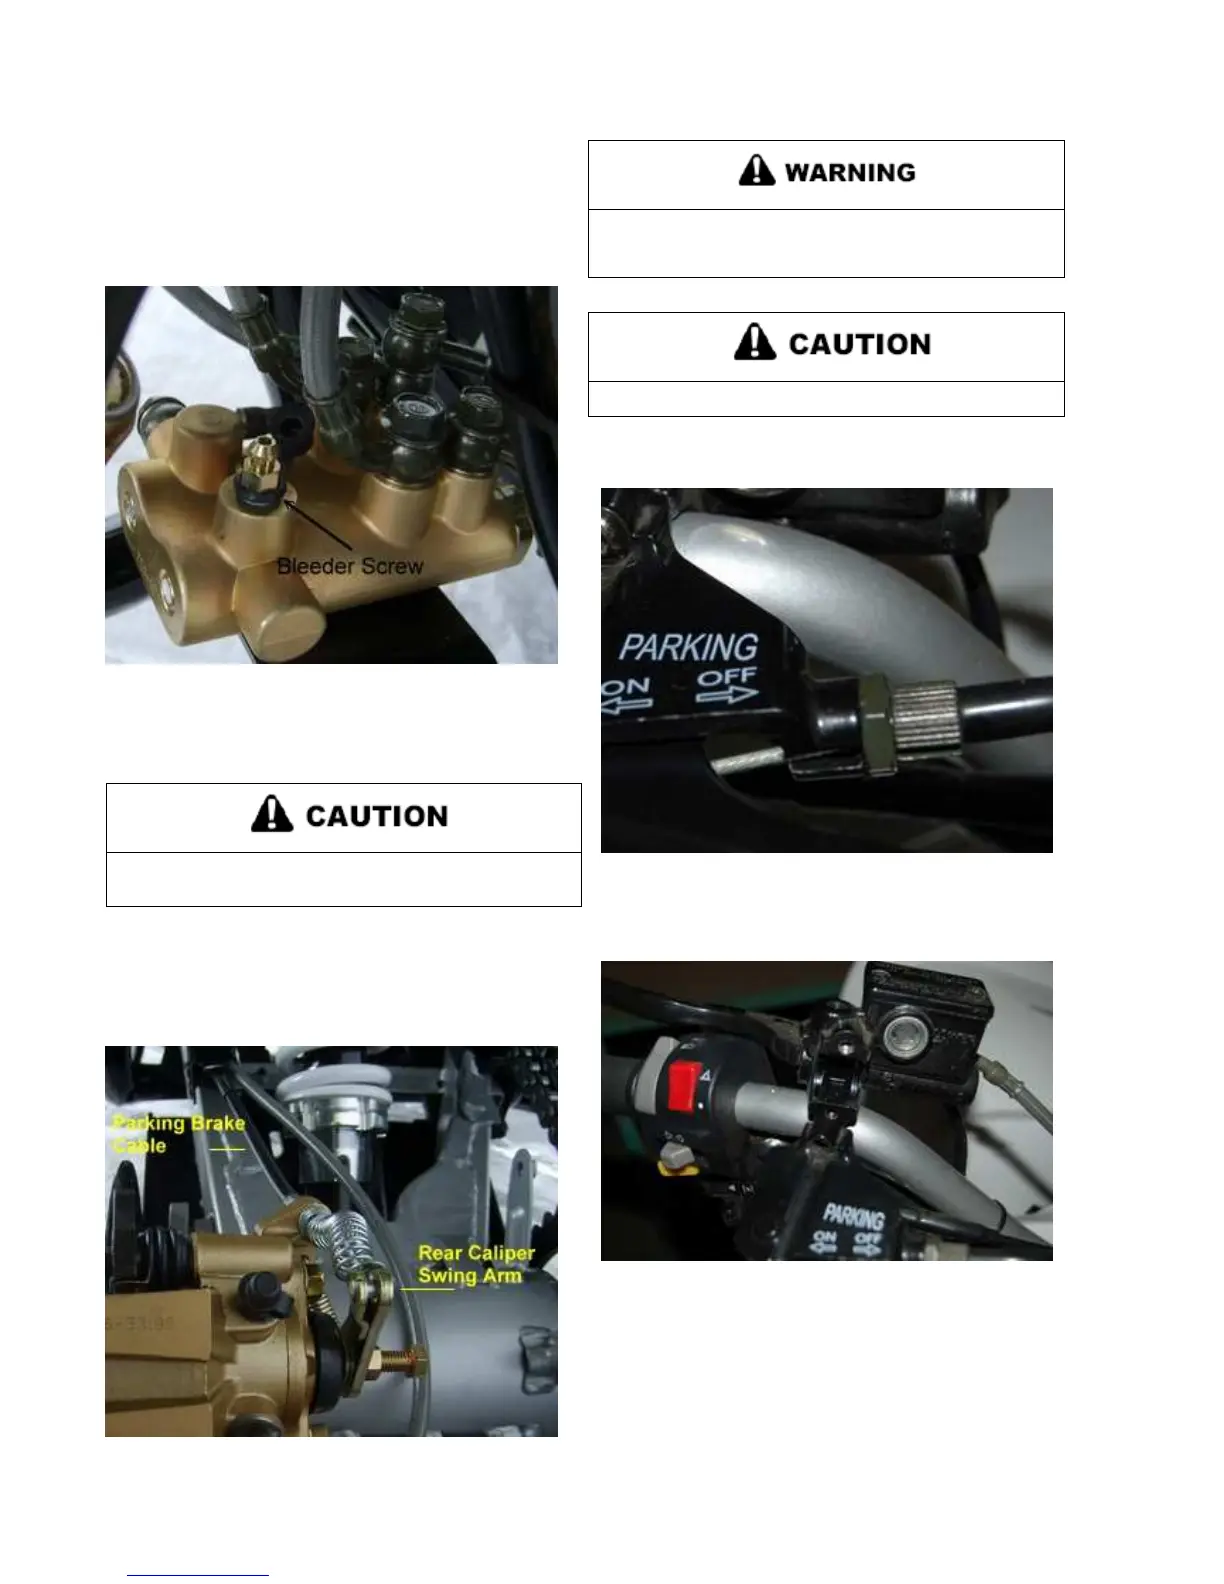
PARKING BRAKE REMOVAL
The parking brake system operates using mechanical brake
cables. The left front parking brake lever operates the rear
brake caliper swing arm to push caliper piston assembly.
When removing and installing the parking braking
system. The spring may cause serious bodily injury.
Always wear safety glasses during procedures.
1. Loosen the adjusting nut to the left end.
2. Remove the parking lever clamp blot, parking lever and left
hand master cylinder as an assembly.
 Loading...