CVT SYSTEM
3-12
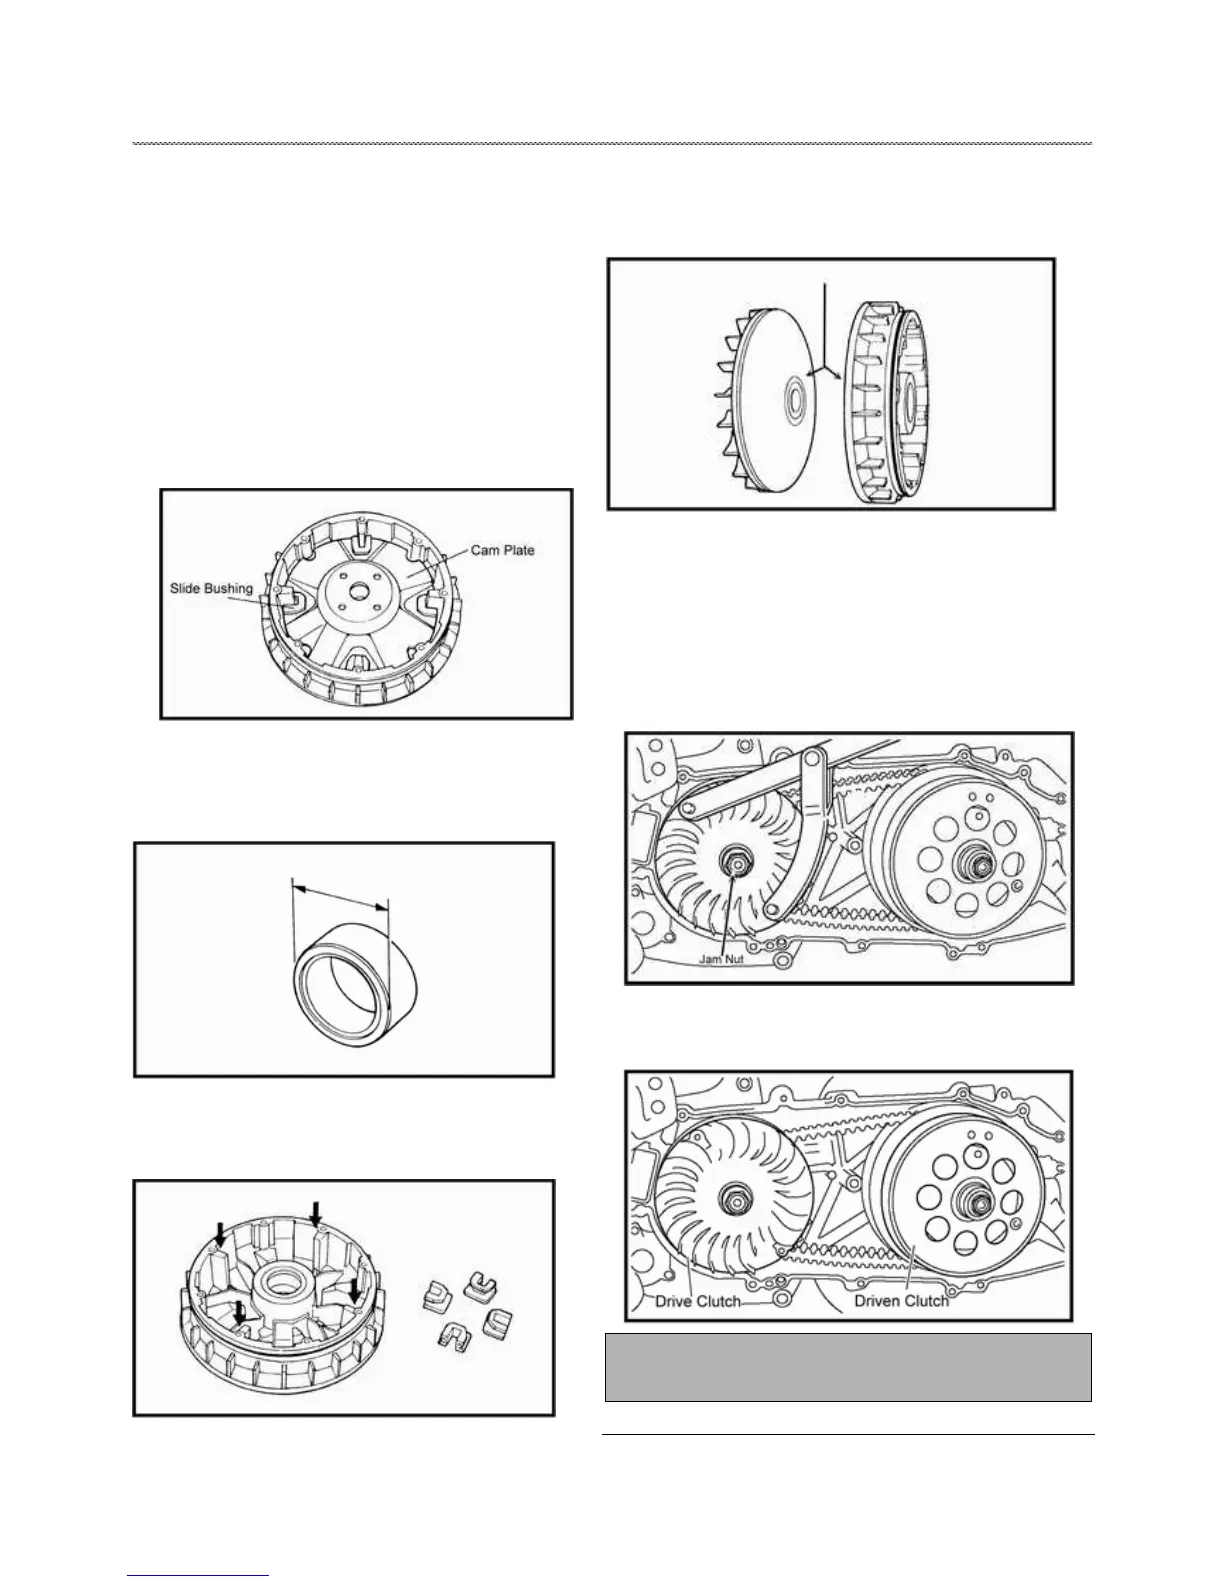
DRIVE CLUTCH SERVICE
DRIVE CLUTCH DISASSEMBLY AND
INSPECTION
1. Remove outer drive clutch sheave and drive belt. Note
parts assembly order.
2. Slide sheave and cam plate off crankshaft as an assembly.
NOTE: When removing primary sliding sheave and
cam plate assembly, hold cam plate and sliding
sheave together. This prevents the rollers from
falling out of the assembly.
3. Remove cam plate.
4. Inspect surface of roller weight for wear or damage. The
outside diameter is 23.2mm and the service limit is 22.7mm.
5. Inspect surface of slide sheave; slide bushing and cam plate
for wear, pitting, or damage.
5. Inspect belt-contacting surface of both sheave for wear or
damage.
DRIVE CLUTCH ASSEMBLY
1. Install the V-belt onto the drive clutch assembly when the
pulley is at its widest position.
2. Install the drive clutch outer sheave when the pulley is at its
narrowest position.
3. Ensure the V-belt is tight.
4. Holding the primary fixed sheave with the rotor holding tool,
install washer and nut tighten the drive clutch nut to 100 Nm.
Drive Clutch Lock Nut Torque:
100 Nm (74ft-lbs)

 Loading...