AC Current Gain and Flatness Calibration
Review Test Considerations and Flatness Adjustment Considerations before beginning this procedure.
Configuration: AC Current
All AC adjustments use the 3 Hz bandwidth measurement filter.
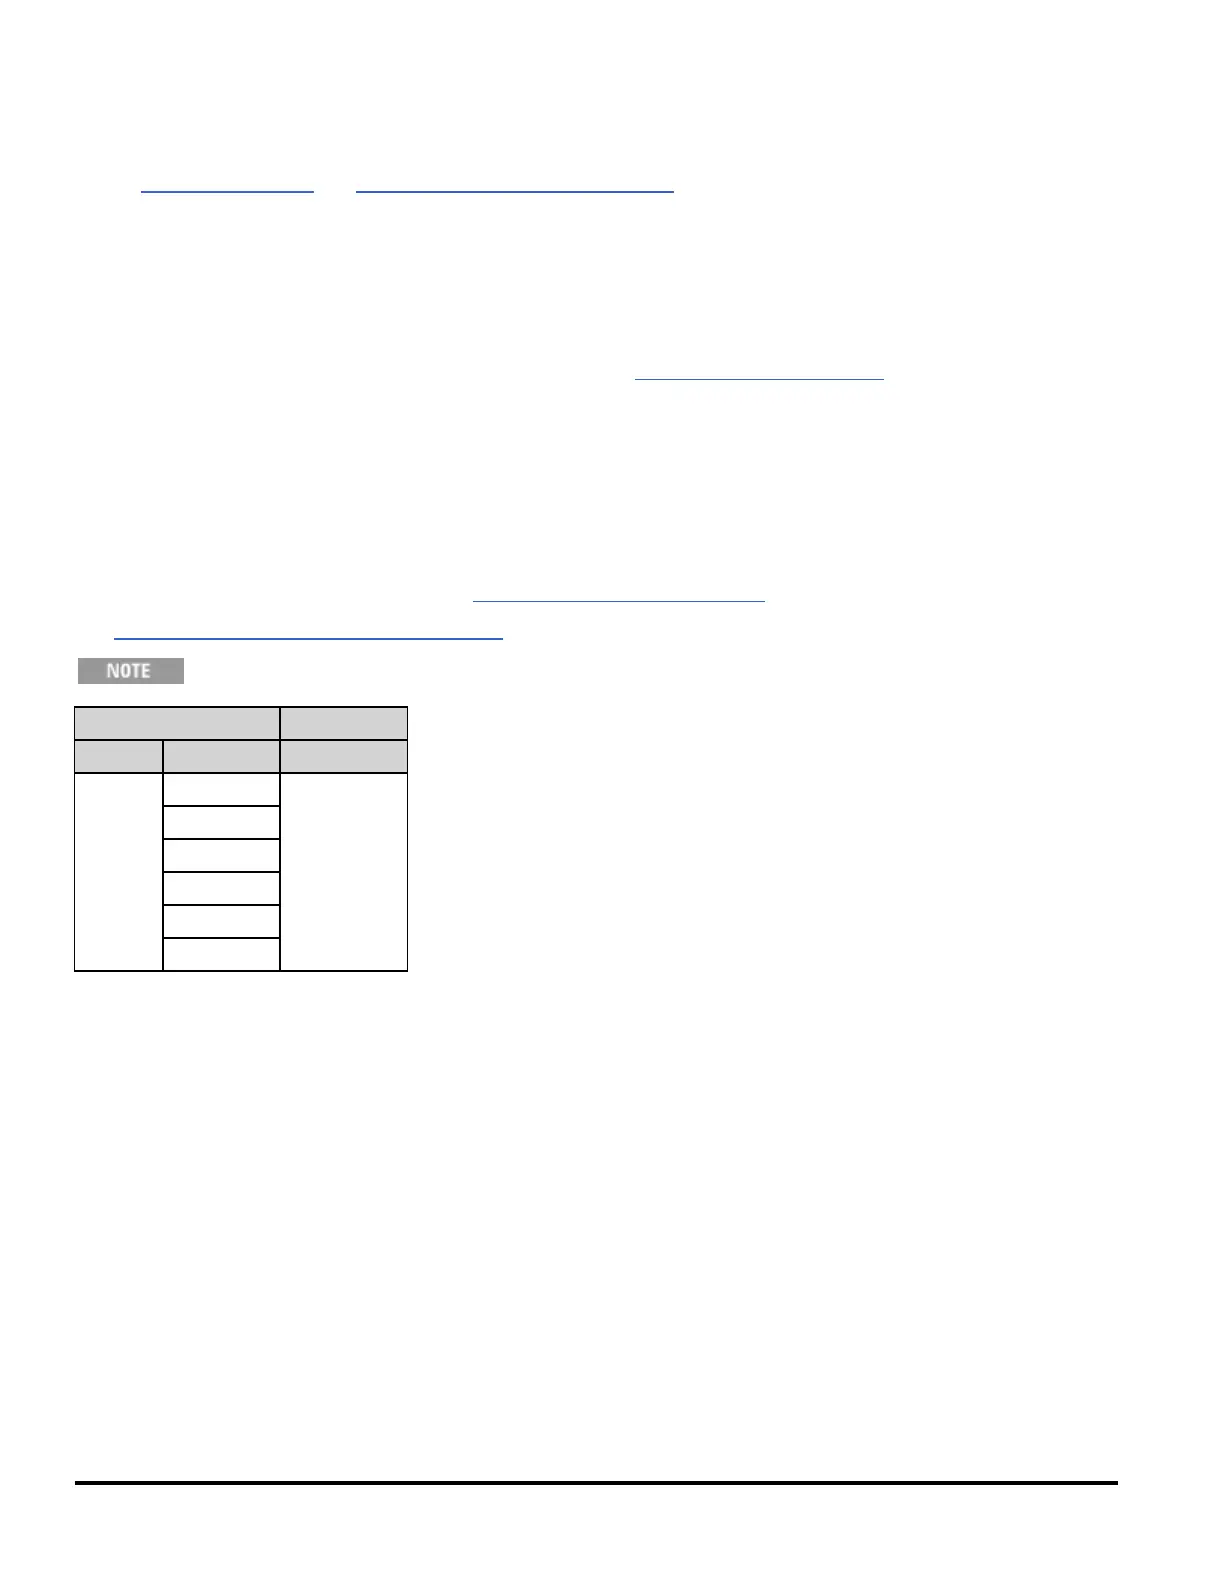
1. Configure each function and range in the order shown in the table below.
2. Apply the input signal shown in the Input column.
3. Enter the actual applied input current as the Cal Value (see Entering Adjustment Values). A Calibration Step
Succeeded message indicates success; if the display shows Calibration Step Failed, check the input value, range,
function, and entered adjustment value and repeat the adjustment step.
4. Repeat steps 1 through 3 for each frequency shown in the table.
5. Repeat steps 1 through 4 for each input current range: 1 A, 100 mA, and 10 mA. Apply current equal to the full
scale of the range being calibrated. Do not perform these steps for the 100 µA, 1 mA and 3 A ranges.
6. Repeat steps 1 through 3 for the 1 mA and 100 µA ranges, using 1 mA and 100 µA inputs at 1000 Hz only.
7. Store the new calibration constants (see Storing the Calibration Constants).
8. Verify the AC Current Flatness adjustments. You may also want to perform the additional verification procedures.
Each current and frequency takes approximately 2.5 seconds to complete.
Input Instrument
Current Frequency Range
1 A 5 kHz 1 A
7.5 kHz
9.7 kHz
10 kHz
220 Hz
1000 Hz
338 Agilent Truevolt Series DMM Operating and Service Guide
 Loading...